Its always a pleasure seeing an older Motorhome getting a new life from a bit of and overhaul or some good old fashioned TLC.
Click on any image to see Hi res
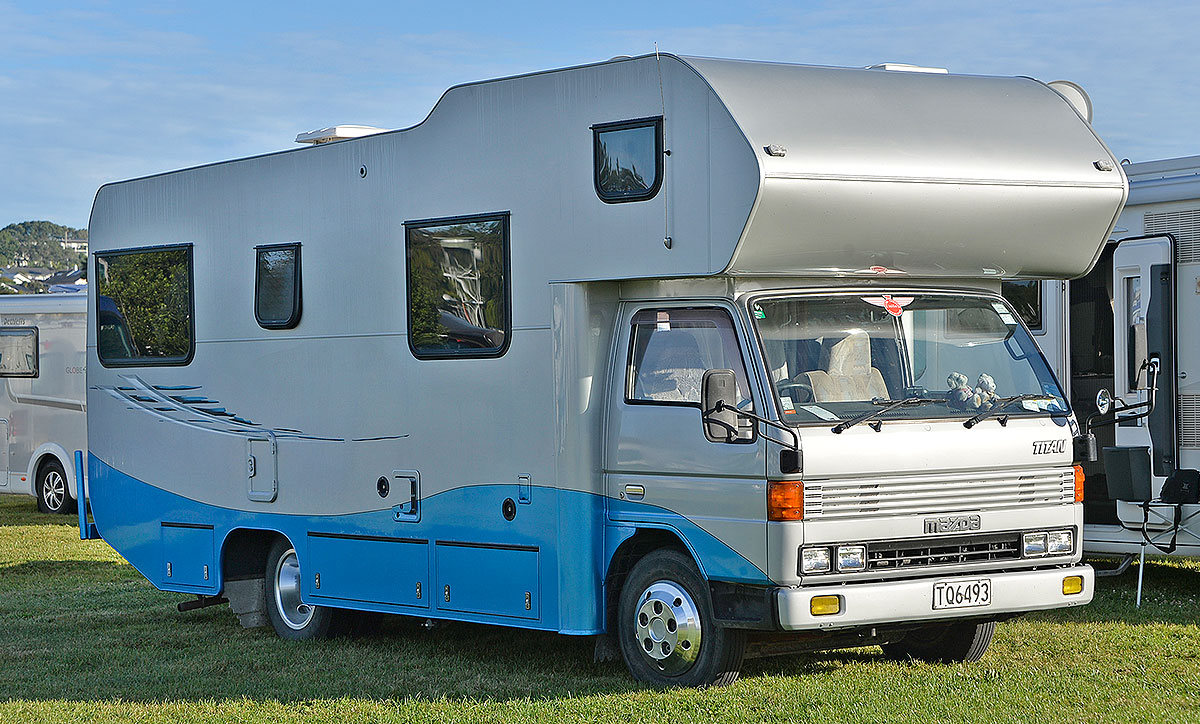
Looking Good
Alan and Keitha fom Matamata have had their 1990 Mazda Triton for about 15 years and about 5 years ago decided it was time for a makeover. The 9 month do up was mostly about the exterior but lots was done of the inside too.
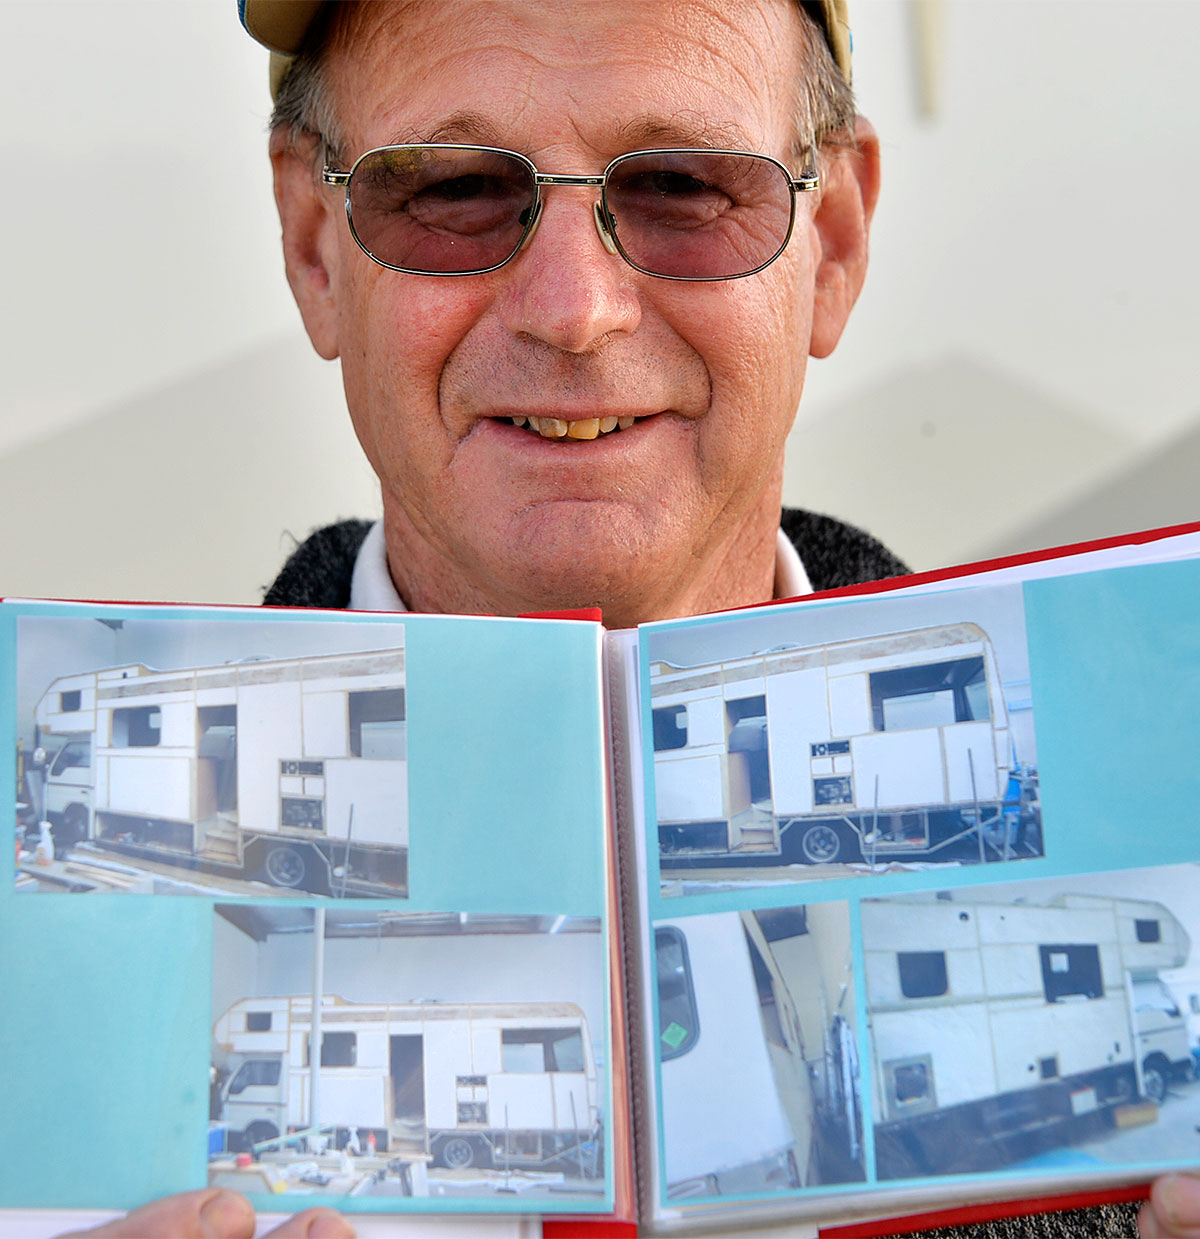
Alan with his album of “Before” pictures
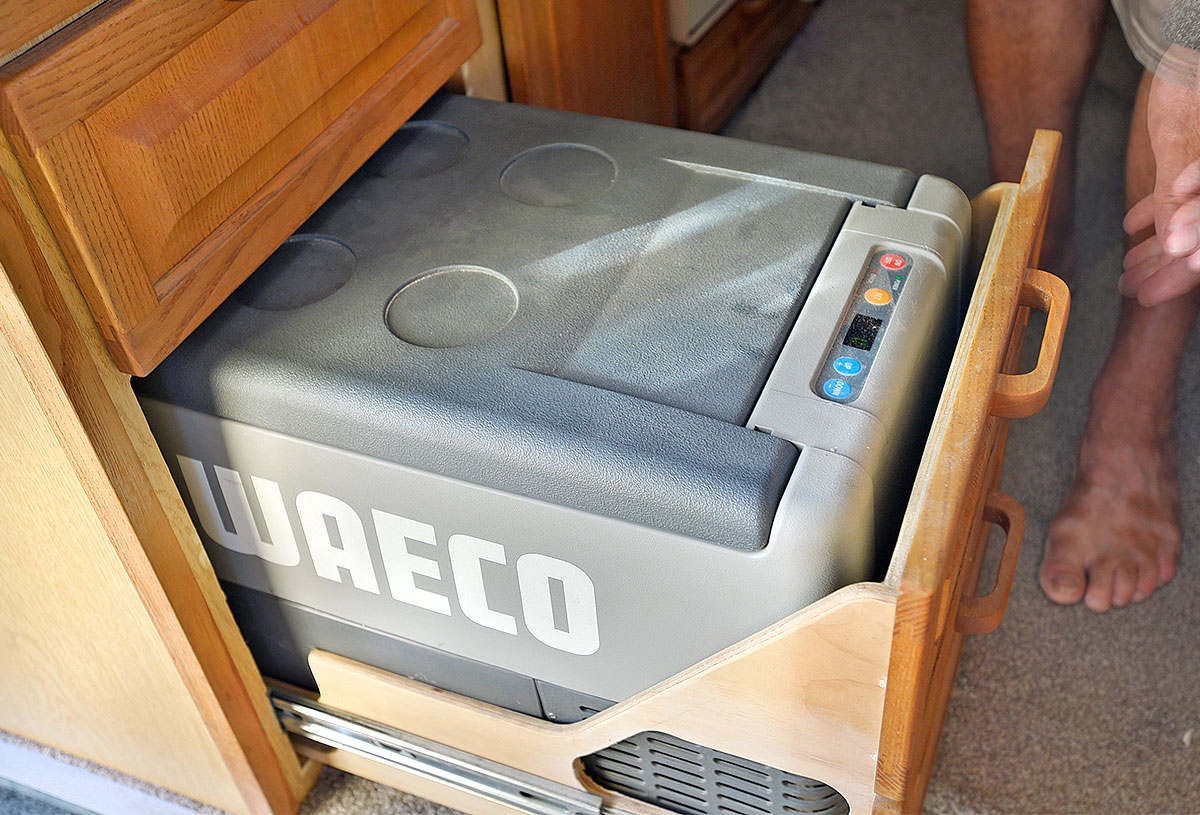
I really liked the hidden Waeco fridge in the double drawer. Nice touch.
The Waeco fridge hidden away in a drawer
The exterior was completely reclad and repainted with Aluminium panels with Insulation on the inside.
Click on the Gallery below to see a slide show
Galley area
The social end.. now a bed
Bruce and Keitha with their Home away from Home
Alan proudly showed me a small photo ablum of how it was and when you look at where it is today, a different beast.
A lovely truck and a great do up.. well done to you both.
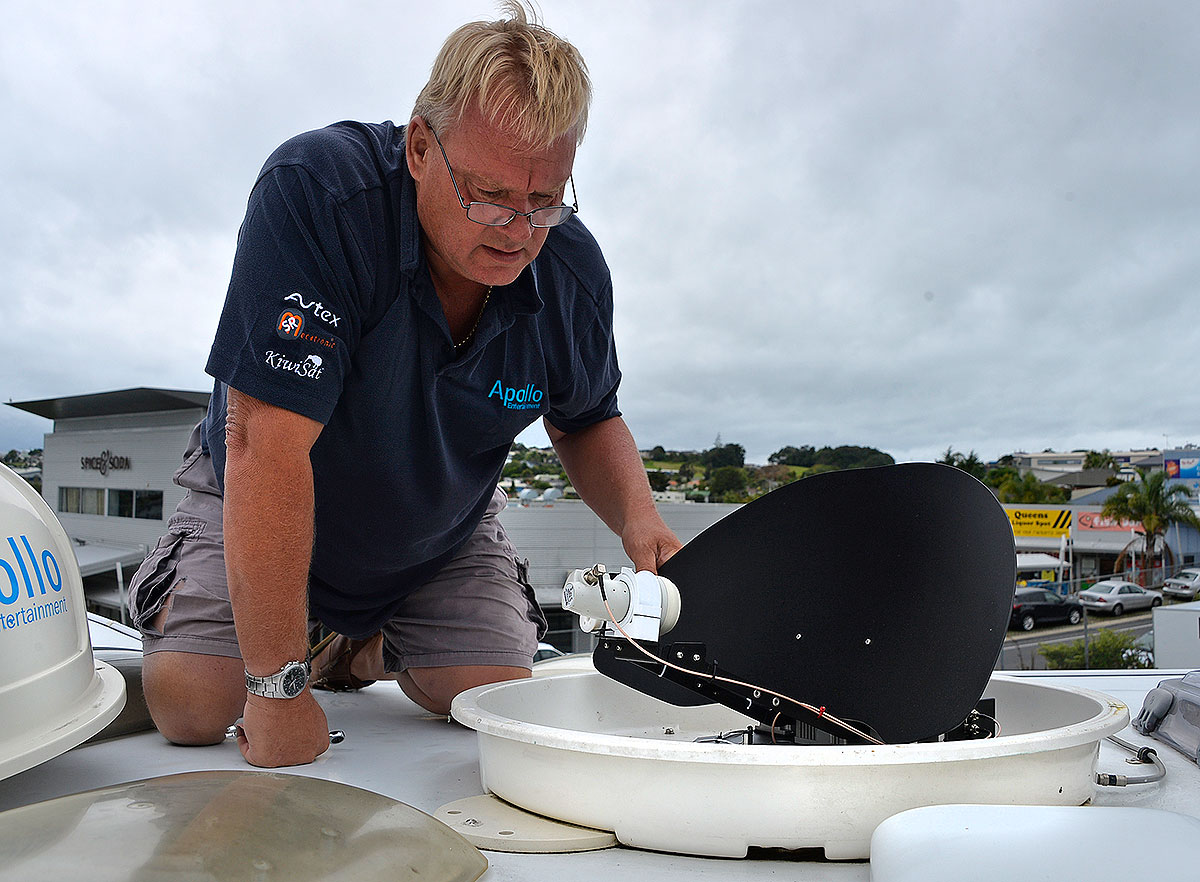
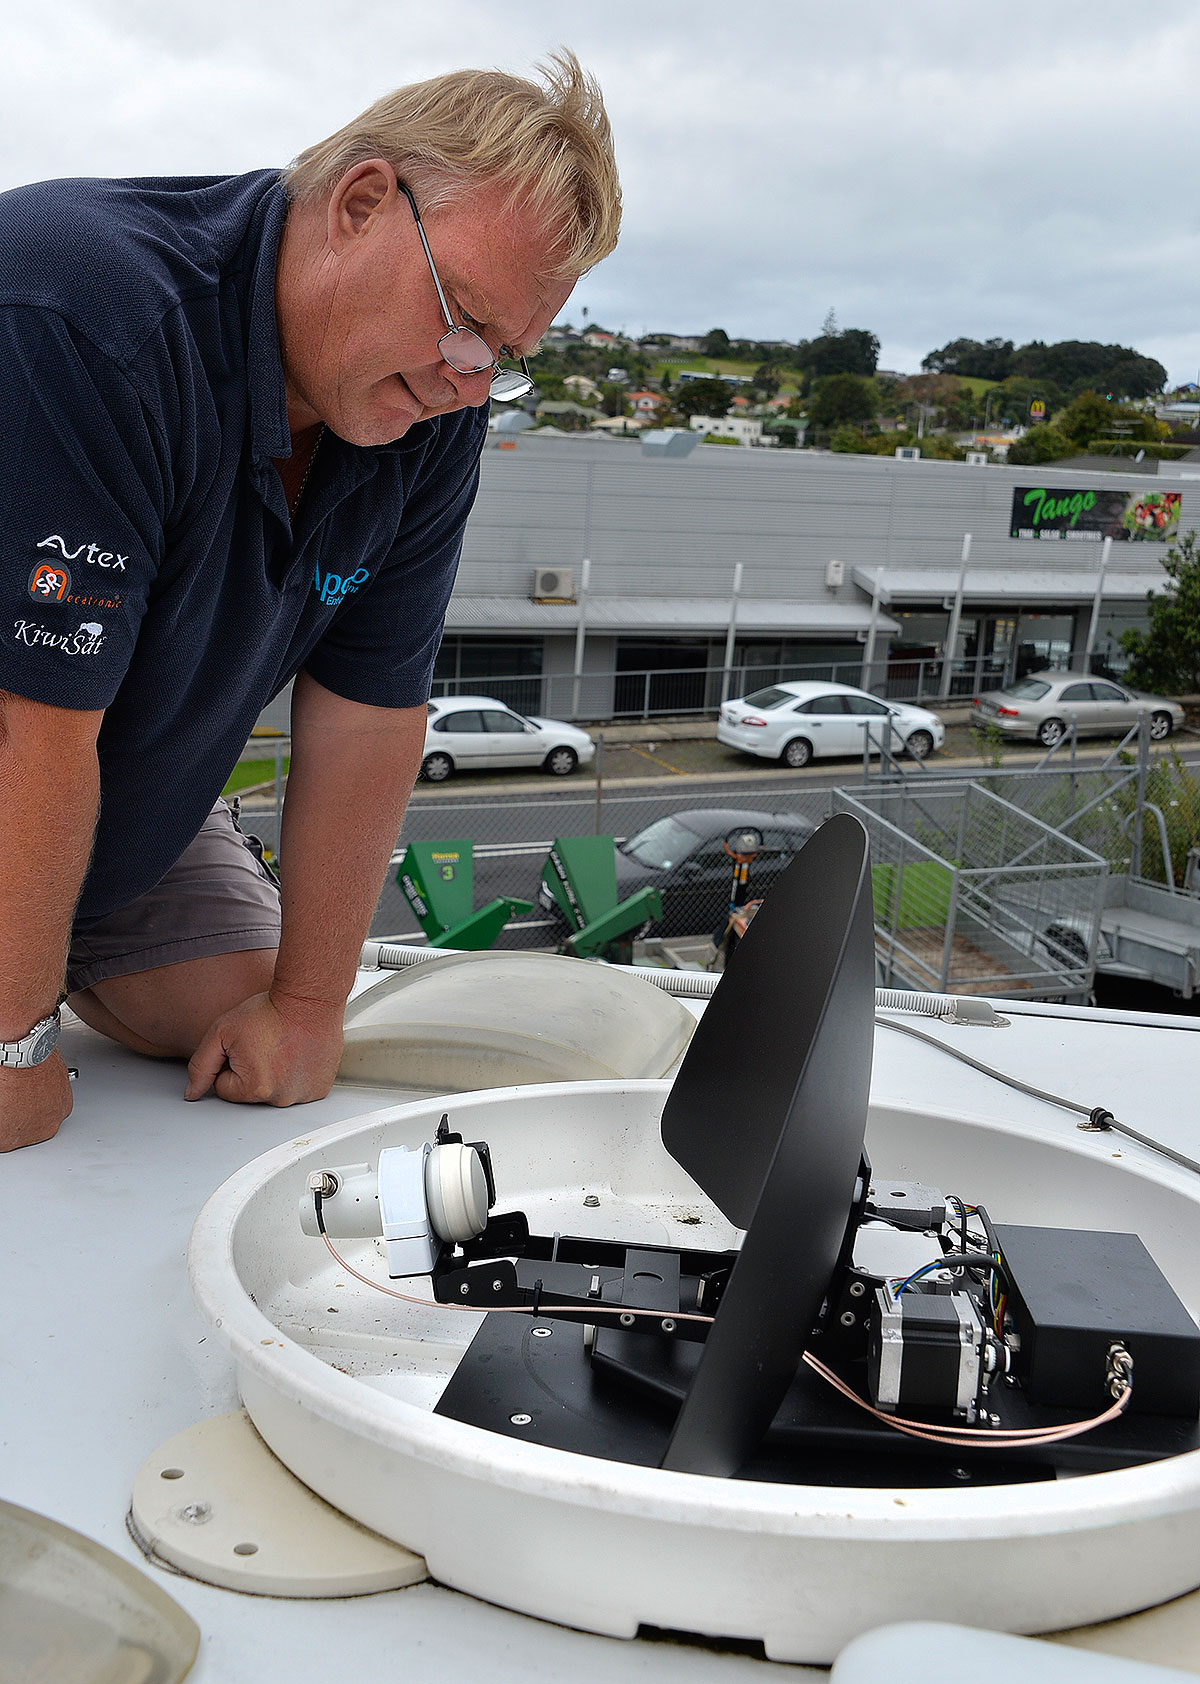
I had to pop in to Apollo TV to get my now nearly 4 year old Apollo dome serviced as I was having trouble getting some of the channels. Chris was very happy to sort it all out for me!
Click on an Image for Hi Res
All is revealed.. looking good
Ever since Prime moved, it has been really difficult to get and TV1 and TV2 suffered badly from rain fade where TV3 didn’t!
Chris checking over the Dome
After talking to both Chris and Duncan, I made and appointment and off I went to their office in Whnagaparoa. Nice guys that were only too happy to help me with the dome. It also turns out that my Dome cover has just about done its dash so there is a new one coming. $399 fitted. They get hammered by our high UV and get cracks in them. Mine has cracks around the screw holes on the edge so is all good for a wee while.
Chris got the ladder out and within 10 minutes or so, had it reset and pointing correctly at the Satellite fixing all the problems. Apparently my dome has a GPS in it to it knows where it is in the world and sets itself and the skew based on position and the signal strength as well.
Chris was telling me that when they first starting bringing in the Domes, they realised that the Dome Cover was much bigger than the Dish so they had the Dish made as large as they could and still fit under the Cover giving us TV watchers more signal!
I couldn’t get over the friendly customer service and speed at which they dealt with my wee problem.
The sample straight out of the Box
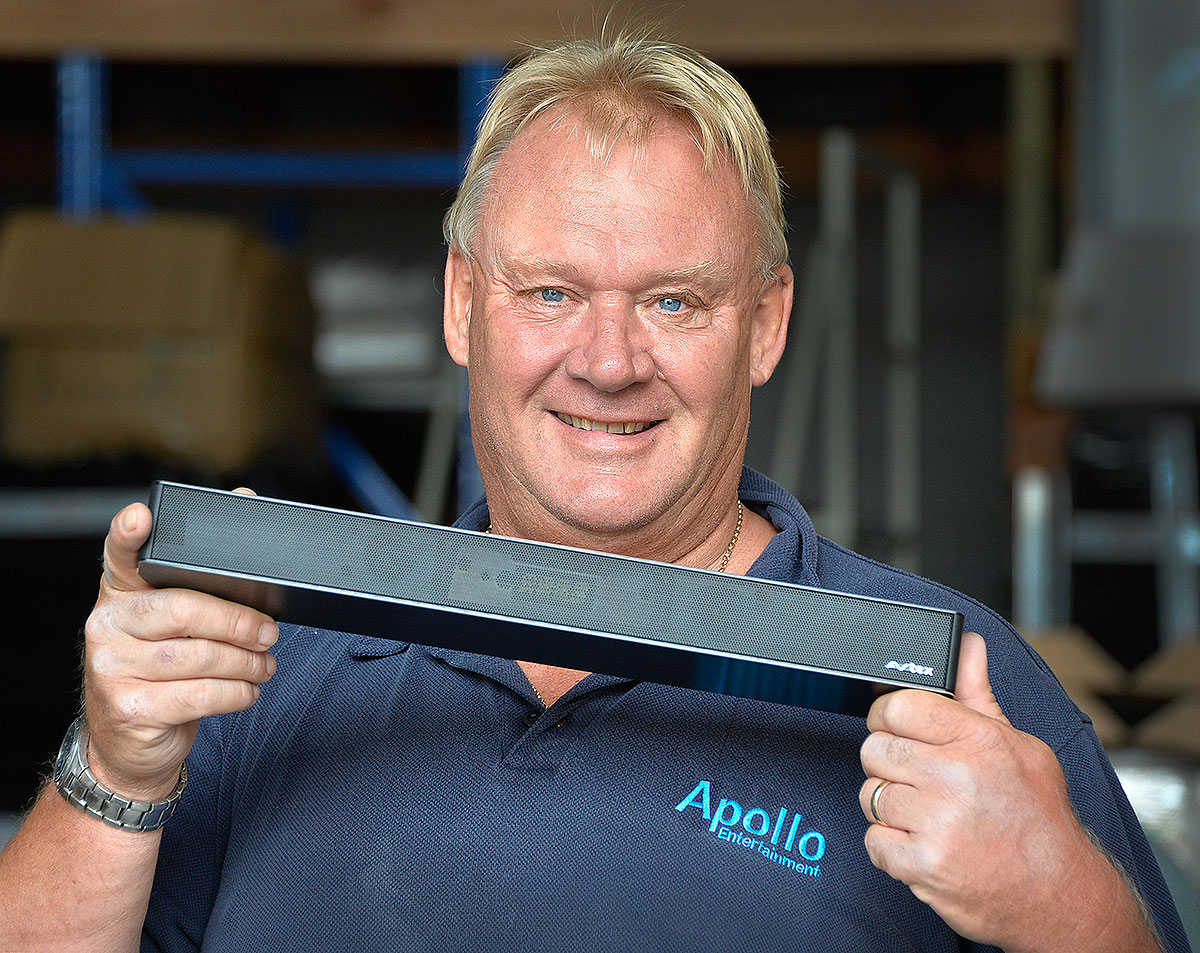
While talking to Chris, he was telling me about the new Avtex Sound Bar which fits on the bottom of the Avtex 19” TV and vastly improves its sound while only drawing .75A and they’re only $375 retail.
Chris with the first Sound Bar
Duncan set one up for me to have a listen and the sound is stunning. The power and sound is all sourced directly from the TV where they mount underneath. All very easy and tidy. They can also be used as a remote Bluetooth speaker for your cell phones too.
Their first shipment is arriving shortly and is already just about completely spoken for!
The sound bar fitted to a 19″ TV
Some of the new technology in this space is amazing with so much happening.. now to just win Lotto and I’ll be very happy 🙂
Well its been nice to be back in our house and to have Rafe safely parked in his little spot alongside.
It has been a fun 8 months or so cruising around Europe and the South Island and we both feel better for it.
Click on an Image to see Hi Res
Back in the late 70’s, we had another smaller house in Devonport which we were in for 28 years or so. The boys grew up here and as we needed more space, we simply kept adding on until there was no more site coverage. At the time I had a huge Photographic Studio up in Albany and had decided to move home amd work from home as my work had changed to more location work. What studio work I had could be done in a big garage. So around 2006 we bought Roslyn Tce.. 8 years or so later, I no longer have any real studio work and the boys have left home, its time to downsize.
The Motorhome parking is on the far right with a 16 amp plug on the side of the house too.
Having been used to living in a Motorhome for over 6 months, we are rattling in this huge house with no need for a Studio. Its on the Market!
While we were on the road, one question I was asked pretty reguarly was how were we getting on with renting it. How do we know its not getting smashed up and the rent going astray etc.
Click on the Gallery below for a Slideshow
Kitchen
Living area
Dining
Lounge
The front of the house with Motorhome parking top the right.
Main bedroom
New Bathroom
Across the back
Enter Dianne our property manager who has been really good checking out the tenants thoroughly, credit checks etc, Regular inspections were done to see it was being looked after. When we got back, the house was in good shape. The tenants had had it commercially cleaned.
Back to the House sale..Its been a busy time! I’ve been busy painting fences and fixing things I should have done years ago.. and the place is looking good. If you’re looking for a place in Devonport with motorhome parking (up to 9 metres) and with power, here it is!
Fiona mentioned the other day why we didn’t fix all these little things years ago! I wonder 🙂
It has been two and half years in the making but we’ve finally solved the Glass cabinet problem.
When we first picked up Rafe, unlike other Dethleffs, the Esprits, the Sunlights, the Magic series’s and the Trends.. all of them had Glass cabinets you could fit a glass in. The Globe 4’s cabinet had two shelves in it and was so narrow that only shot glasses and really small glasses would ever fit in.
Click on the images for Hi Res or a Slideshow
One of he narrow shelves. The Glasses don’t fit on them
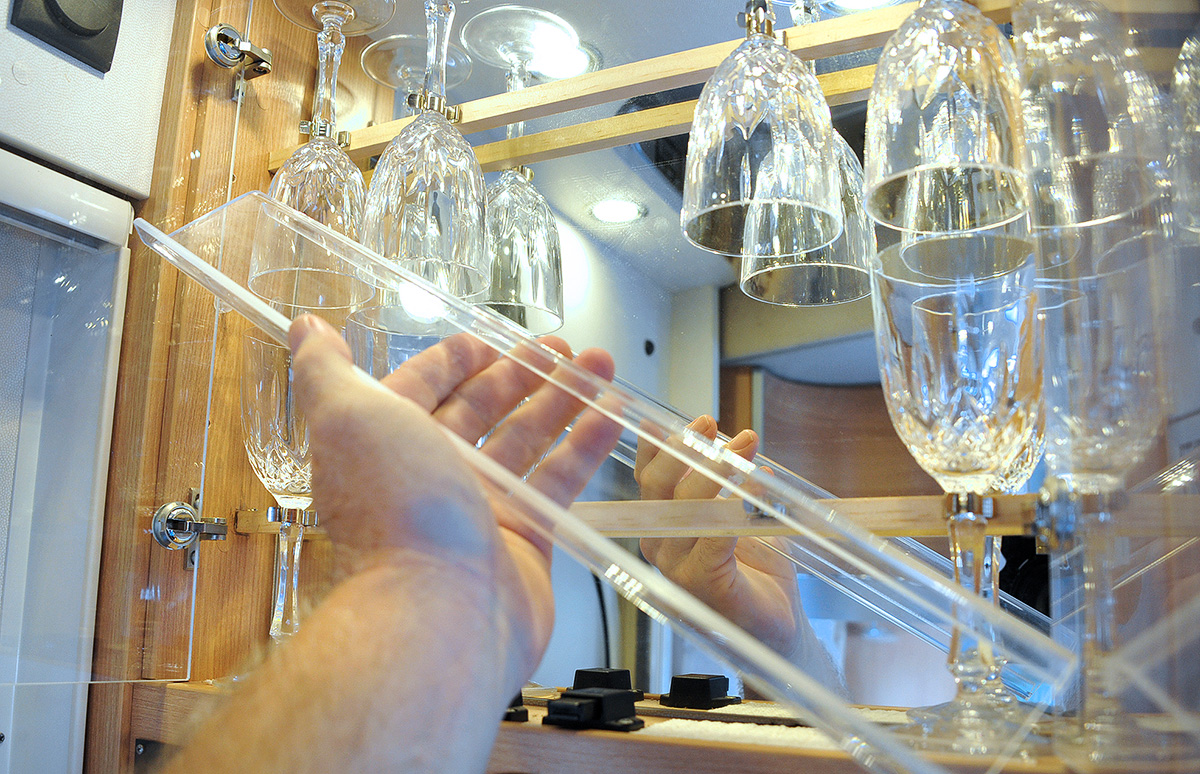
The first thing I did was remove the shelves so normal sized glasses would fit if they were narrow enough. Then there was the problem on how to fix the glassware so it wouldn’t rattle or get damaged as we moved from place to place.
A couple of lengths of pine screwed in across the cabinet and some tool clips to hold the glasses and we’re all done.
A tool clip around the stem of the glass
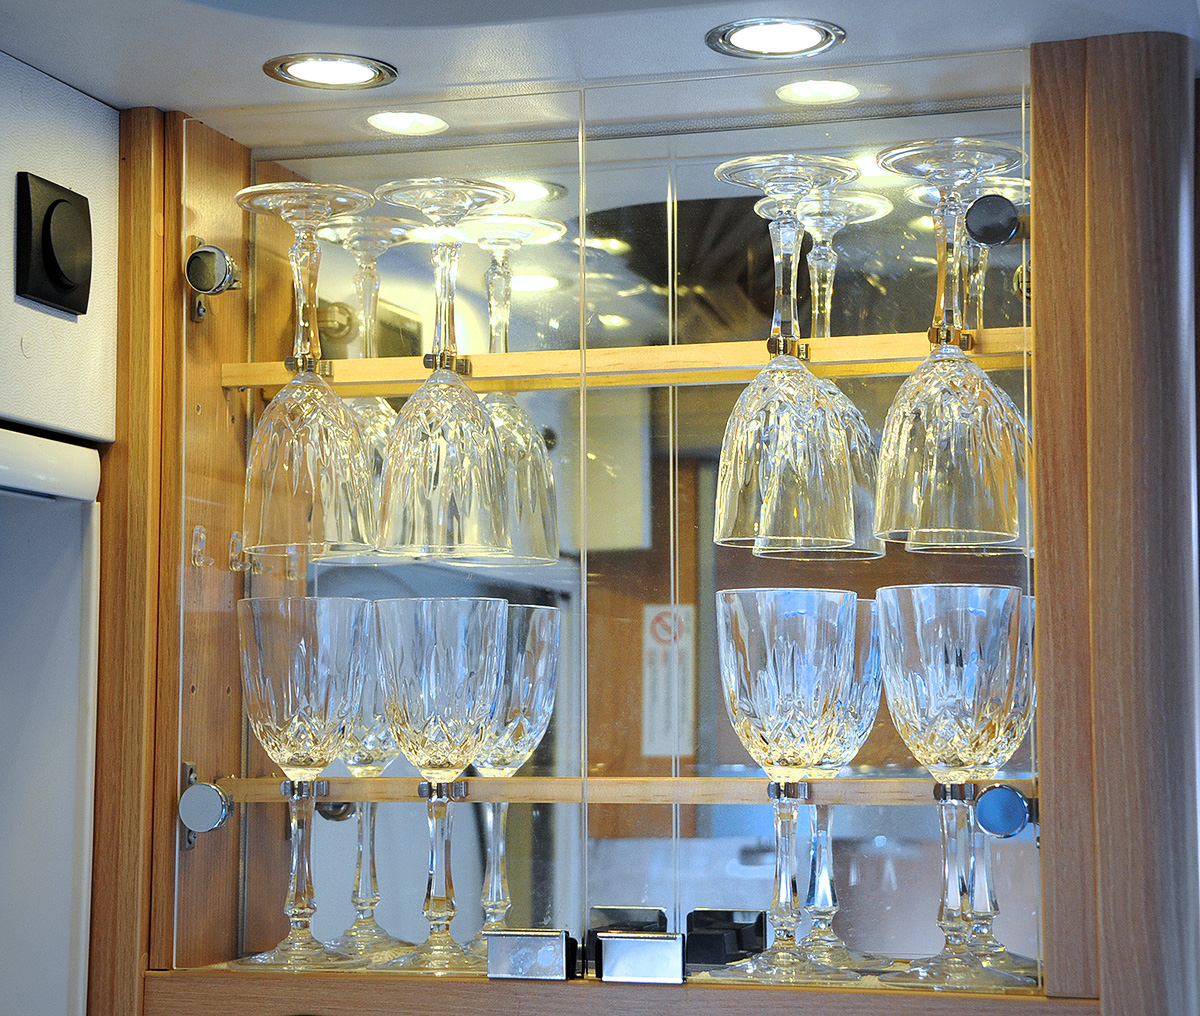
While we were in Martinborough earlier this year, Fiona found 11 cystal glasses in an antique shop by the square. They suited perfectly. Her new name from friends Gary and Dianne is “Mrs Waterford” and I think she suits the name quite well 🙂
The shelf with the crystal glass base sitting over the edge.
Tool clips
A tool clip
The screw taking the weight of the pine
I’ve set the cabinet up for these glasses as we have a few spares if a couple get broken.
The Cabinet all done looking pretty sharp
Both “Mrs Waterford” and I are both pretty pleased with the way the cabinet looks and there no rattles at all.
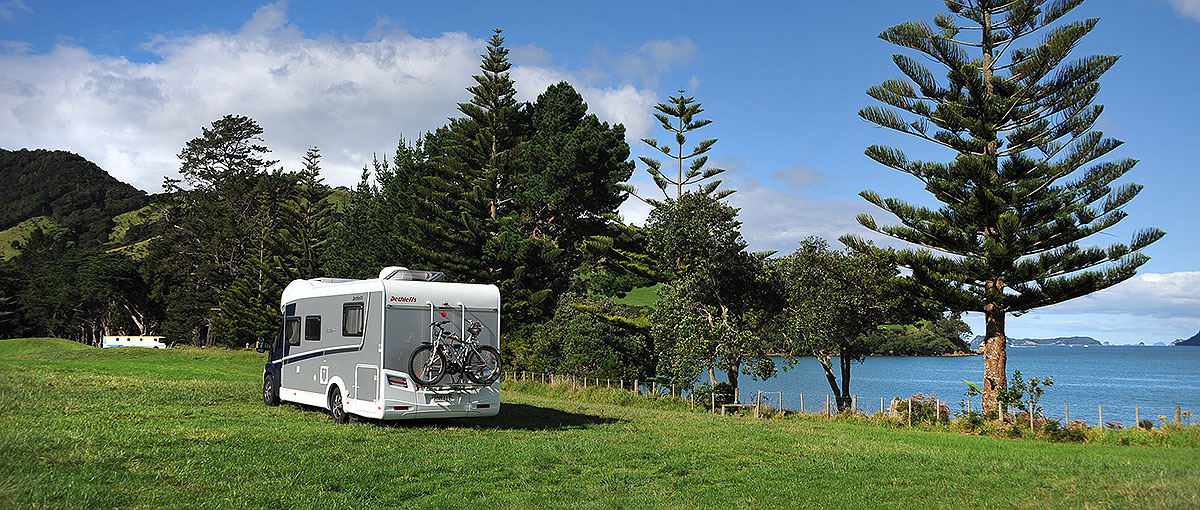
We were right on the edge at Simpsons Beach by Whitianga. A fabulous spot which we’ve been to a few times before.
Click on the images for Hi Res or a Slideshow
Ten steps to the water.
Its on a farm owned by the Simpson family which runs along the foreshore and behind which they’ve been letting people camp at for many years. They charge $10 per vehicle, Motorhome or Caravan per night and donate the money to a cause of their choice. A fantastic gesture and they’re super nice people.
The Beach
One of the quirky things about this area is the Netspeed Mobile Internet coverage. There is a 4G beam from Whitianga out over the water but Simpsons Beach is right on the edge of it but more in the beam for 3G. Because it is 1 click into the 4G, it can’t do anything useful and surfing the web or anything else is a waste of time.. nothing happens ! A lot more happens on 4 bars of 3G than 1 blip of 4G!
What I found you had to do is go into the Huawei App on your ipad or iphone and turn the “Auto” feature off to “3G” so that the router will settle for 3G and not be too ambitious 🙂
The Home screen on the app..Select the Settings Cog
The steps on a Ipad app.. Click on the settings cog on the right hand top of the screen. Then click on Network, then Network Carrier. You’ll see Preffered Network at the top.. click on that to get 3 G and select it and back out (without touching anything else 🙂 ) Its a good idea to reboot the router at this point and it will be away with plenty of throughput.
Click on the images below to follow the gallery in order.
Select Network
Select Network carrier
Select preferred Network
As you come out, you should see this.
This will affect any wireless carrier anywhere. Its all about your position relative to a transmitting tower.
There must be other spots around NZ where this happens too. Just remember to return the settings to “Auto” after you leave Simpsons Beach or another place like it.
Great spot
Despite this minor alteration to get Fiona her Netflix fix, Simpsons Beach is a fabulous spot and we love staying here. Once when it was chocker in the middle of summer, the local Mr Whippy van cruised through for ice creams 🙂
Its interesting that while quite a few brands of Motorhomes have adopted tracklighting, many haven’t.
Click on the images for Hi Res
Nice lights in the track.
Rafe started out in life having three tracklights for lighting. Two on either side of the saloon and one across the top of the bed for reading lights. They were probably a great idea in that you can twist and slide the lights and put them anywhere you want them and also shift them out of the way. The only catch with them is that the ones that we have, have very flimsy plastic tabs on them which are so easy to break off, its ridiculous.
The plastic Tab
To be fair to the manufacturers, they can’t be blamed for excited grandchildren accidently bumping into them with their heads when they’re standing on the seats but when the owners are reluctant to use them in case they break, to me means there is a problem.
The screws for the glass at the waist of the light.
The other issue is that we found that as we cruised around NZ, the screws holding the glass would undo and eventually the glass would end up smashing on the table below with glass everywhere.
In the end after breaking a few, we now travel with them in a box and tend not use them for fear of snapping the tabs or breaking them.
Now to get rid of the Track
After looking for ages through lighting shops and RV places, I discovered some really nice LED lights for another model Dethleffs which I ordered through Vantage RV. They had to come from Germany and just arrived the other day so I didn’t waste any time getting them installed. These ones are screwed into the shelves and I’ve set them back out of harms way.
I really wanted to remove the track but found that it was glued as well as screwed so I’m still thinking about this as I don’t want to butcher the cabinets getting it out.
And they can turn right around and direct light where you want it.
The lights are fabulous. We recently had the first trip away with them and the light was awesome.
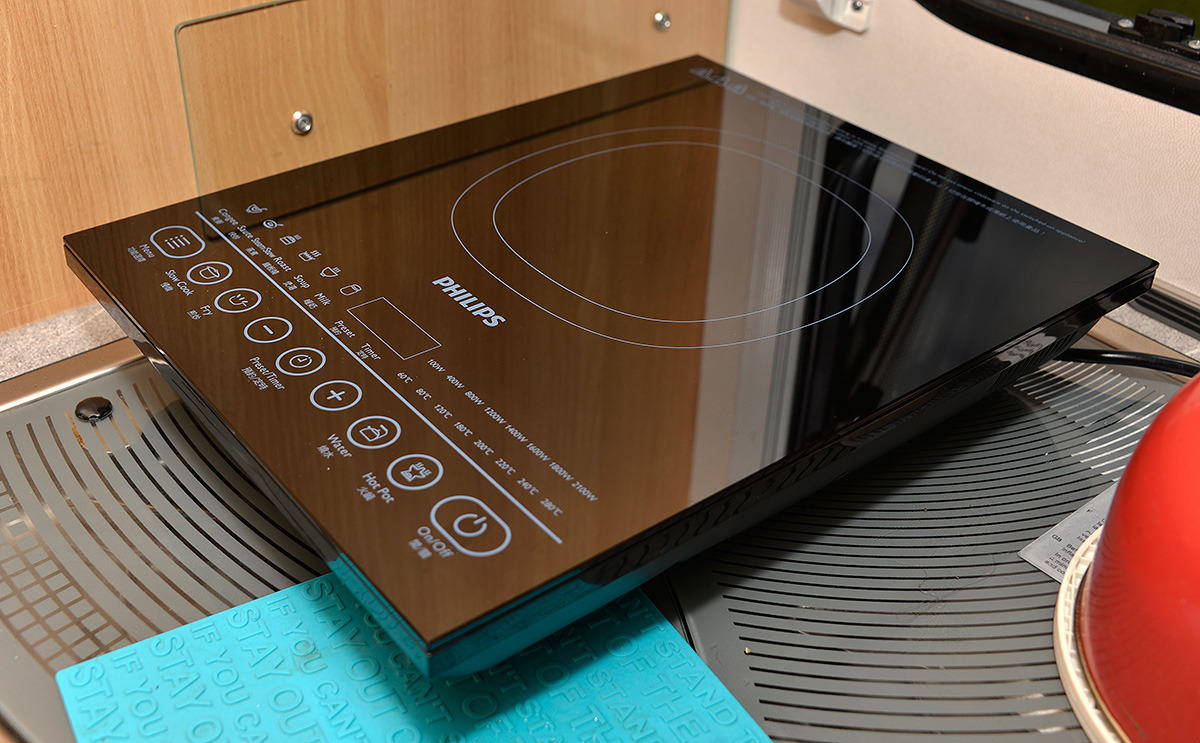
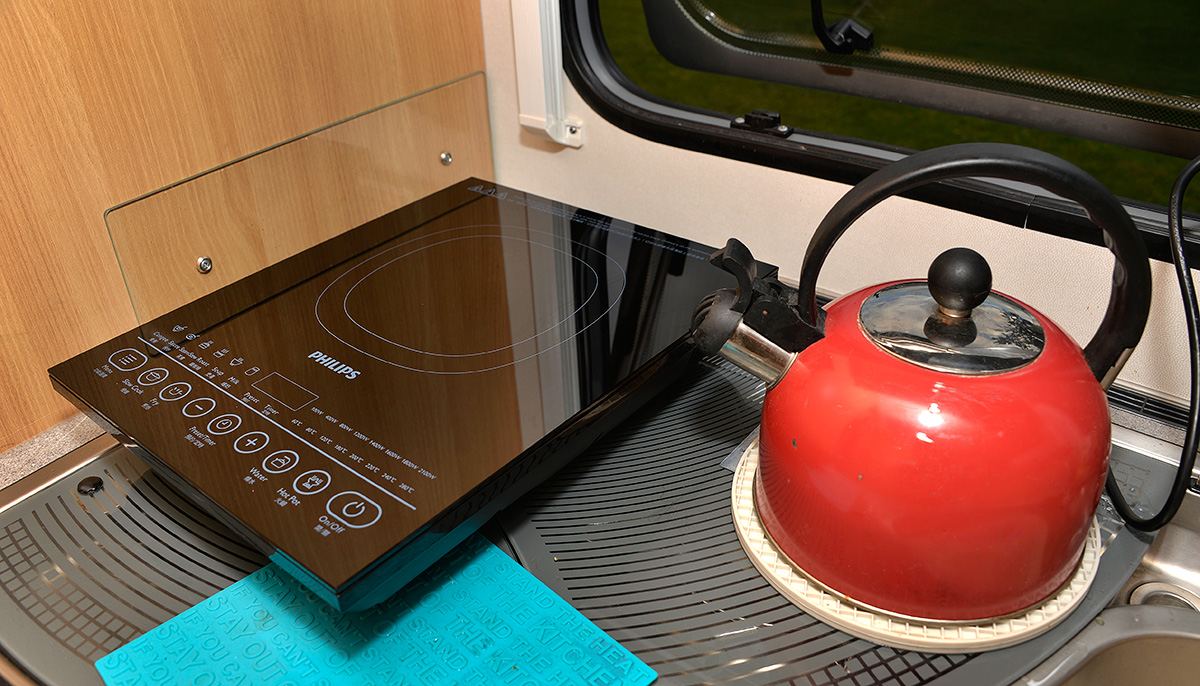
A couple of months ago, I found out that Philips had released a portable Induction plate and they were available via our NZMCA discount from Noel Leeming.
I had to try one and since using it, I’m completely sold. Fiona loves it too. Its amazing.
Don’t forget you can click on the images for hi res!
Its a bugger of a thing to photograph .. almost like a piece of black glass!!
Just recently I got really brave and decided to try to boil the water for coffee on it with our scruffy old kettle. From a cold water start, in the time it took to put coffee and pills into a cup and a tea bag in the other, and milk in both, the kettle was whistling its head off. Even with gas, this would take all of 5 minutes or so.
Cooking a steak… cold frypan, a little oil… chuck the steak in, hit the go button and the pan is sizzling within 5 seconds !!!! .. and it tastes sensational.
Admittedly you can only use it when you’re plugged in but its neat to be able to use this instead of gas and it keeps control of the heat instantly.
The only thing you have to check is that you have pots that a magnet will stick to and it comes with a magnet so you can check your pots. The unit will scream at you if you don’t have anything on it or the pot is incorrect.
Recommended Retail is $199 from Noel Leeming .. my discounted price was closer to $120 !! …although this was a few months ago.
Its amazing who you meet and what clever things they do to their motorhomes to make them work better for their lifestyle. During the recent Dethleffs Owners group meeting at the Classic Car Museum in Hamilton, I was fortunate enough to meet Walter and Nolina from Taupo and to see some of the clever things they have done to their Dethleffs Esprit.
Don’t forget you can click on the images for hi res !
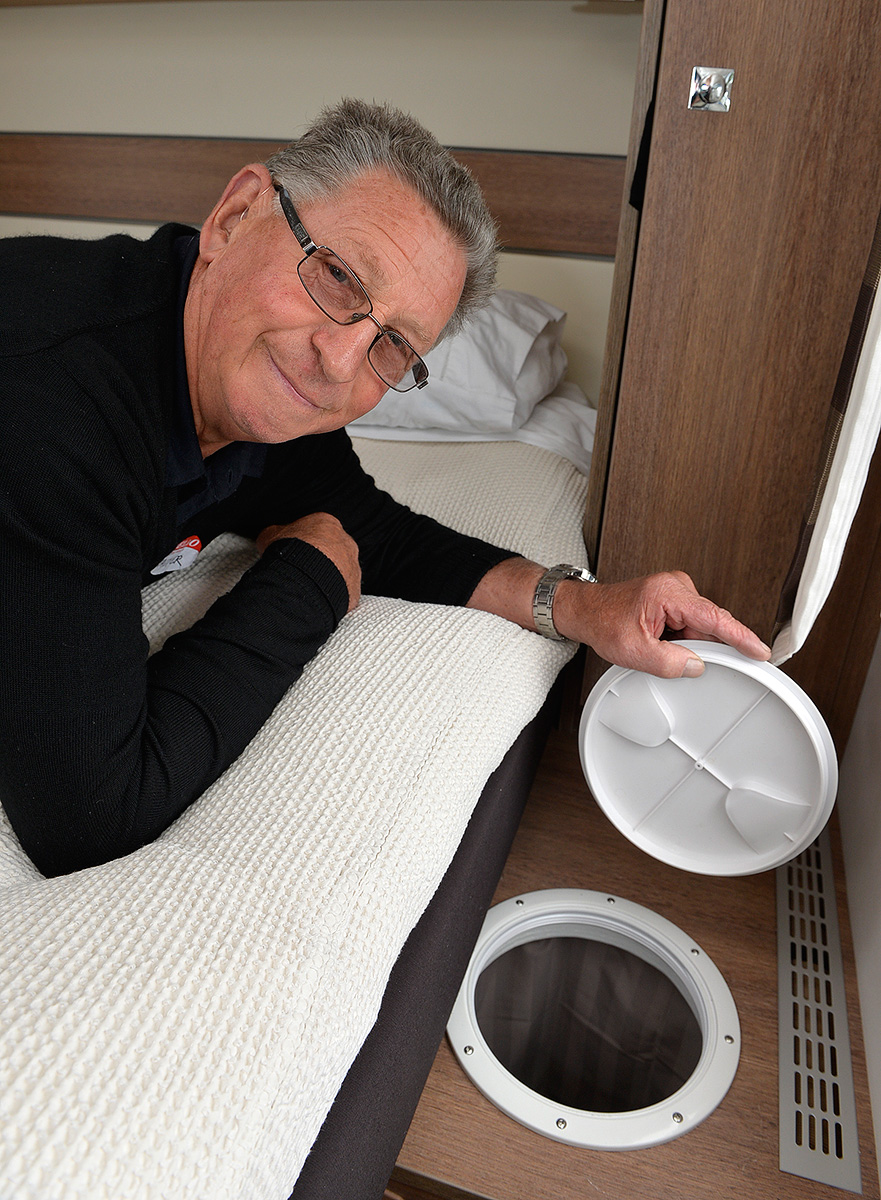
Walter lying across the bed showing the top of the laundry chute.
Walter saw the need to have somewhere to put their laundry. In almost all the centre island bed Dethleffs models, there is a shelf which extends about 800mm along each side of the bed from the back wall.
In mine I have a speaker and some usb jacks for phones and ipads etc. Walter very cleverly decided to use his on one side to install an opening round marine hatch which opens to a chute which Nolina made, that drops down into the garage underneath. The bottom of the chute detachs as a bag to cart away the washing. Fabulous idea and a great way of getting the washing out of the way.
The chute in the garage with the detachable bag.
That’s an idea I’m going to use 🙂
They have also made use of waste space under a seat and in a cupboard for a glasses case and a drinks cabinet under the seat.
Nolina with the drinks cabinet.
Great stuff! A great use of what could otherwise be wasted space.
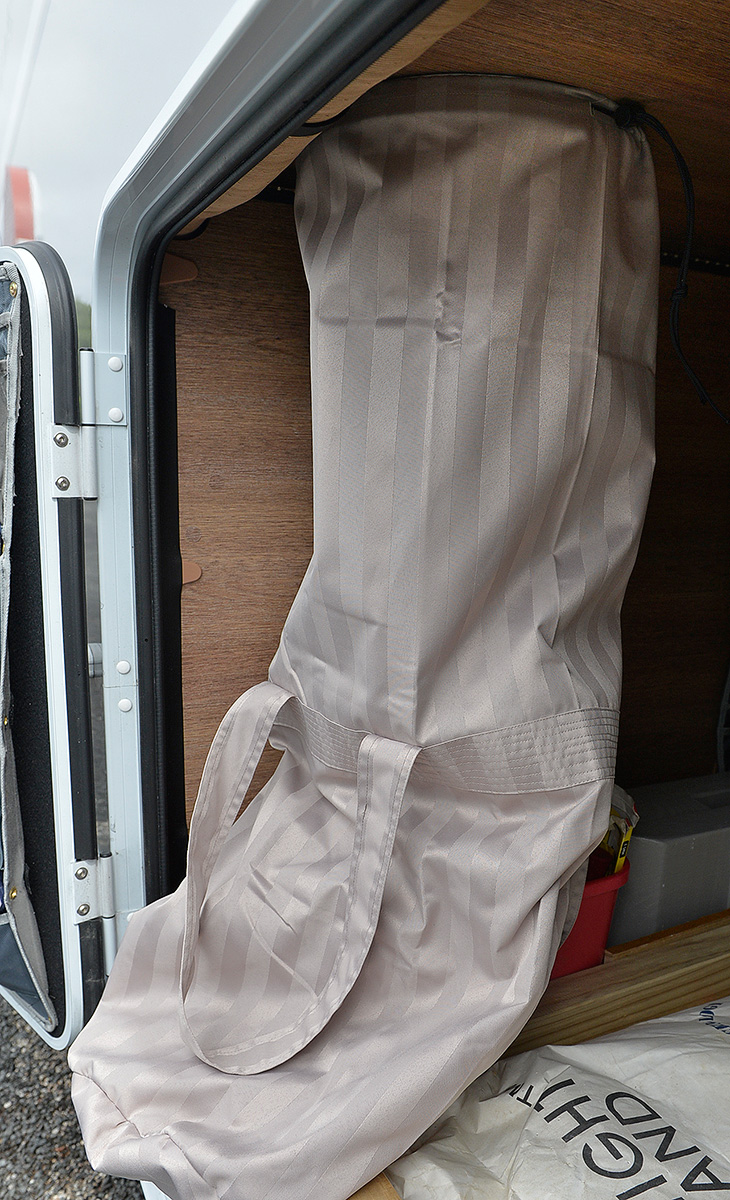
I don’t know about you but when I’m away Motorhoming but I largely wear T shirts, Jeans and Shorts etc. Stuff you’d stick in a drawer. The Dethleffs come with well set up wardrobes but not a lot of drawers in the bed room area for clothes.
The cloth basket with clothes
So I set out to change our wardrobe into something that would be useful for clothes like drawers.
The first option we used lasted about 18 months which was a hanging basket type of arrangement which was suspended from the rail. It had cloth covered cardboard boxes which slid in and out like drawers. This worked quite well for about 8 months when it just collapsed to a point where it was almost unusable.
What we started with. You can see the top hangy bit straining on day 1
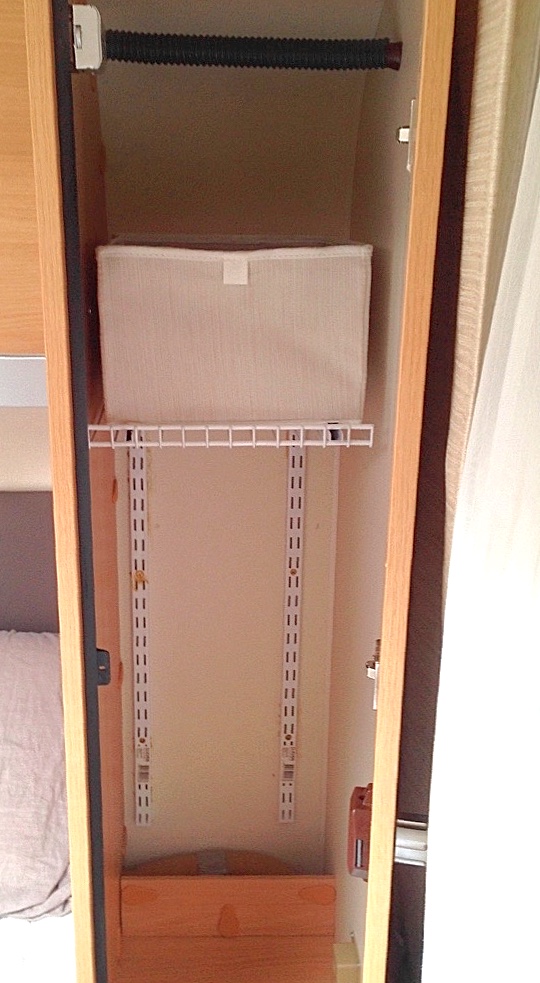
I set out a few weeks ago to sort this out with some shelving bits which I got from Bunnings.
The screwed rails with the first shelf in
The Steel supports screw in first using glue and short screws(also glued) and then the shelf brackets clip in with plastic locks which prevent the shelf or brackets from coming out while you’re driving.
All the shelves in
I thought that I would possibly have to bungy cord the shelves in while we were moving but so far, I haven’t even had to do that. It works a treat. The whole things for these shelves cost about $240.00 so it wasn’t insignificant but the problem seems to have gone away 🙂
We were on our way back to Auckland from Kerikeri when we found out our old friends Gary and Chris were at Uretiti Doc park for a few nights. We thought we’d surprise them.
As we arrived right on the dot for “elbow exercise time” (with a glass in hand) at 5pm. We started on some wine while Fiona made us all a nice chicken tea.
We weren’t far into the conversation when Gary filled me in on the new Netspeed Router firmware upgrade and what a difference it had made for him.
With all of my speed tests around the country and comparing notes with Gary’s tests, it became very obvious that his speeds were generally 5 mbs a second or so faster than mine. I put that down to the fact that the sides of his van are fibreglass and the sides of mine are composite with an outside shell of aluminium. I’d assumed from that despite us having external aerials, that the router in automatic mode with aerials, was favouring the internal aerials which gave Gary a better signal. Well. .. No more 🙂
The good folk at Netspeed have released a router firmware upgrade which gives you the option to tell the router to only use the external aerials. The firmware upgrade is free but you will have to install it yourself or get someone slightly techy to do it for you. Netspeed will also do it over the phone with you too. It only takes five minutes and is not complicated and well worth doing. The big thing with this upgrade is not to be rushed and let the upgrade finish before fiddling with anything.
Wait for that magic moment when you get the box pop up that says “Success!”
Back to our elbow exercise.. While chatting away, Gary brought out his laptop which had the upgrade file on it for my router and in a few minutes had it installed on my router. In Uretiti, I immediately went from 2 bars of 4g to three and that added about 15 Mbps odd to my download speed as I was able to get my roof aerials really pumping rather than let the router do as it pleased with my useless internal aerials… Useless inside a metal cage anyway.
What a wonderful sight
Thanks heaps Gary.. We had a great night. Nice to see you both again too.
The Netspeed speed test at Uretiti earlier
Download: 24.42 Mbps
Upload: 2.45 Mbps
Ping: 49 ms
After with the external aerials pumping!
Download: 46.62 Mbps
Upload: 3.39 Mbps
Ping: 35 ms
Connection Type: Wi-Fi
The upload speed is still awful but it is an iffy spot but it’s well worth doing the upgrade !!
How to do the upgrade.. Call Netspeed for the link for the download then download the right file for your router.
Log into your router as administrator.. For security reasons, I’m not going to tell you how to do this here but look at your router instructions.
Follow the instructions in the following screens.
The login screen on your router once you’ve logged in. Open browser.. Type in 192.168.1.1 to get here.This is in Update. Click on Local update to upload your file and WAIT until it finishes!Once it has finished, you can go to this screen in Settings and set your aerials up. I’ve got mine on External only
Have fun and enjoy the extra speed. Call the fine team at Netspeed if you get stuck or need help.
Fiona & Chris, two empty nesters put their dreams of doing something different into reality… Now back in a house, they were living in their Motorhome, come along for the ride.


You must be logged in to post a comment.