

One of the things that broke around the South Island was our habitation door flyscreen. There are 4 strings that keep it steady in the middle and the second one down just let go from old age. The string was knackered. We were in Te Anau when it finally let go and although we could still use it, after we left the Te Anau midges behind, we didn’t really need it.
Click on any Image to Enlarge
There are really no clear instructions for fixing these things and by the time I’d done mine three times and picking up bits and learning as you go, I managed to get mine working nicely. Fiona had to keep me settled and there was the occasional swear word that leaked out here and there. Just as well the Grandkids weren’t here 🙂
The Research
After doing a bit of homework on it, I talked to Bruce Philpott who has the same van as us. He replaced his a few years ago with a locally made customised one. He was really helpful in giving me the rundown on how to get the blind cassette out of Rafe with out breaking to much other stuff!
Then I read John Pedersen’s blog on the fun he and Sarah had with theirs when it let go a few years ago. He talked about how he banished his to the “Naughty room” a few times until he and Sarah could deal with it. I understand completely 🙂 Johns blog is a good read.
Clever Engineer, Alan Watt has also done his on his Dethleffs Trend and had lots of useful advice. Like John, he advised me not to throw away the old string so I could get the right lengths and also to use Fishing Braid with glue which I did. The best advice I got from Alan was take it quietly before you rip into it, study it, when its in bits and as you go to understand how it works. Once I got my head around it, it became a lot easier.. great advice!
Most European Motorhomes are supplied by either of two Dutch manufacturers and although I found a pdf file from the one I’m sure ours came from, there were differences. But the BIG tip I got from that is where to tie the knots from the blinds. This was from Horrex in the Netherlands.
There is also a good video online which doesn’t have sound but is well worth a look at too.
Getting Underway
After a good chat with Bruce on where the screws were and things to look out for, I set out to remove the cassette from Rafe. It came out pretty painlessly and I set up a table and laid it out ready to drill out the pop rivets in each corner.
Click on the Gallery to see “the bits” enlarged.


Its a good idea to spread out the bits and get phone snaps how it all goes together in case your is different from the ones below.

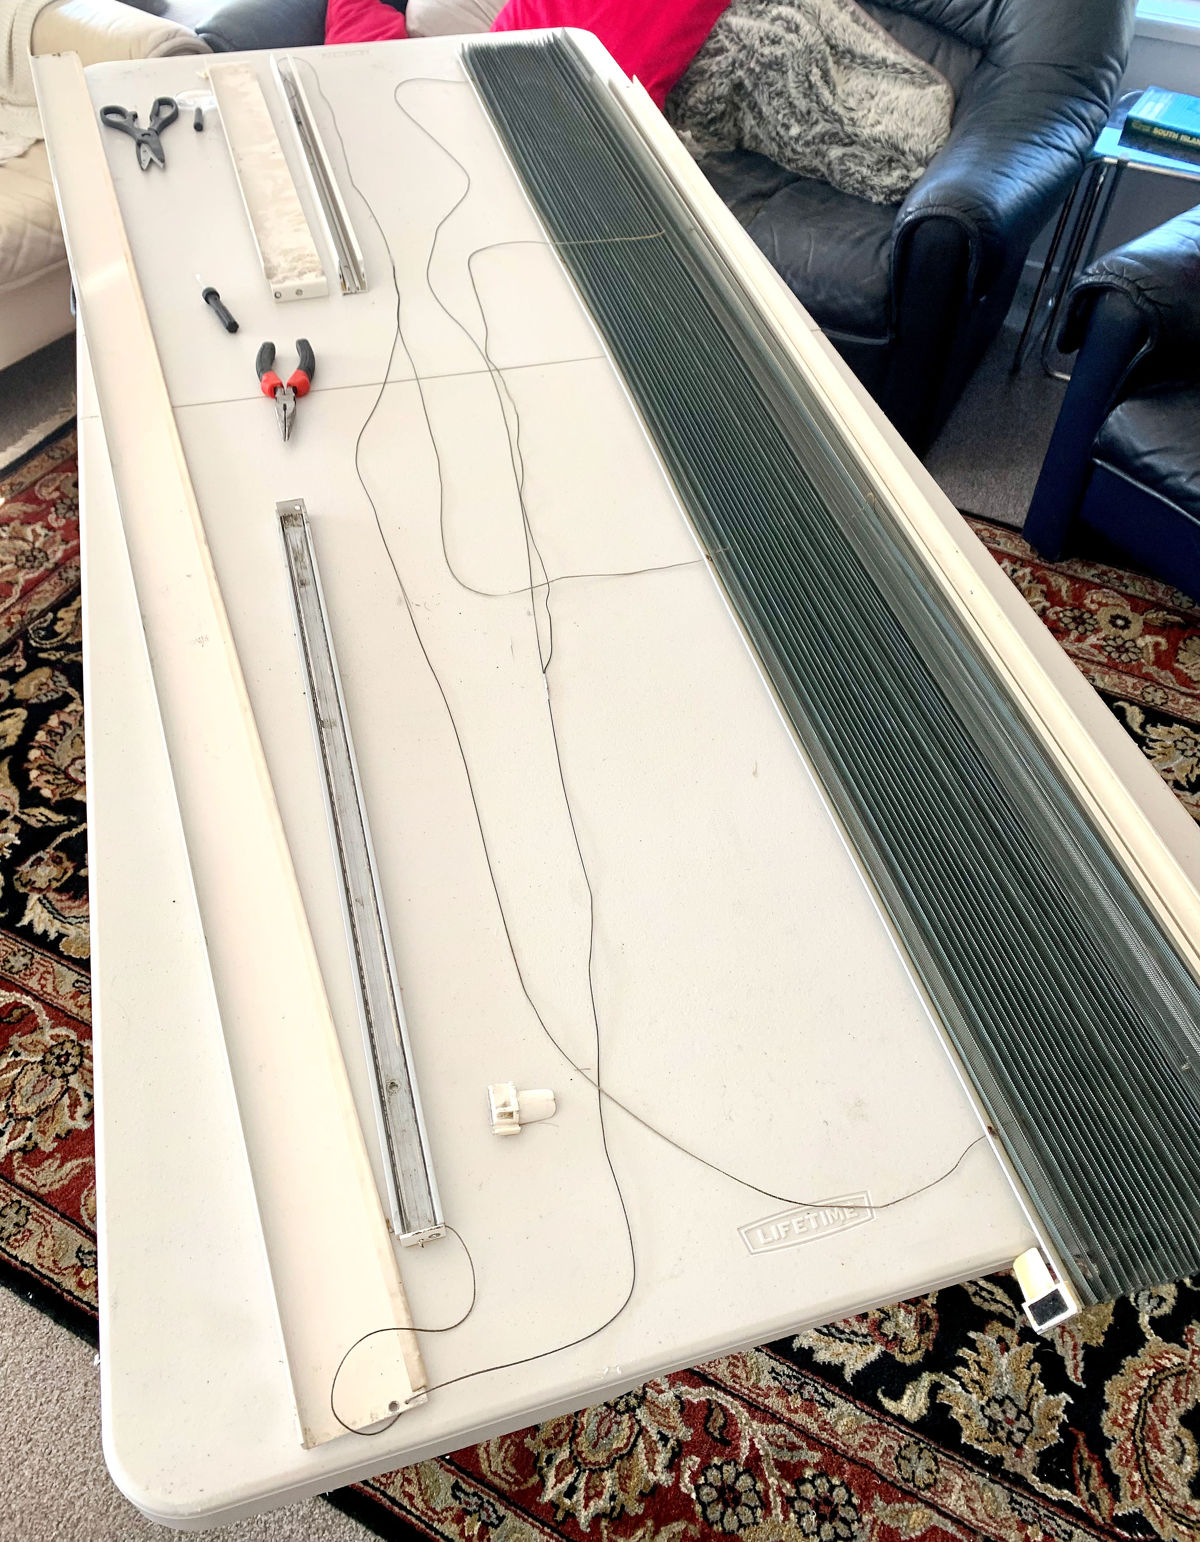
Once the pop rivets were drilled out, and we had it all in bits, we just had to take the blinds pack out from their slide on handle and slide the case from the back. We cut the old string out and we sewed the new string though the holes. The string goes around the back of the blinds, and back to the front, both top and bottom.


We tied the ends together and then glued the knots. The cord runs out the ends in opposite directions. Top strings out the bottom and bottom strings out the top. Some use cut off electrical connectors and squash them rather than tying them.
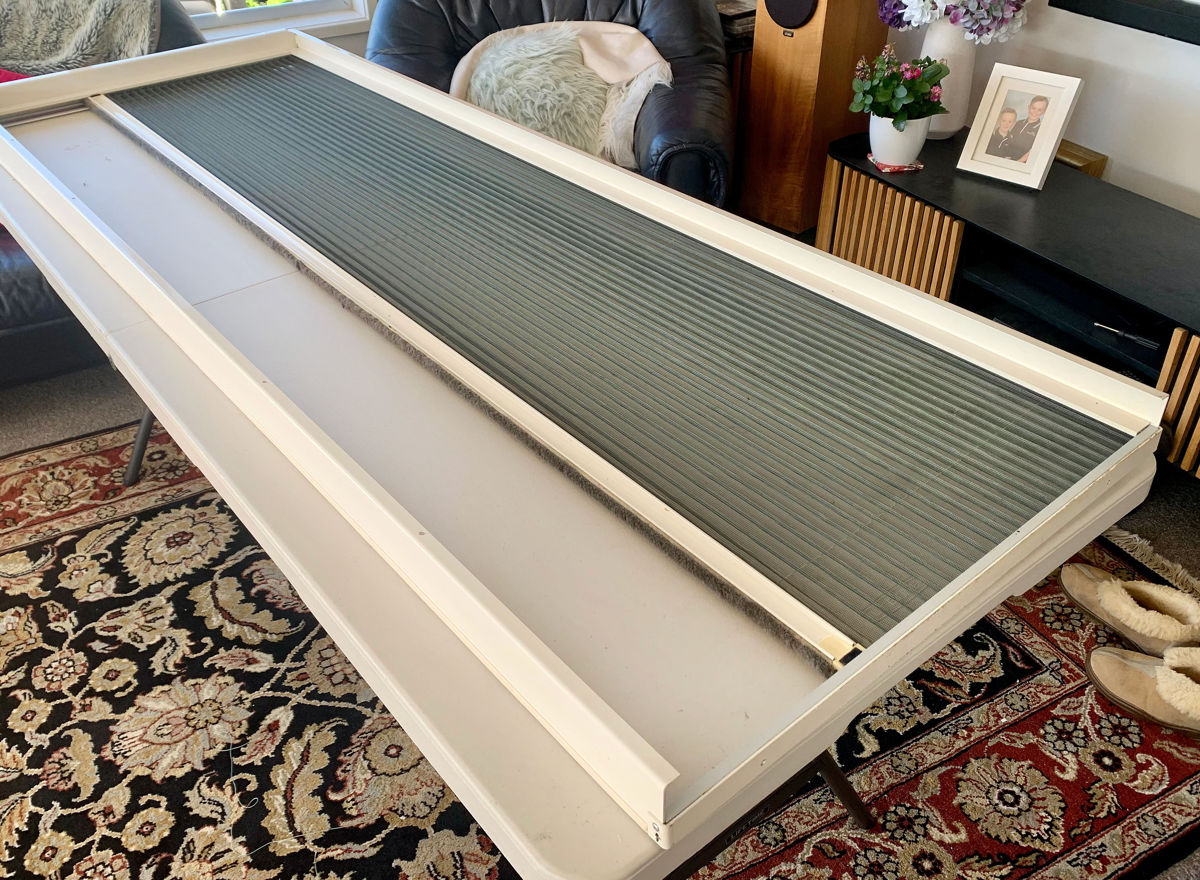
After tying and positioning the knots we taped over the string on the back of the blind pack to keep the string in place.
On went the slide on back case over the tape and the slide on front handle onto the blind pack. Tip: make sure you’re careful to feed the string through the handle in both directions. (top to bottom and vice versa)
It was time then to start pop riveting the bits together around the outside starting with the corners at either end of the blind pack. The Handle sticking out with the string. See below.

The bottom on ours had a fixed knot on the end of the bottom rail away from the blind. Don’t forget to feed it through the side of metal case first. See below with the old string before it was cleaned 🙂

In went the tensioner and we tied a knot to it along the top rail. This needed to be done and tensioned before pop riveting on the outside metal case as the string goes through the end and gets jammed by the outside case. I had to drill out the pop rivets and redo that corner again after tensioning 🙂
As I said, I took three goes before I got it to work reliably.
The first time, I made it too tight and broke the string the first time we tried to open it 🙂
No 2, It was too lose so we completely pulled it apart only to find all we had to do is drill out one corner and tension it properly 🙂
Third time lucky..


I reckon I could do it in a couple of hours or so now but it is finicky and can be frustrating.. If you’re handy with a drill and a pop rivet gun, give it a go.

You must be logged in to post a comment.