With the Covid Germ still out there still and it stifling our travel plans, I thought it would be a good time to revisit our month in Europe in a Motorhome following friends Gary and Dianne a few years ago… about 15 odd posts!
Enjoy
————————————————————————————-
32 degrees C and I thought they only have snow here. Its Hot!!
Click on the images for Hi Res or a Slideshow
We were up early to leave our London digs and to get to Paddington where the Bath train left from, we had to catch two Tube Trains. They are amazingly efficient and once you get your head around them, theyre fantastic. We were at Paddington with time left over for a thickshake and some free Wifi at McDonalds 🙂
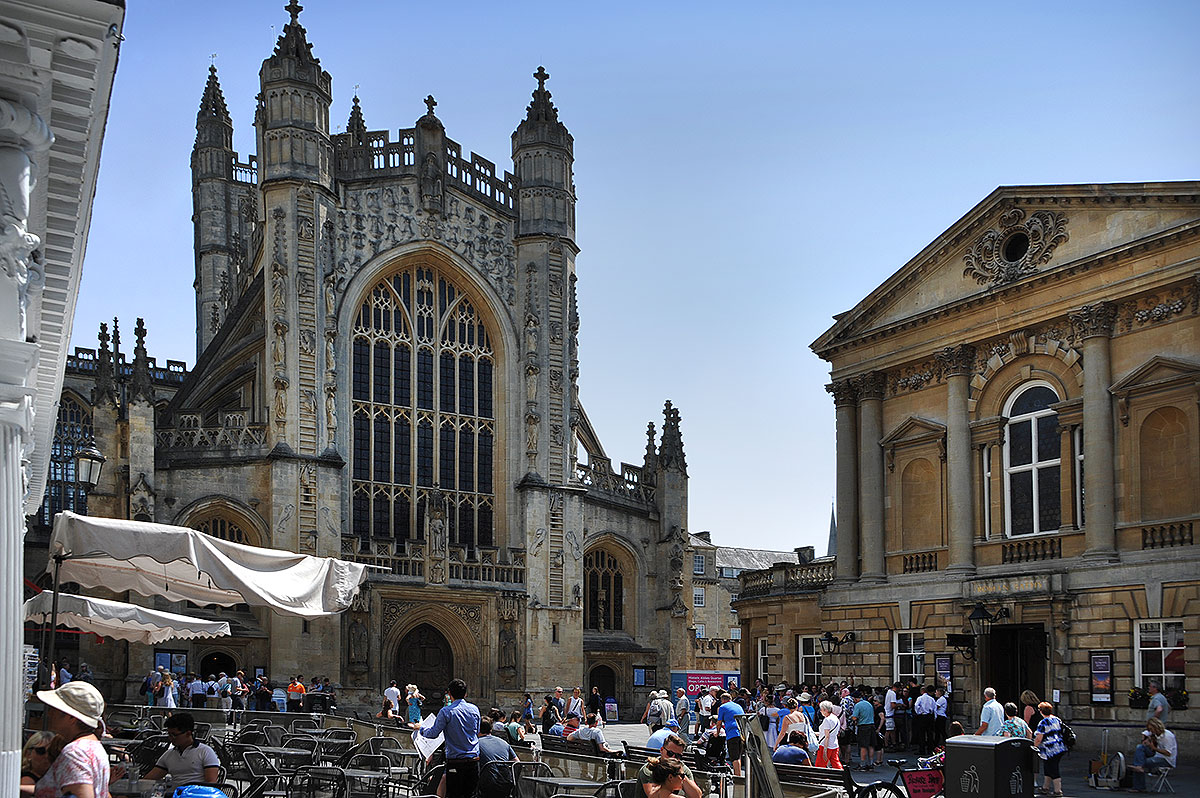
The Bath Abbey
After an hour or so we arrived in Bath. We caught a Taxi to the Hotel which has to go round the back of Bath due to the one way streets to get to our Hotel, and then later in the day during our walk, discovered that the Station is only just around the corner. Oh well .. it was hot and we had a fair bit of luggage to drag around 😉
Just outside London. You don’t see these anymore but this is a full working Gasometer!
The Bath Abbey
One of the quirky shops
The Main shopping street
Main Street
We dropped off our bags and went for a wander around to check out the town. This is one very old town which I think was built by the Romans and like the other towns has the same stunning old buildings. Some of these though are really old.
The Roman Baths arch over the street
We spent the afternoon sitting out the heat under an umbrella with some cold drinks watching all the tourists board their buses outside the hotel.
Fiona in the Umbrella Street. I’m not sure what this was all about but it is a bit different 🙂
A lovely town with more to do with the rental car over the next few days.
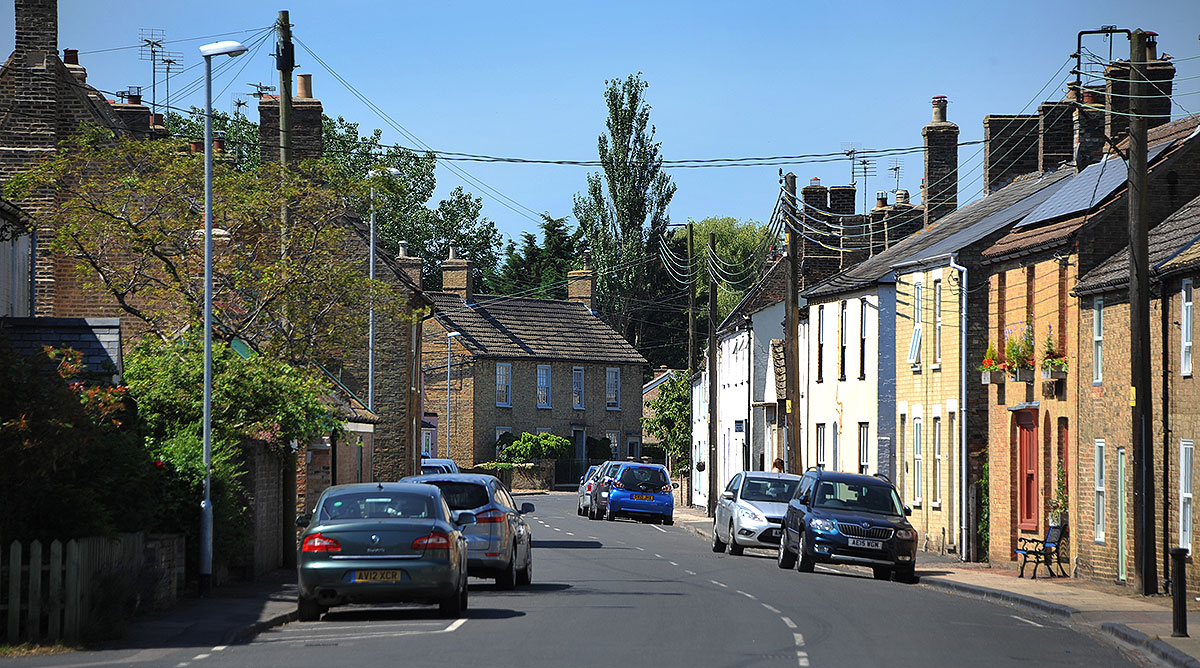
One of the main reasons we came up to Ely is that my English family were all originally from Little Downham which is about 10k’s out of Ely.
The main street of little Downham
Little Downham is a small farming village basically all centred around one main street.
Click on the images for Hi Res or a slideshow
The church at the end of the road
At one end is the church which is like what you see on the TV shows and at the other end of the street is a pub called The Plough. Word has it that every generation in my family has had a drink in this Pub. It was shut when we were there so my turn will have to wait for another time.
The Church
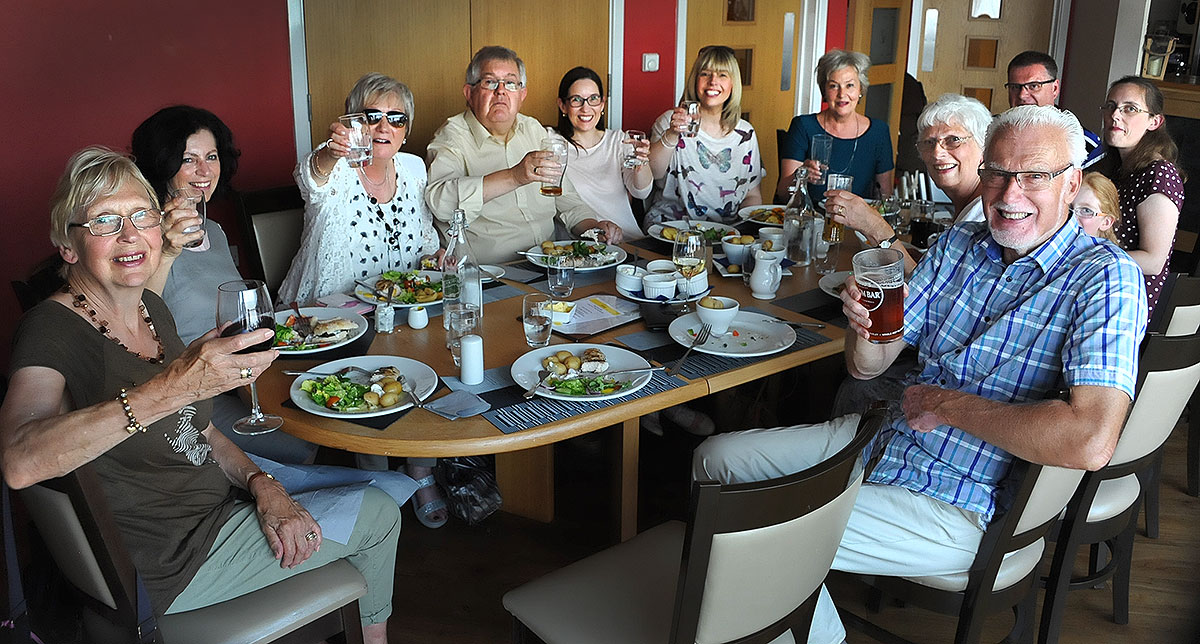
One of my cousins Jan and her husband Bryan who are motorhomers too, organised the family to meet at another local pub called the Anchor. For Fiona and I, it was the first time that we’ve met most of them but I had known about many of them.
Outside the Anchor looking down the main street of Little Downham
Jan is a niece of my grandfather Bert and there were 11 brothers and sisters in the Miller family ! .. lots of cousins.
The whole family around the table
My grandfather Bert was a real hard case and was in the battle of the Somme during the first world war. He was a Tankie in one of the old diamond shape tanks in this battle and was one of the few to survive. He was listed as missing in action as they couldn’t find him!
Word has it that when he arrived back in Little Downham the town was deserted. He saw someone he knew and asked where everyone was. “Oh they’re all down at the church at your funeral Bert!”
So off he went down the road. His mother was so pleased to see him that she scraped the dirt of his great coat and put in a tin. This has been handed down through the family and is now in the safe hands of my son Alex with all the other family military memorabilia. The dirt is said to be from the Somme but is could easily be from a puddle anywhere 🙂 Good story anyway!!
Stacey enjoying herself.
Sarah having a giggle.
Kath. My grandfathers brother Stan’s daughter.
Roy and Fiona having a natter.
Stacey and Sarah, Jan’s daughters.
Roy. My grandfathers sister Elsie’s son.
Linda, Jans younger sister and my grandfathers sister Gwen’s daughter.
Margaret, My grandfather’s sister Glady’s daughter.
Fiona, Jan and Bryan
Sarah and her Auntie Linda
The whole family around the table
The Plough
Back to the reunion.. we had a great lunch .. it was neat meeting all those from my Grandfathers family. They’re a fun lot and we’re looking forward to doing another trip here to see them again.
Linda, Jan’s younger sister who lives in Ely very kindly gave us a ride back to the Lamb Hotel in Ely where were staying.
I just love these English towns with the history and the amazing buildings.
With the Covid Germ still out there still and it stifling our travel plans, I thought it would be a good time to revisit our month in Europe in a Motorhome following friends Gary and Dianne a few years ago… about 15 odd posts!
Enjoy
————————————————————————————-
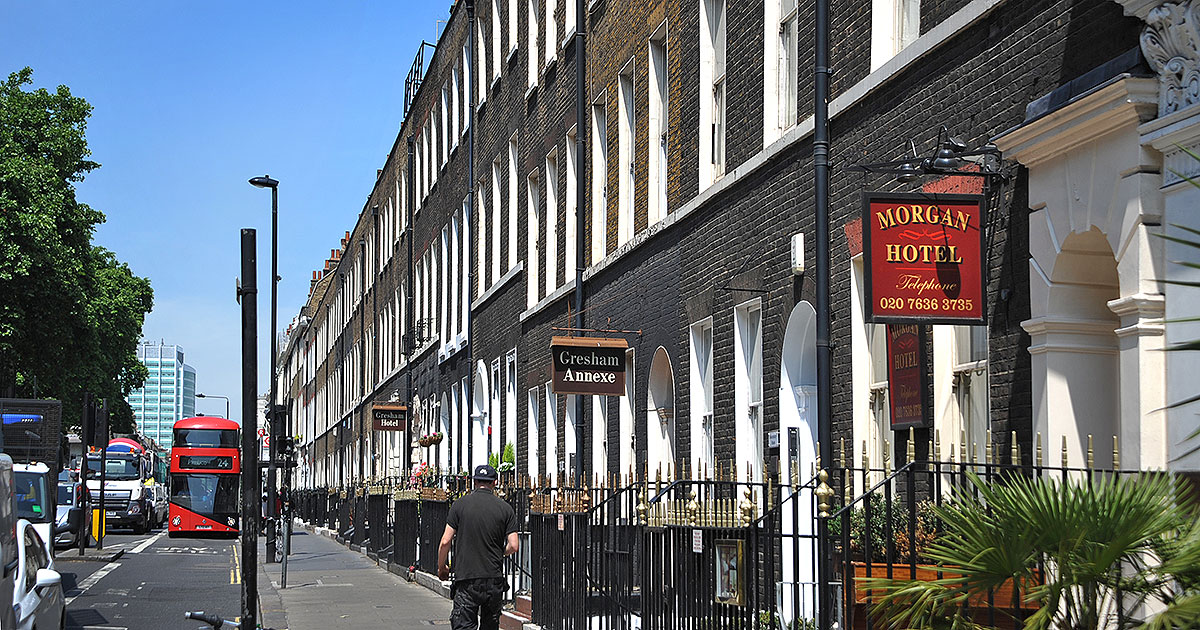
We arrived in London about midday and from the train station headed straight to our Hotel by the British Museum.
The Morgan, where we stayed in London
It was really handy to everything and only a block or so away from two of the Tube stations from significant lines.
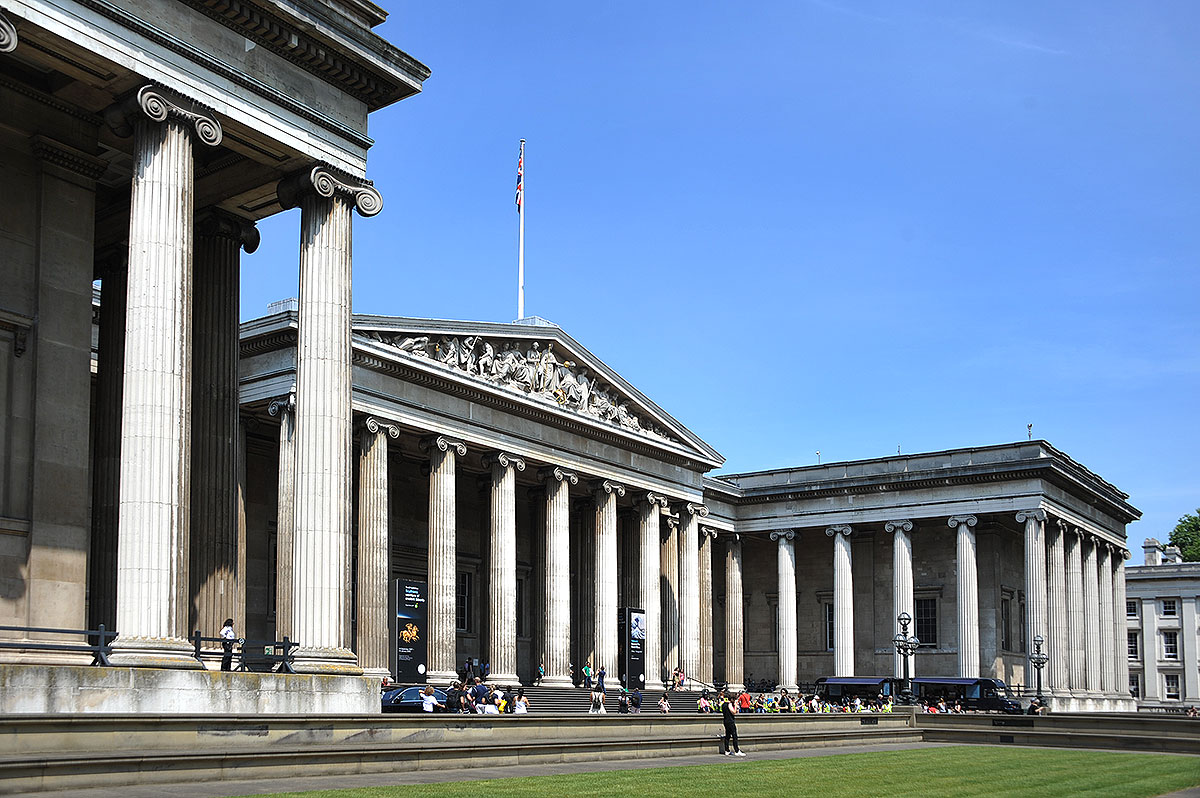
The British Museum just around the corner
The next morning, we headed up the road to a bus stop for the Hop on Hop off bus or as many call it, “The round and round bus”. Armed with our London pass, we headed off down into the London traffic on an open top Double Decker bus and it was great.
Click on the images for Hi Res or a slideshow
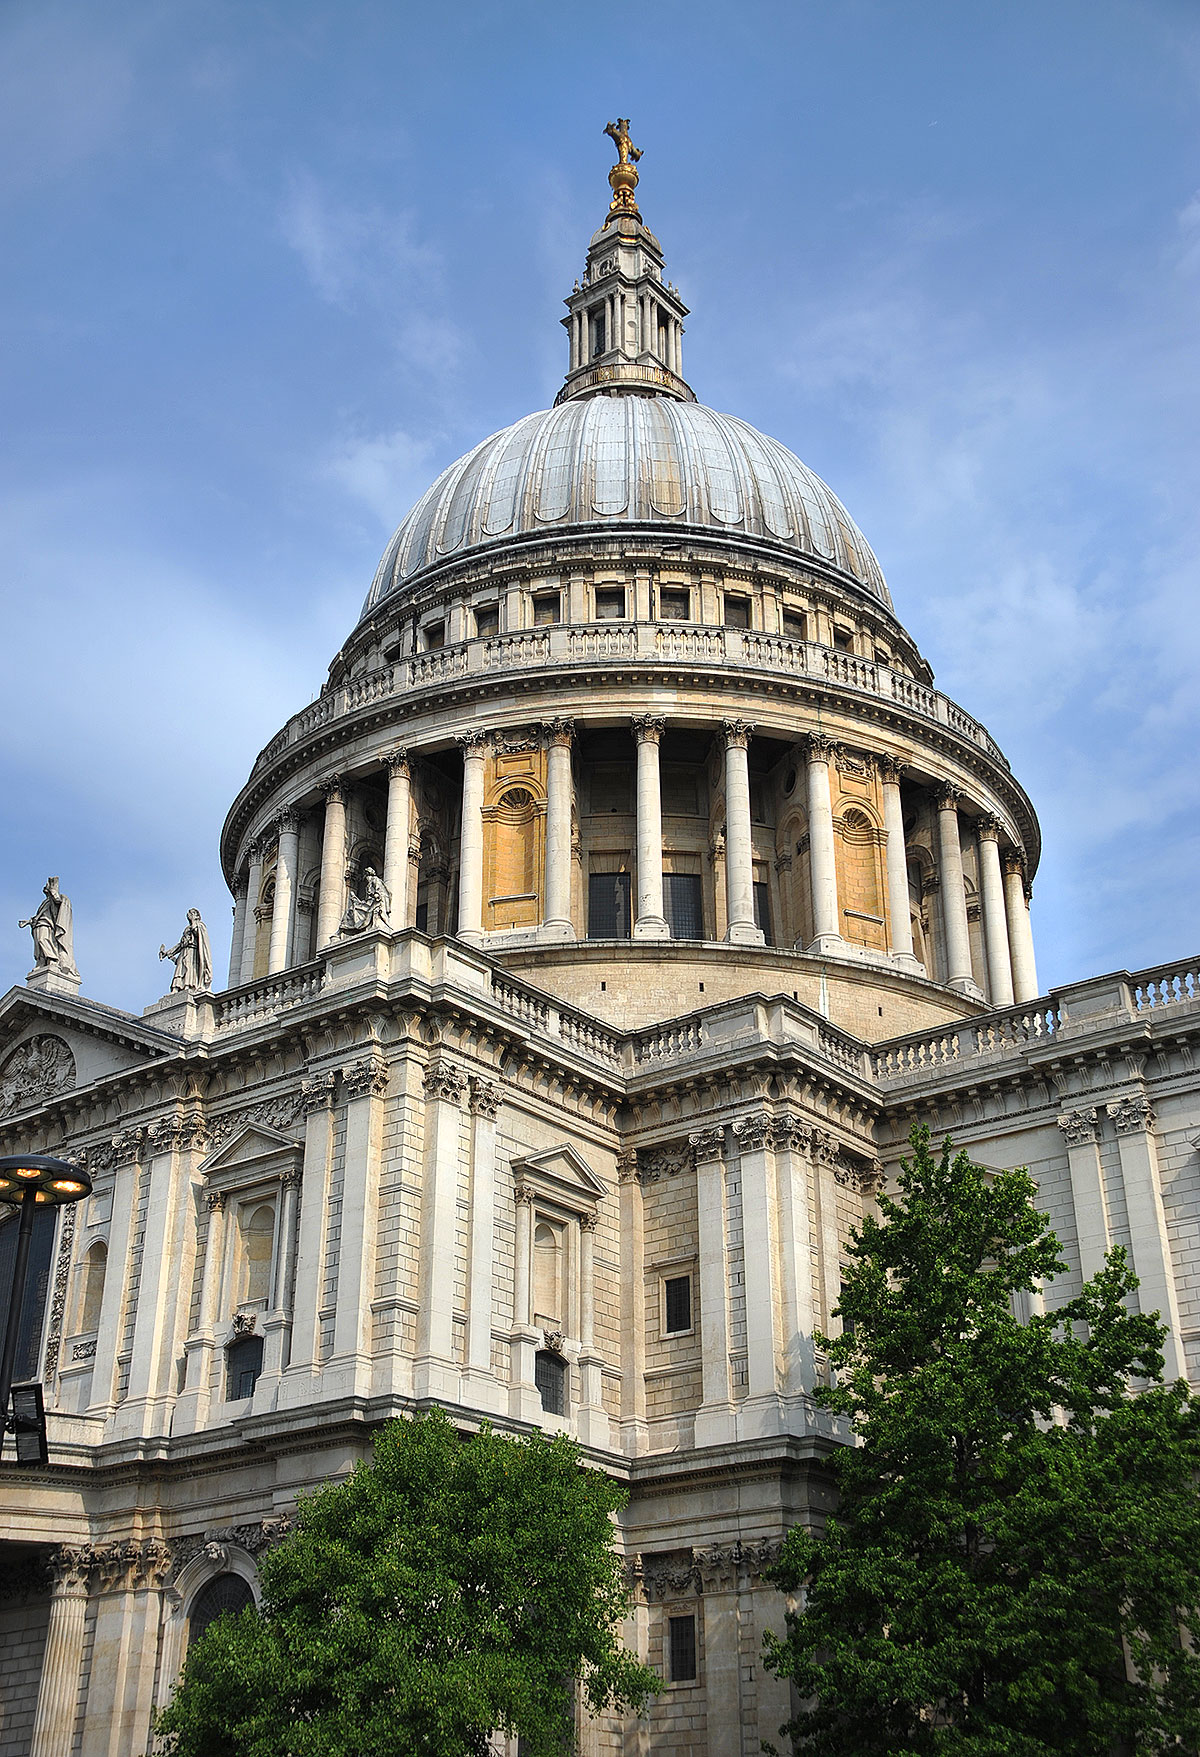
St Pauls from the traffic !
Down to Trafalgar Square and then we went left along the Strand and then to Fleet St. Here we hit the traffic and didn’t move for about 20 minutes!! It eventually let us past St Pauls and not long after that, we ended up at The Tower of London and the Tower Bridge.
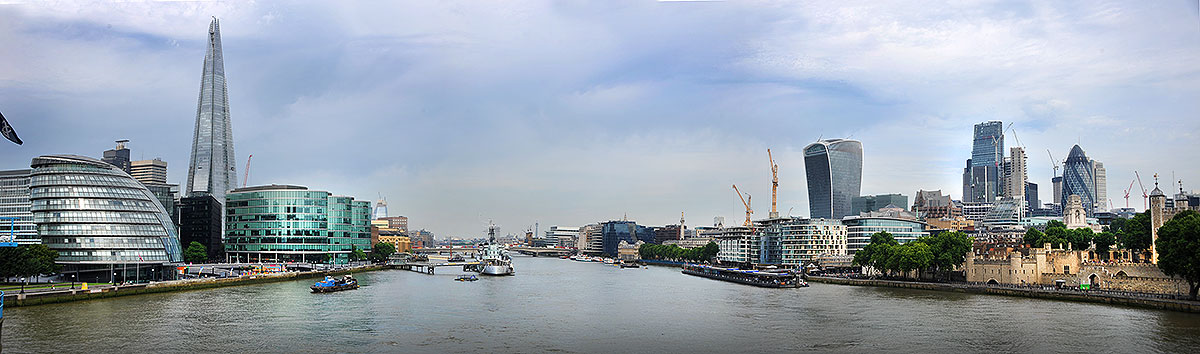
From the Tower Bridge
Once we got across the Tower Bridge we hit the traffic again. It was almost gridlock and I think it took about an hour to get through to Southhampton bridge which is near where the London eye is.
Nice apartments opposite the Museum
The Shaftsbury Theatre
Cleaning with a view
Fleet Street
Crossing the Tower Bridge
The Tower Bridge
Big Ben
The Shard behind the Tower of London
There is a lot of construction going on down there with several new apartments blocks going up.
House of Parliament
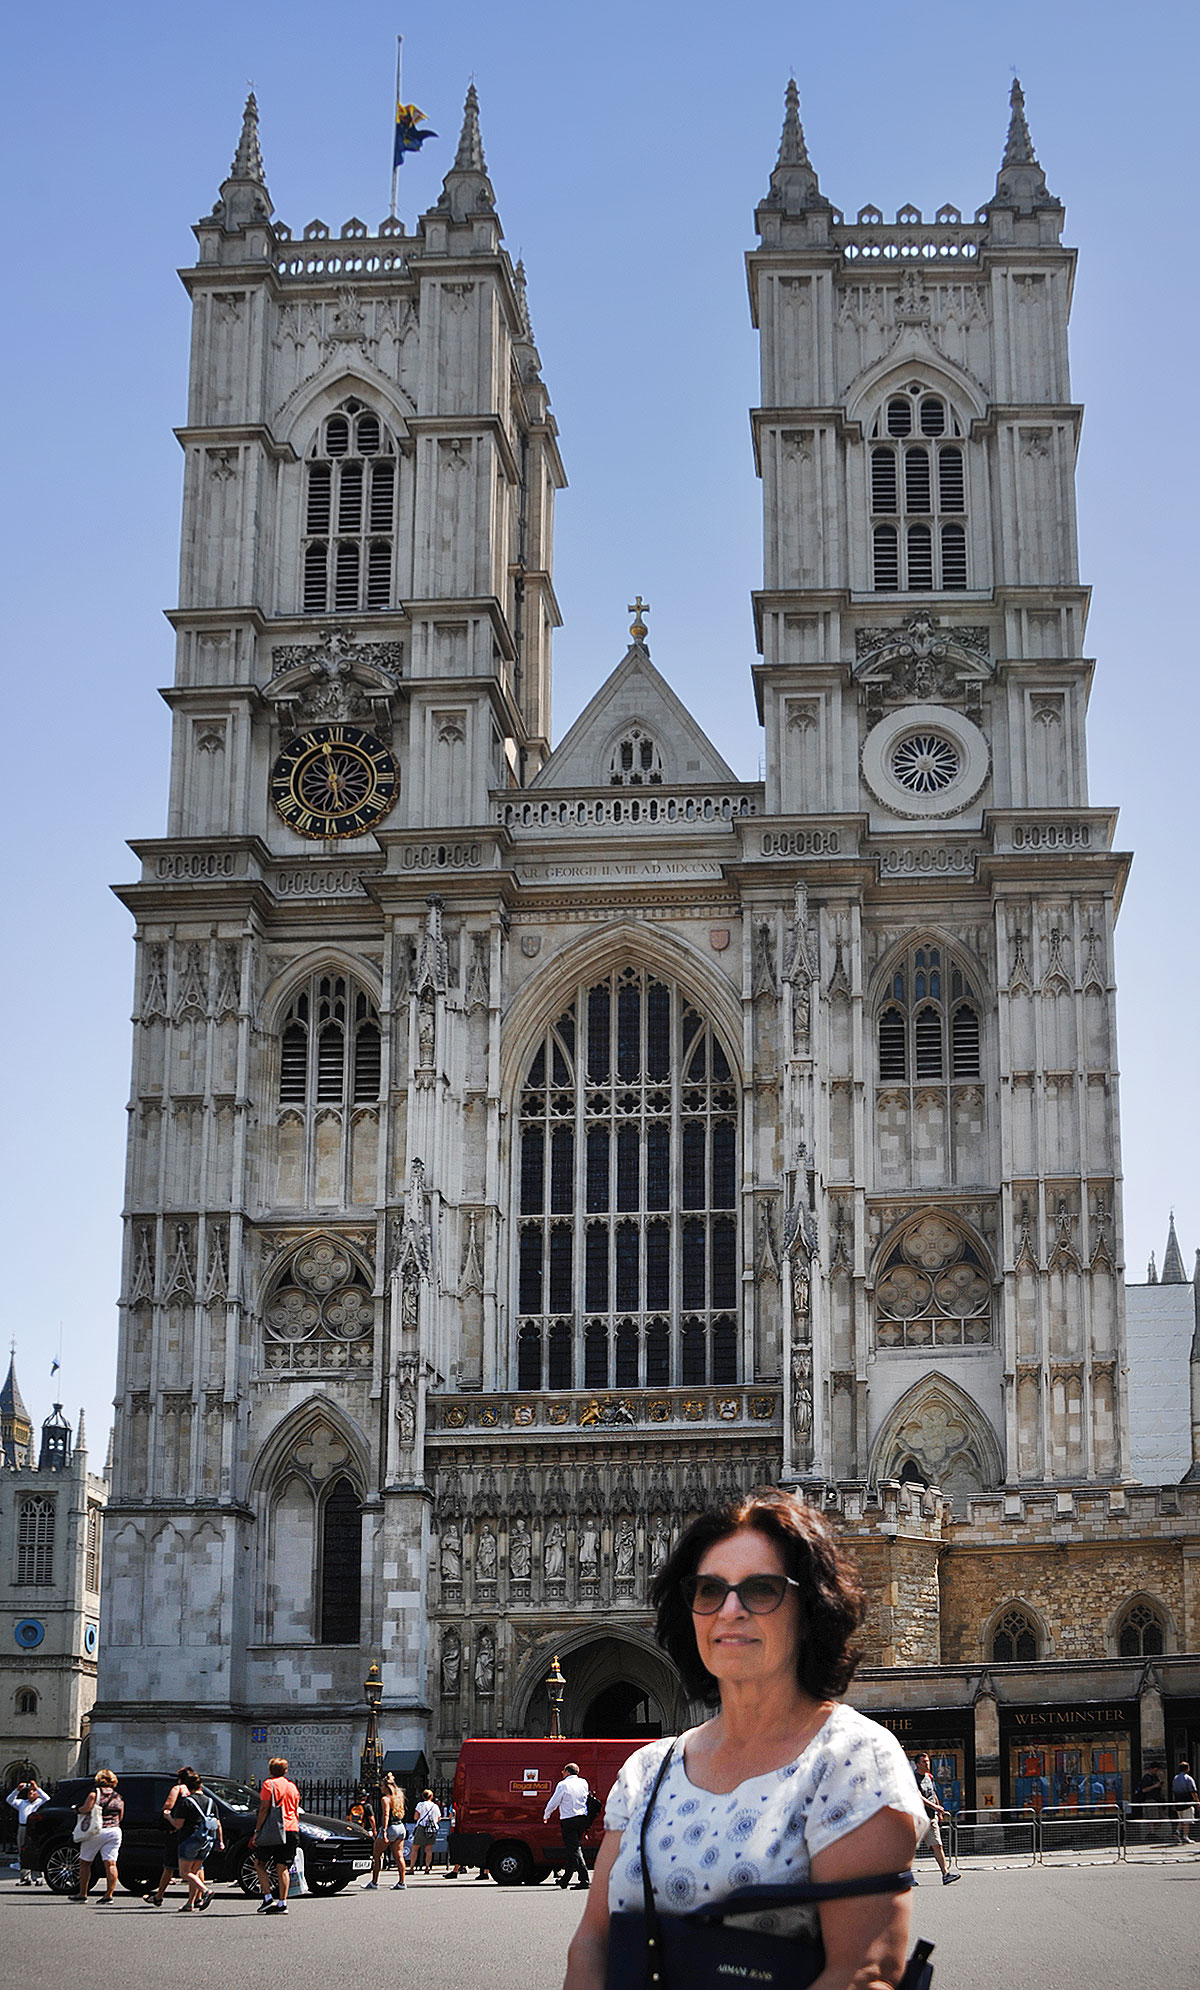
We got across to Westminster where we got off the bus and headed for the Cathedral.
Fiona outside Westminster Abbey
What an amazing building and it just oozes history.
The audio tour is great and a must do but both Fiona and I struggled to understand what we were looking at as the Audio tour didn’t really line up with the map very well. We got there in the end and it was time to find a pub for lunch.
Just around the corner in Parliament St was the Red Lion pub which had an upstairs dining room. I had the biggest Cod and chips with mushy peas I’ve ever seen in my life with an English beer.
The fish was fantastic, the beer was fine.. it was called Londons Pride but not being a big beer drinker I was really just interested in a taste. I think I prefer Heinekin as far as beer goes.
Great service, resonable prices and nice food.. This was the first time I’ve had mushy peas and I loved them. Fiona had a chicken salad and that was great too. .. washed down with a quality English cider which neither of us can remember the name of.
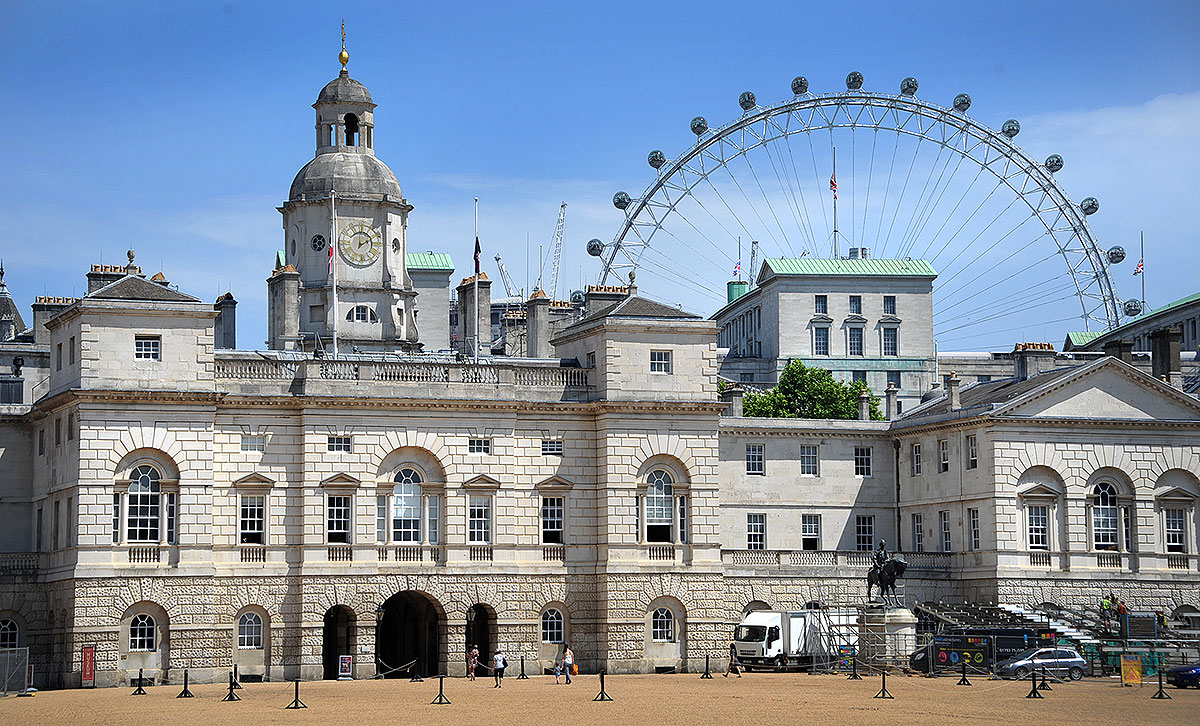
The Household cavalry Museum
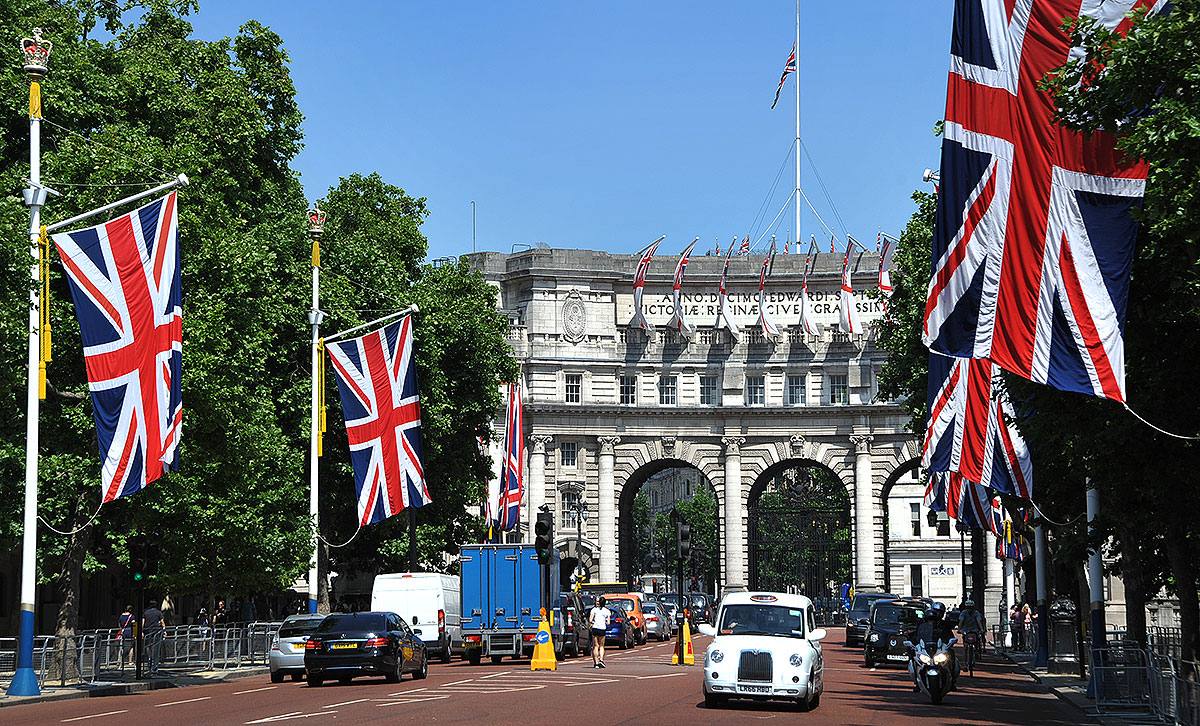
We left here looking for the Churchill War room but the queue was so long and in the heatwave sun, we decided to flag it and while Fiona headed for the Household Cavalry Museum, I headed towards the Marble Arch and got some images of Buckingham Palace and the arch itself.
Marble Arch
The Household Cavalry has a close association with the Coldstream Guards. Fiona’s dad served in Malaya with the Coldstream Guards under the then CO Sir Ralph (pronounced Rafe) Anstruther who Rafe is named after.
Buckingham Palace down the Mall
Fiona caught up with me at the Charing Cross tube station and we both headed back to the Hotel. It was hot. They were talking 30C! so we were pleased to get back to the air conditioning.
A good day and the bus is definitely the best way to see London.
With the Covid Germ still out there still and it stifling our travel plans, I thought it would be a good time to revisit our month in Europe in a Motorhome following friends Gary and Dianne a few years ago… about 15 odd posts!
Enjoy
————————————————————————————-
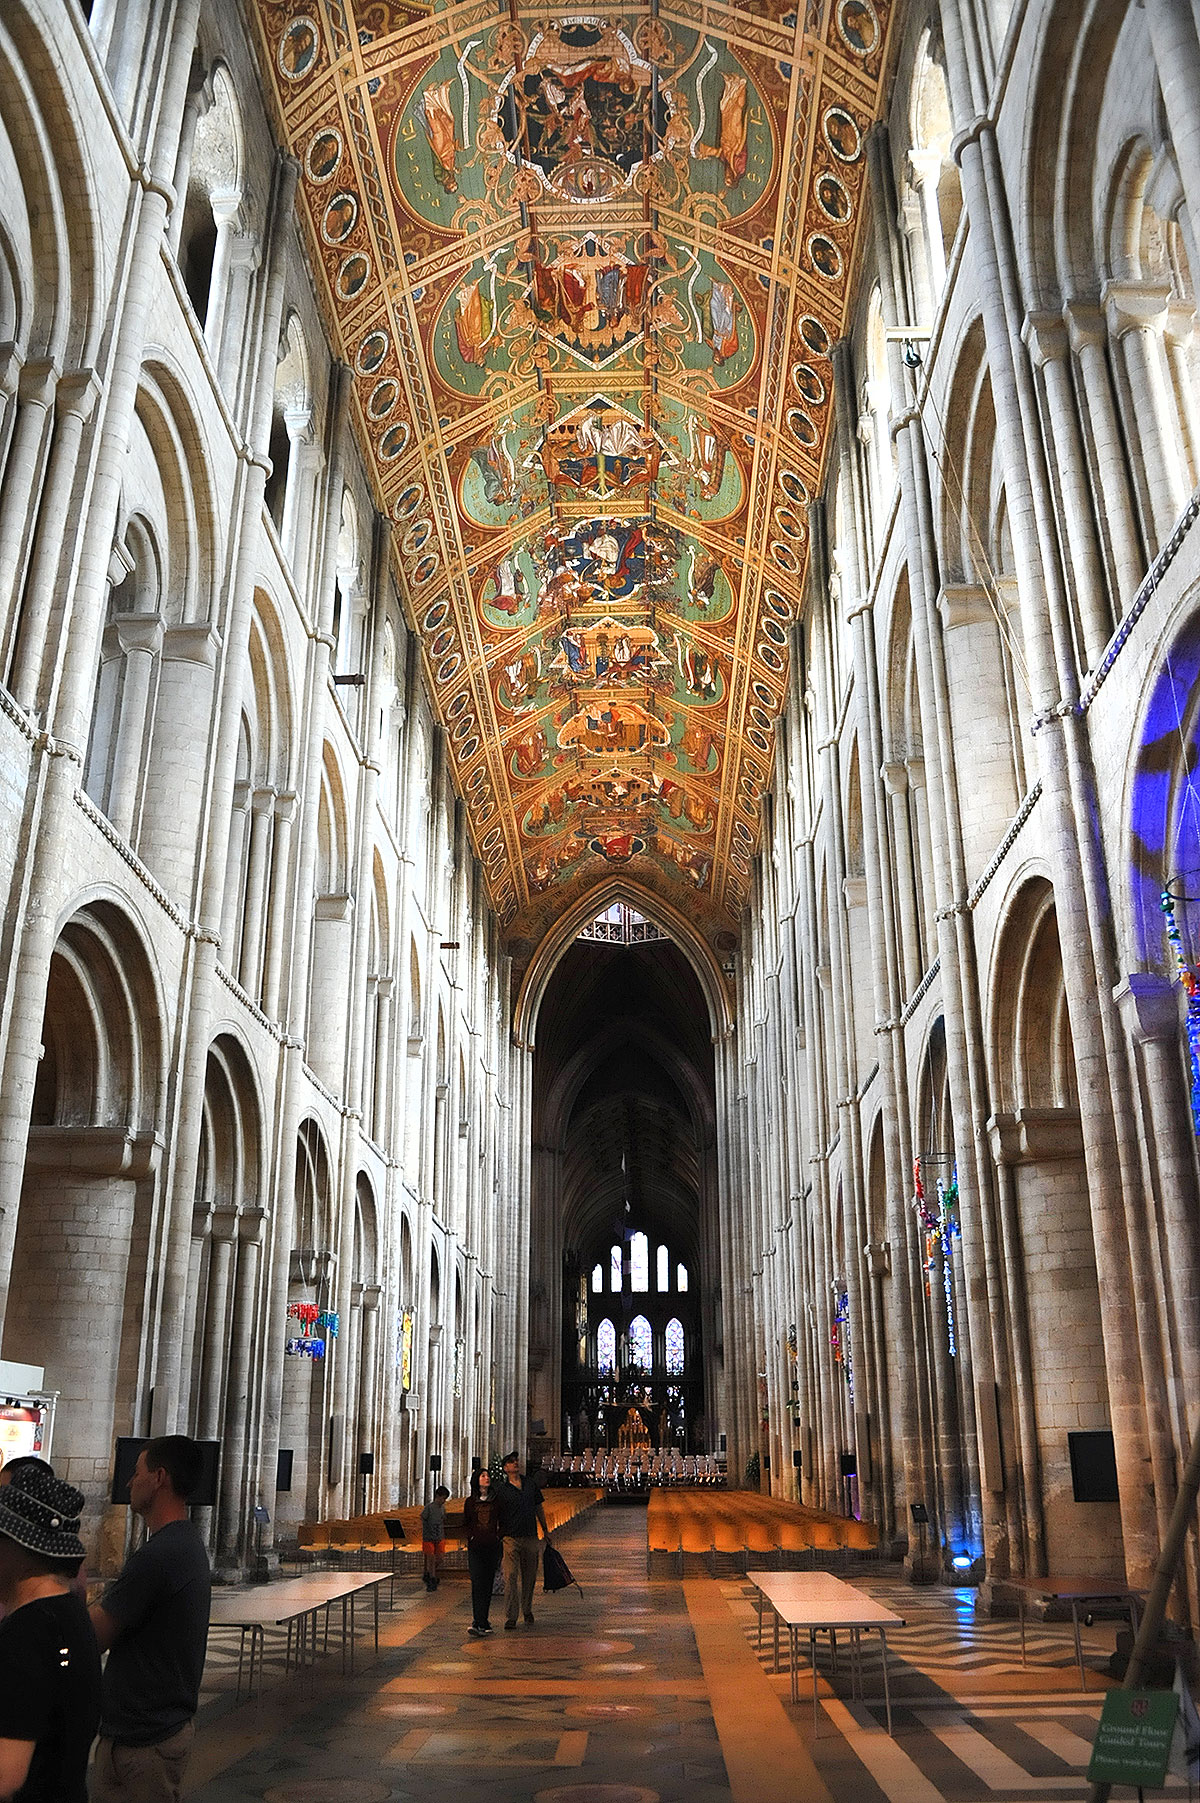
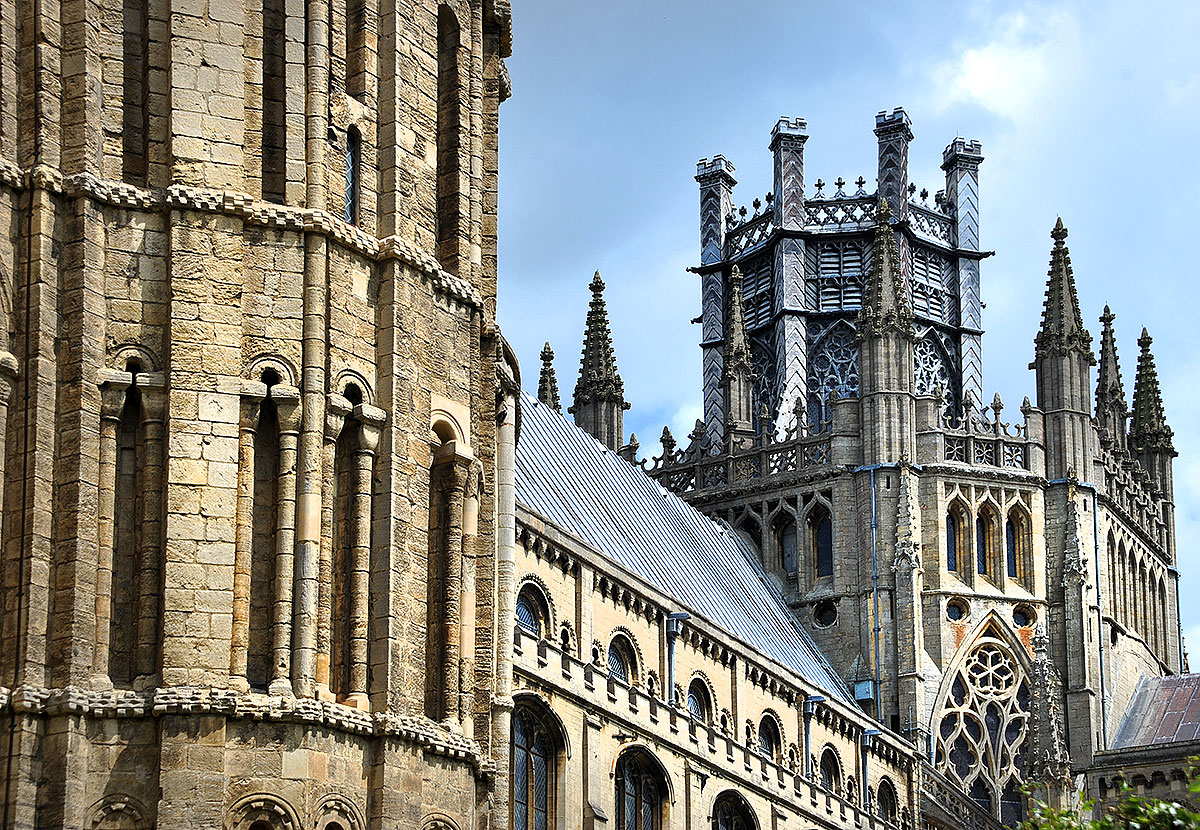
We were early to check in to the Lamb Hotel so we went for a wander around Ely...After checking out the Cathedral which is massive, we headed down the main street towards a market.
Click on the images for Hi Res or a slideshow
Inside the cathedral
The buildings are amazing and the streetscapes just sensational. Everywhere you looked, there was a piccy.
The cathedral at Ely
We ended up in a pub called the Ministers Tavern right opposite from the cathedral and the Lamb Hotel along the road a bit. The barman was wearing a Lions rugby jersey and when I asked for a Chardy, he described it as cheap aussie stuff so I was really pleased to be able to tell him we were Kiwis but I’m sure he knew anyway.
Our friendly barman with the Lions jersey.
He was more interested in telling us that the Lions beat the Maoris with a huge smile on his face.
We talked briefly about the Lions tour and he was a real rugby follower. Nice guy too. He was pleased when I told him that the cheap Aussie Chardy was actually quite nice! It was the only Chardy he had! We checked in at a wine shop around the corner and they seemed to be light on the Chardonnay offerings too.
The main street
The markets down the road
The friendly pub where we had a chardy with Lloyds bank next door
A house near the cathedral
The cathedral
It was too hot for wandering around much more so we went back to the Hotel for a blob.
With the Covid Germ still out there still and it stifling our travel plans, I thought it would be a good time to revisit our month in Europe in a Motorhome following friends Gary and Dianne a few years ago… about 15 odd posts!
Enjoy
————————————————————————————–
The night we’ve been packing for finally rolled around and we were off to the airport for our almost midnight flight to Singapore from Auckland. We’d dropped the car off with daughter in law, Sarah earlier in the day and caught a shuttle to the airport.
What we didn’t know was that both of our sons, Drew, his girlfriend Jenna and Alex were on the same flight up from Wellington. We could have driven our car to the airport and they could have driven it home.. never mind. The shuttle was booked and paid for and it was too hard to undo.
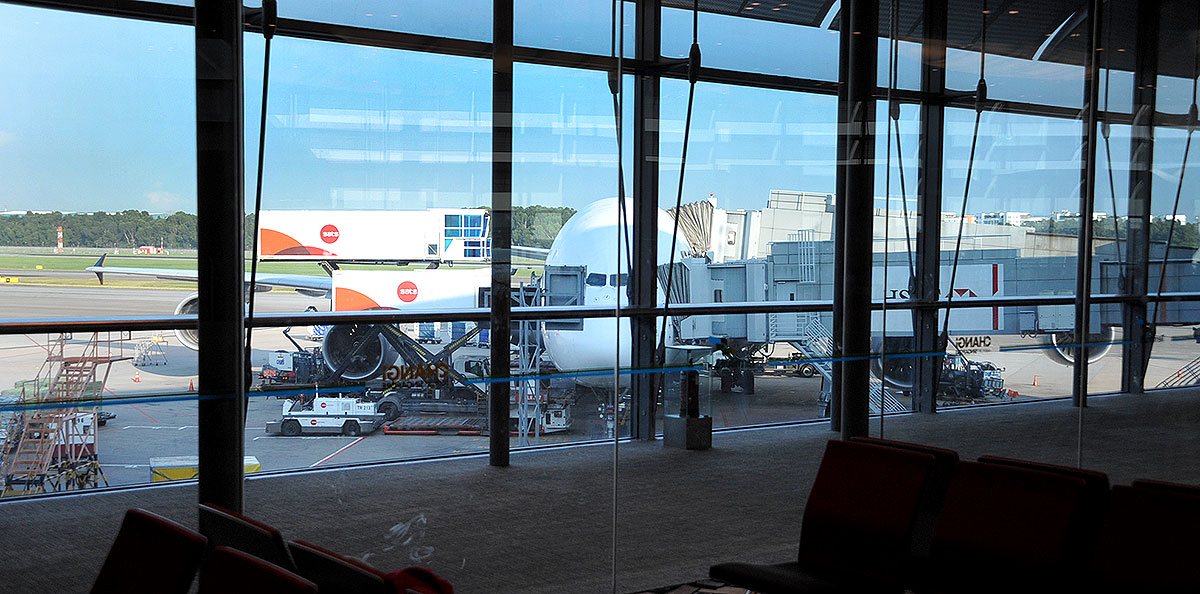
At Singapore with our A380 about to take us to London
We left Auckland at 11:55 and about 2am, we both finally got some sleep. I find it really hard to sleep on a plane and dozy bouts is as good as it gets. I end up tired and grumpy at the other end and after a decent sleep, I’m right again:-)
Arriving at Changi at 6:30 odd, we had two hours before the next flight left at 9am. .. 13 hours !!
Both flights was pretty good though. I was watching the flight track and it was interesting to see that we flew over India and then up through Tajikistan and across to Moscow, out to the Baltic sea past Vilnius and then down to the English channel to Heathrow. .. well clear of the trouble spots!
The terminal transfer Train
Arriving at Heathrow was a doddle and what a massive airport. 5 Terminals all connected by trains in tunnels and you walk for miles between things.
Just to get our luggage was a hike through several buildings. I was expecting to get our bag and then go through Immigration. Not here.. you get in a queue, yep, they love their queues and once through Immigration, you get your bag. There wasn’t any customs that I could see.. we simply walked out, amazing. The immigration guy was a great guy and was more interested in having a chat about some of the strange photos he’d seen of people coming through than holding up a big queue 🙂 .. nice guy.
Click on the images for Hi Res or a slideshow
We were both knackered and made our way straight to the airport Hilton (terminal 4) where we were booked for the night and crashed.
At Paddington with the amazing roof
The next morning, we were up early and caught a train to Terminal 3 where we caught an Express train into Paddington station.
People going for it at Paddington
Paddington is amazing with one of the big wired WW2 looking hanger structures over the whole platform area. Just like you see in all the old movies. Great for piccies so I took a few here. It was busy too with people everywhere.
The huge shopping area in Terminal 3 at Changi
Waiting for the Express to go to Paddington at Heathrow
The Baker street sign
Busy at Paddington
We caught another train from here to Kings Cross and then changed again to catch our prepaid train to Ely. Kings Cross station is very like Paddington with the huge Hanger like look .. amazing.
A visitor from Hawkes Bay checking out the Baker street sign
On the way to Cambridge was the Baker Street stop. My immediate thought was Sherlock. When we stopped, the double entrance doors perfectly lined up for the Baker Street signs and while I took a piccy a young girl wandered into the shot to photograph it herself.. all this without getting out of my seat ! My lucky day.
After lunch, we rocked into Ely. A few trains, cabs and stuff but we’re here and its fantastic.
With the Covid Germ still out there still and the fact that I’ve been pretty much house bound with a nasty flu for the last couple of weeks, I thought it would be a good time to revisit our month in Europe Motorhome following friends Gary and Dianne a few years ago… about 15 odd posts!
Enjoy
————————————————————————————–
Rafe is in Taupo safely tucked up and snug in Gary and Diannes Shed and being very spoilt on carpet too!
Our last view from the place on the hill.
They have sold their Rosie and are waiting for their new “Basil” to arrive from Germany. Basil is a 8.8 metre Niesmann and Bischoff, with all the bells and whistles and yes, it will fit in the shed ! .. more on this later when it arrives.
Click on the images for Hi Res
Fiona with Boxes and Suitcases
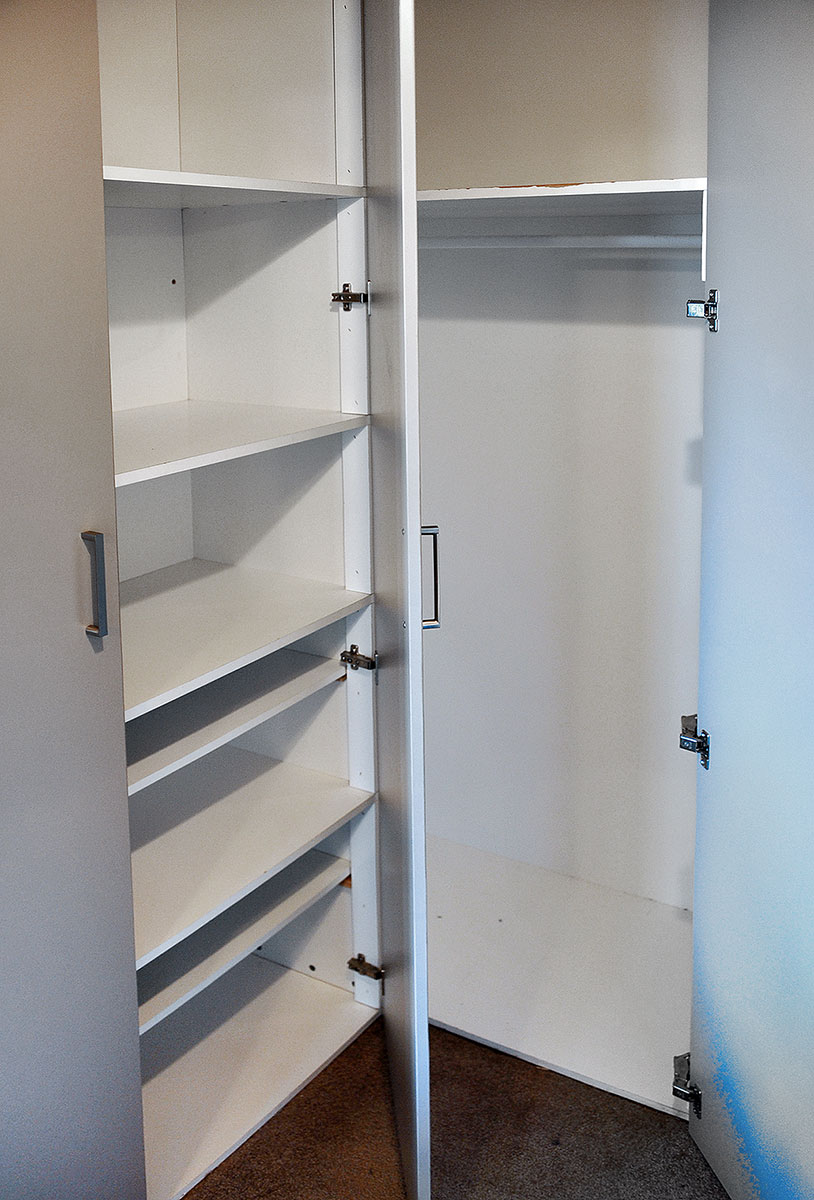
We’re packing up for the trip and we’re also moving our of our room in Milford which we’ve been renting from our son Andrew.
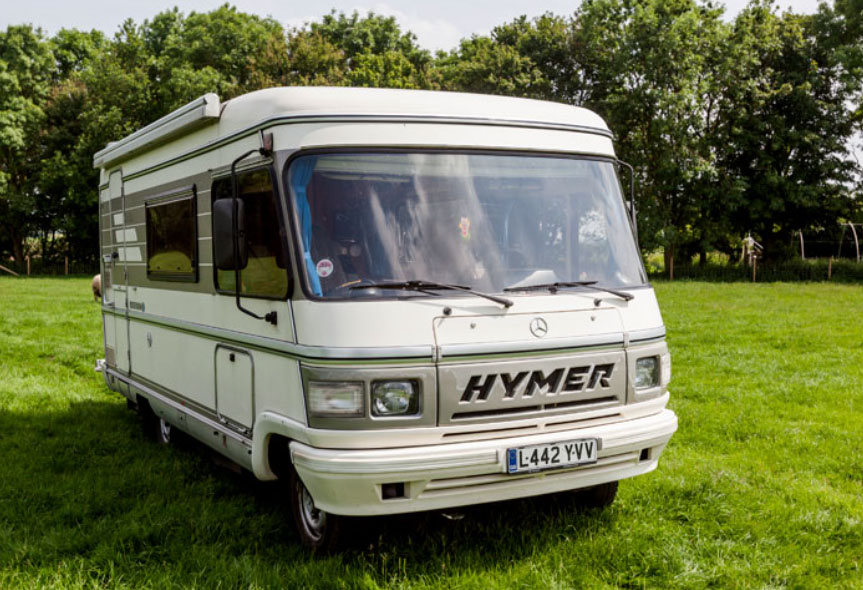
We’ve also packed our bags for Europe. We’re heading first to the UK and after 10 days or so, we’ll be picking up “Ralph”, and yes really, it is its real name 🙂 Its a rental Hymer and we’ll be joining our friends from Taupo, Gary and Dianne on a trip through Europe.
Empty Wardrobe
Gary and Dianne both lived in Prague for a couple of years and have done several motorhome trips through Europe so know it well.
We’re crossing on the Chunnel together and heading through Belgium, German, Poland and up to Estonia and back down again. Through the South of Poland, Czech Republic, France and then back to the UK.
Ralph the left hand drive Hymer
Once we get back from the UK in early August, we’ll pick up Rafe from Taupo, come back to Auckland for some final sorting out of our stuff and then we’re off to the bottom of the South Island until Christmas, effectively fulltiming ! ..yippee.
Follow us by clicking on the Follow button on the top left!
This is one of those real gems. We’ve stayed here a few times now and it although the facilities are a bit rustic, they’re clean, they work, its a reasonable price and they’re nice people.
Click on an Image to enlarge
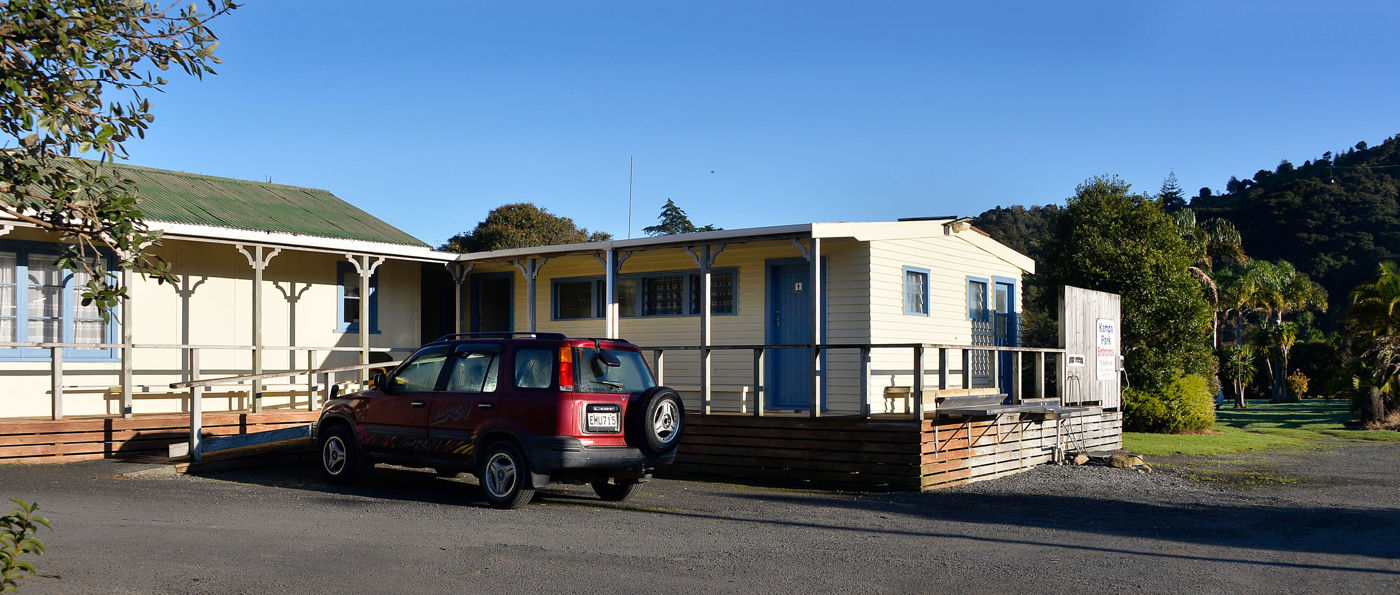
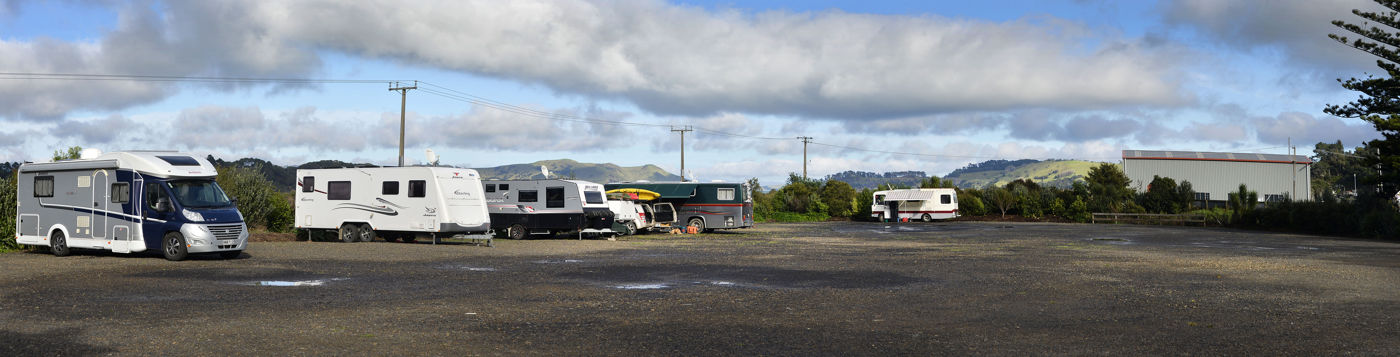
The parking out the back.. early morning
We checked in at the hotel and after parking Rafe, we were pleasantly surprised to see it was pretty dry given the rain the area had been getting. The secret was that there is a good layer of scoria under the grass where you park. There was a couple of ruts from earlier people but they were easily avoided and it was easy peasy.
After having a look at the Coromandel Mining Museum up the road a wee bit, we went for another walk into Coromandel town for a look around for an hour or so and then wandered back. The shops were open yippee! The Mining Museum is run by volunteers and it is well worth a look at it.. really interesting with a lot of images of early Coromandel. I even found a list of the rules of being a Teacher in the 1870’s… quite funny looking at it now but they were deadly serious.
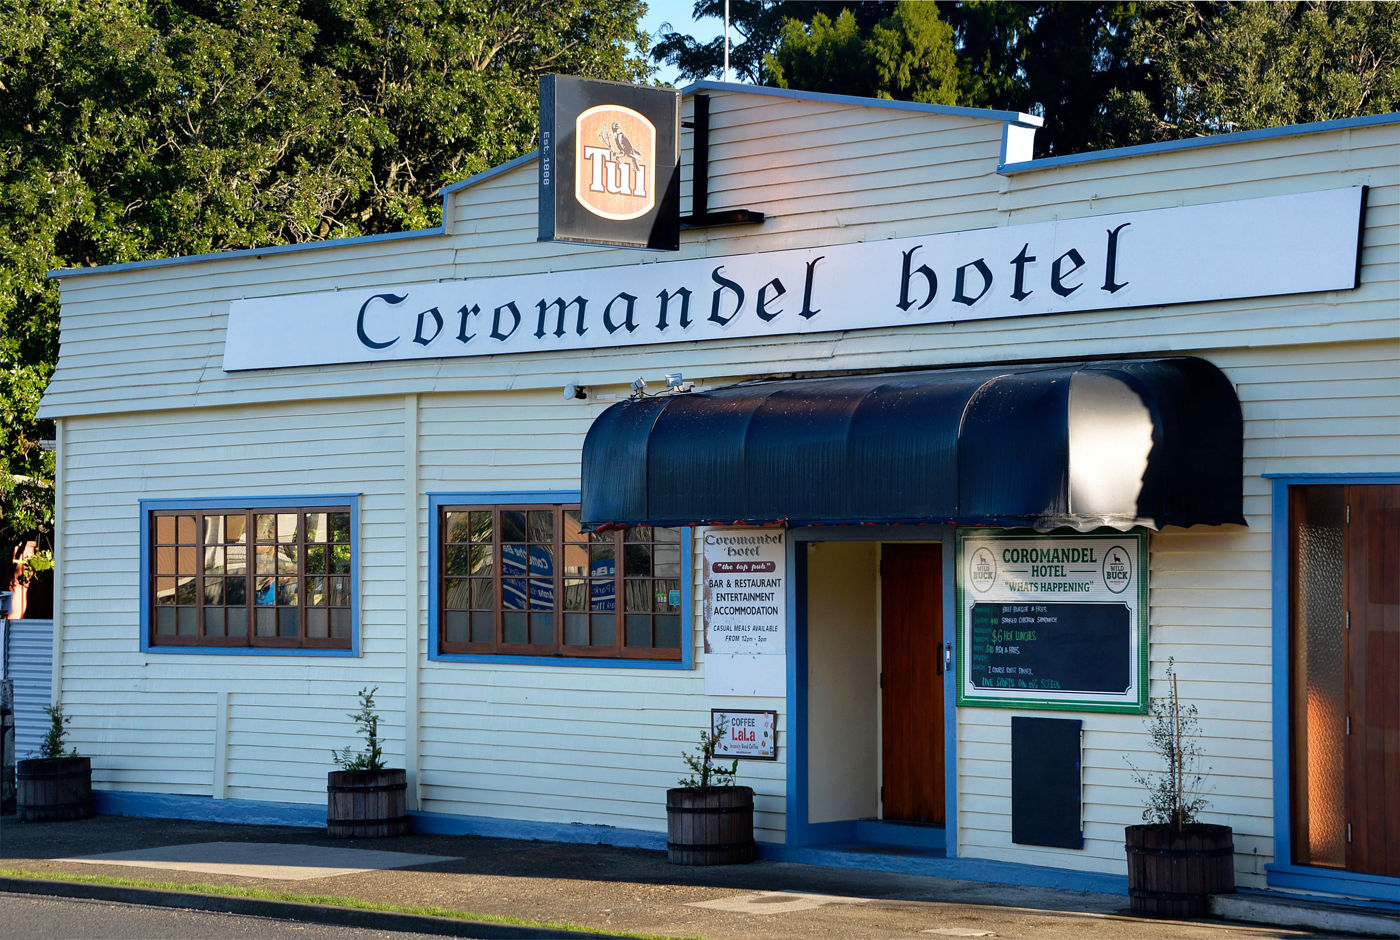
Coromandel Hotel
After getting back to the Hotel, we went for a drink in the Hotel and later had a meal there.
The Ablutions
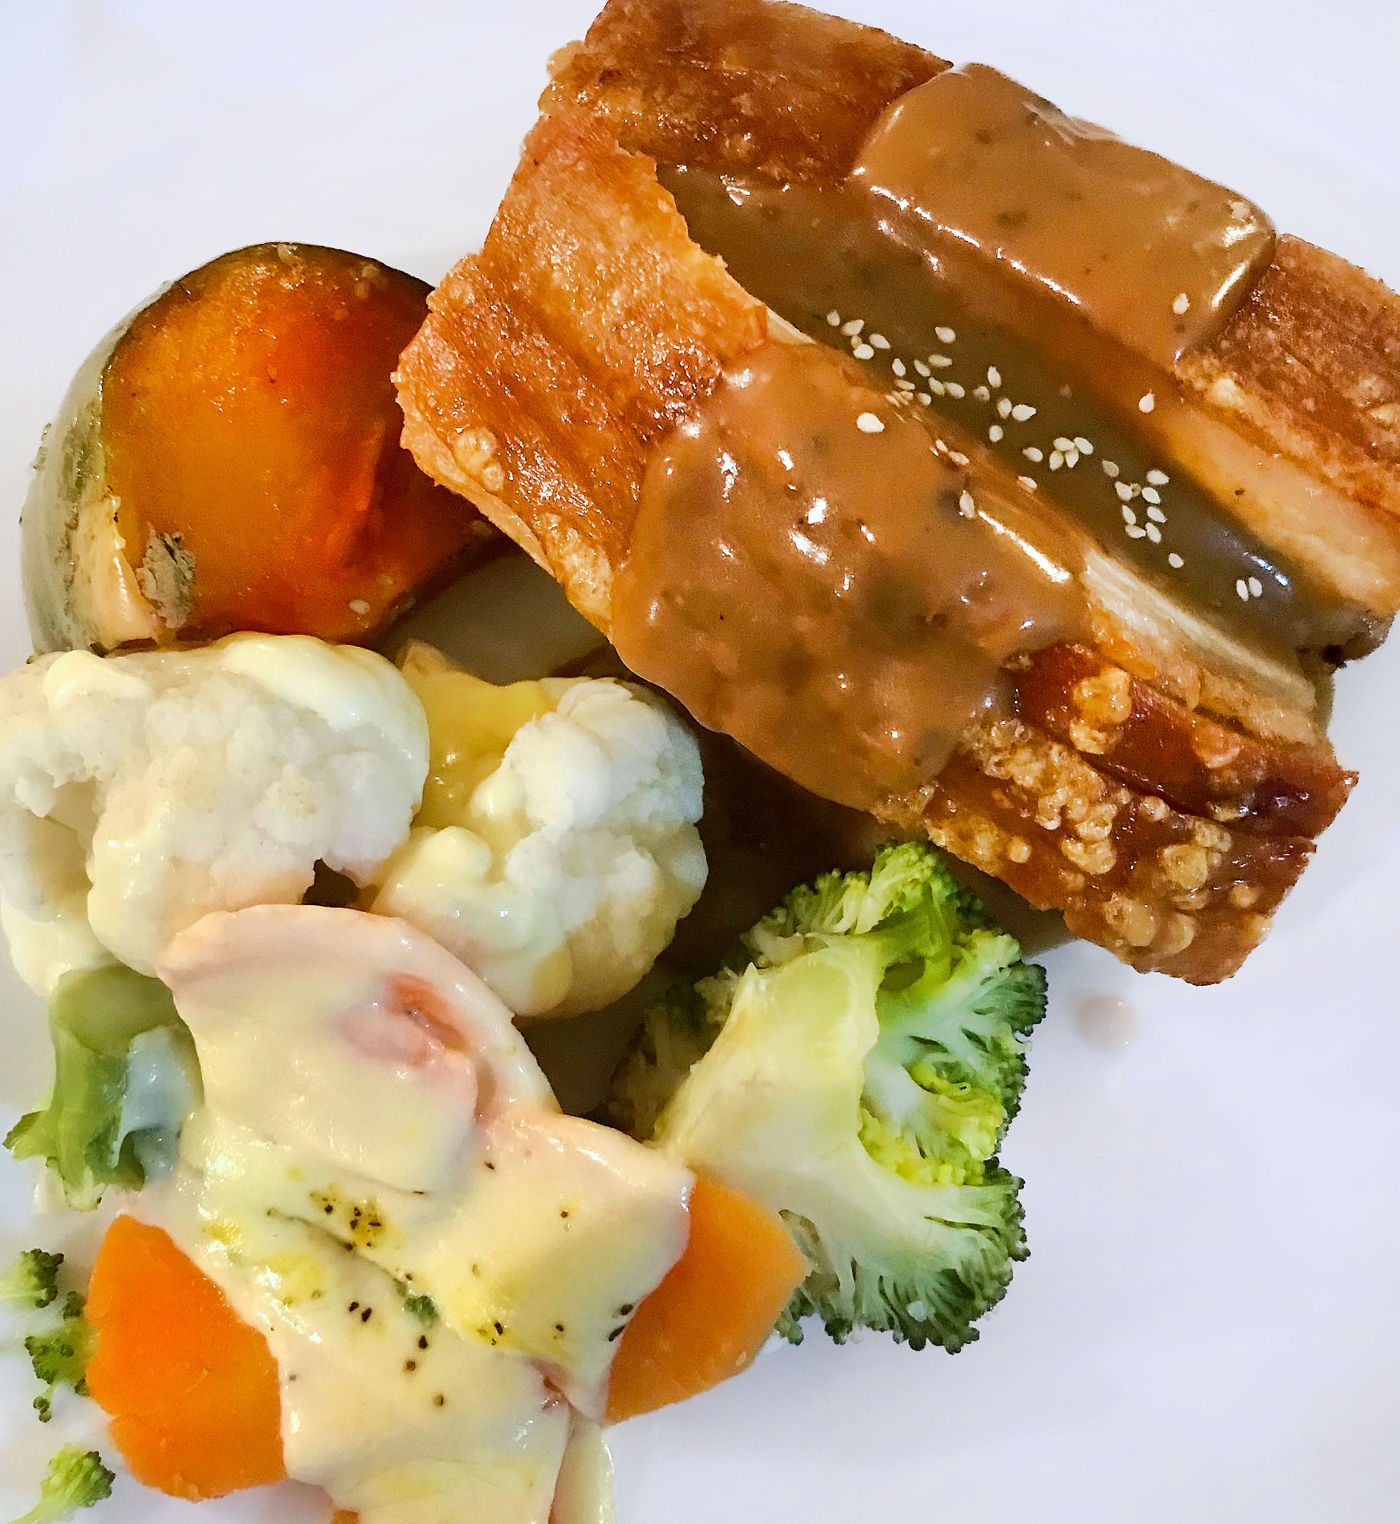
The food is something else.. We both had Pork Belly and it was amazing. I even sent a happy snap off my phone to a mate in Taupo and he agreed by long distance.
The Pork Belly Yummmm!
Great hospitality, the food is fantastic and its an easy walk to town.
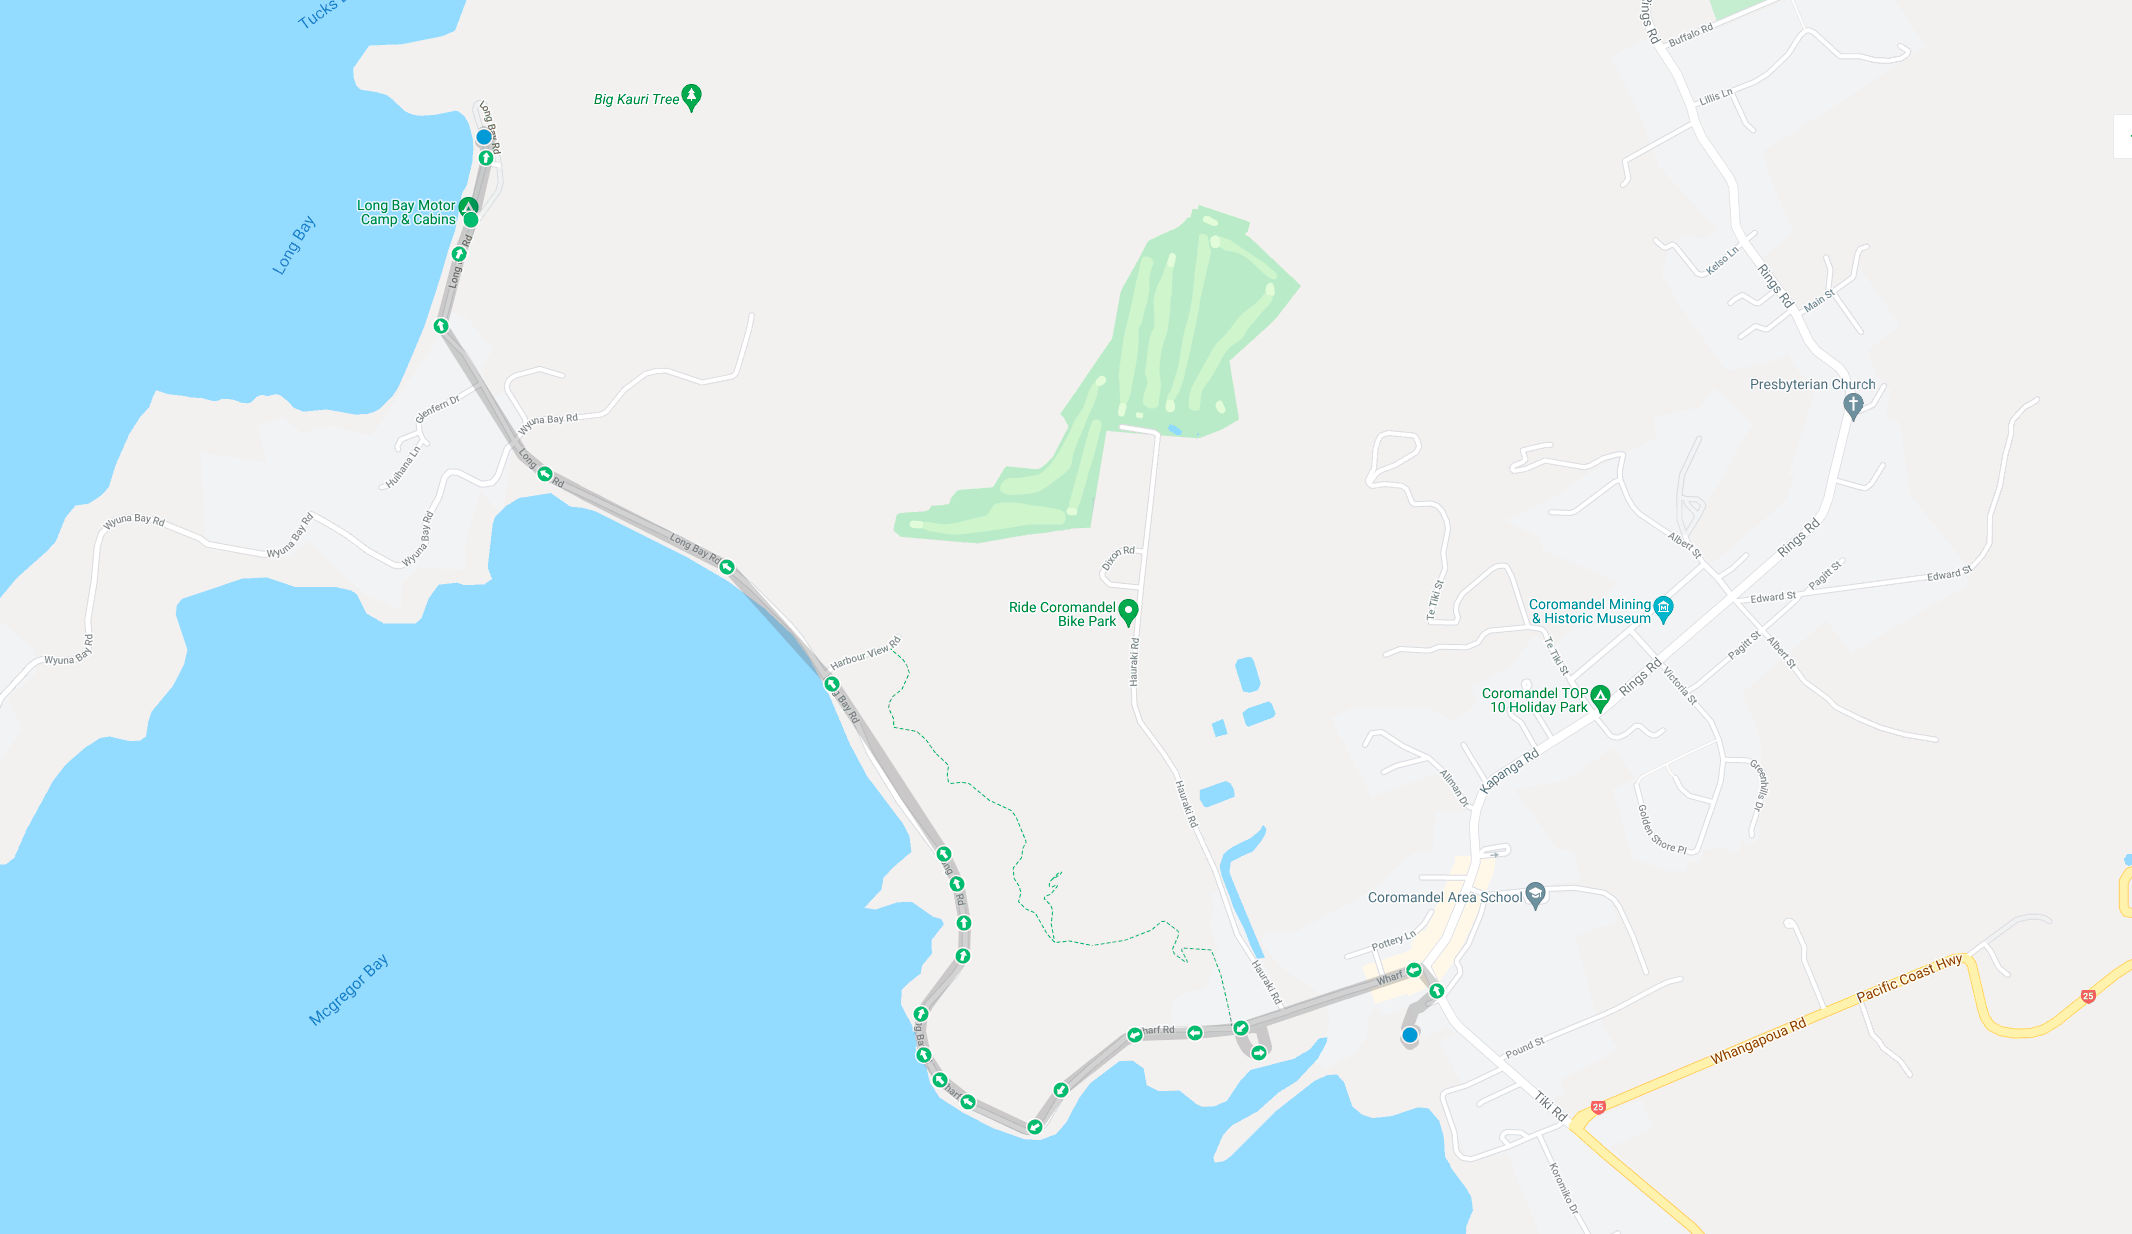
Rafe’s Tracker map to the Coromandel Hotel – Armada GPS
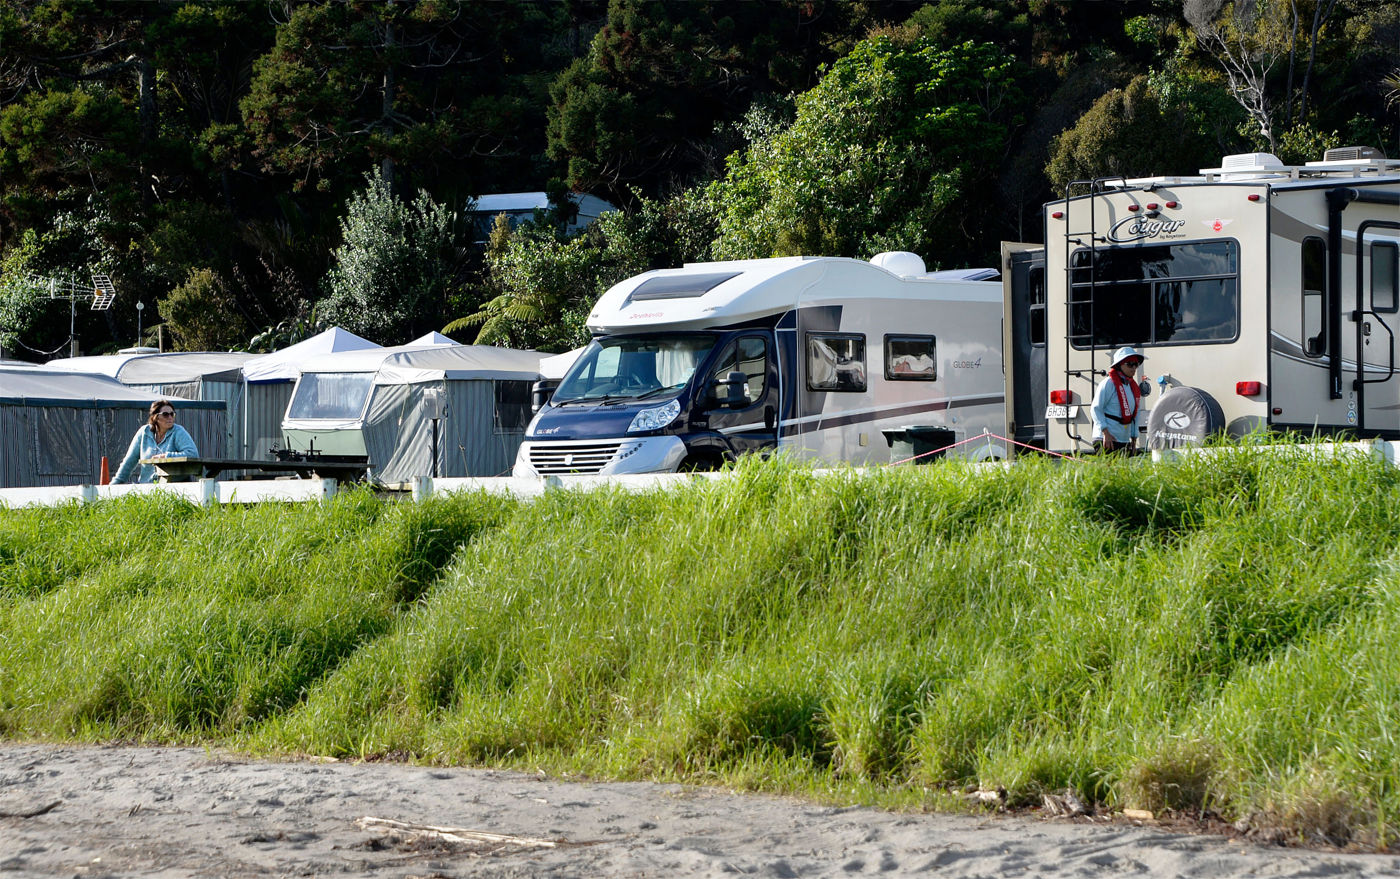
After checking in with Leanne, the camp manager, she advised us that as they had huge amounts of rain, they still had some sites we could use but most of it was roped off due to mud and slush. This is normally a magnificent part of Coromandel and to see it like this was a real shame for them… its only water and will dry out but with the Covid thing and everything else, they needed that like a hole in the head.
I was given the option of two waterfront dryish sites to park on and we easily got in without skidding but the mud was out there 🙂
Click on the Gallery below for a slideshow
At Long Bay
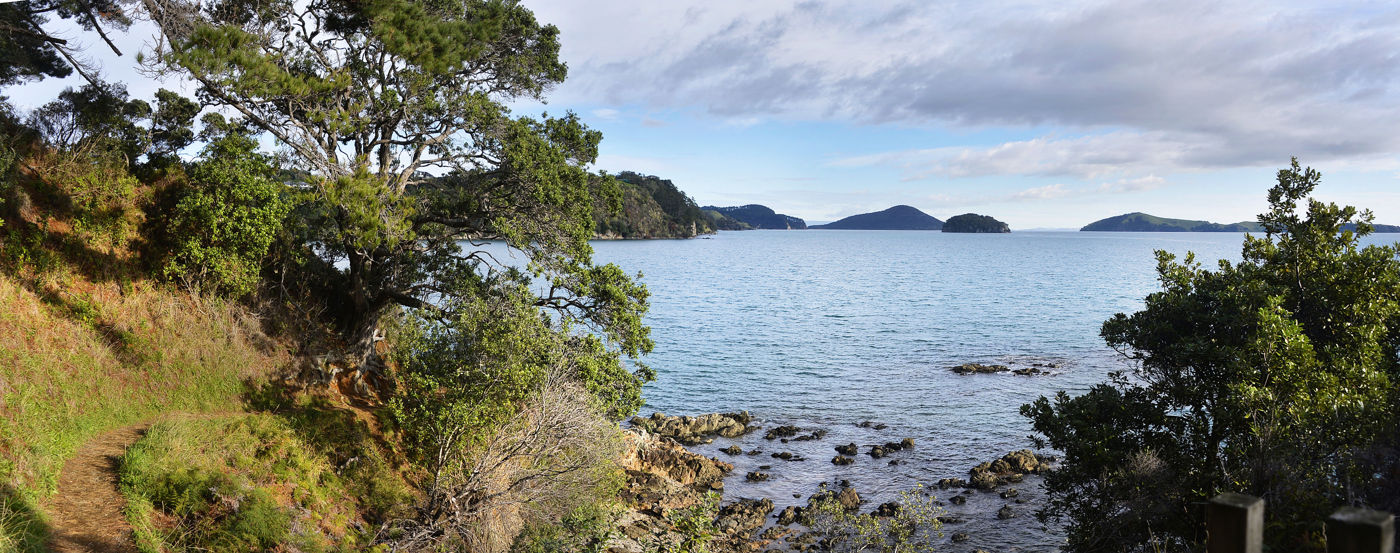
Tucks Bay
Tucks Bay from the headland
Once we’d plugged in and settled Rafe, we set off for a walk around the headland towards Tucks Bay. You can also camp around there as well. Its an easy 15 minute walk each way and is well worth doing. There is also the Kauri grove as well up behind the camp which is well worth checking out too but we didn’t get to do that this time.
The track back to Long Bay from Tucks Bay Tucks Bay
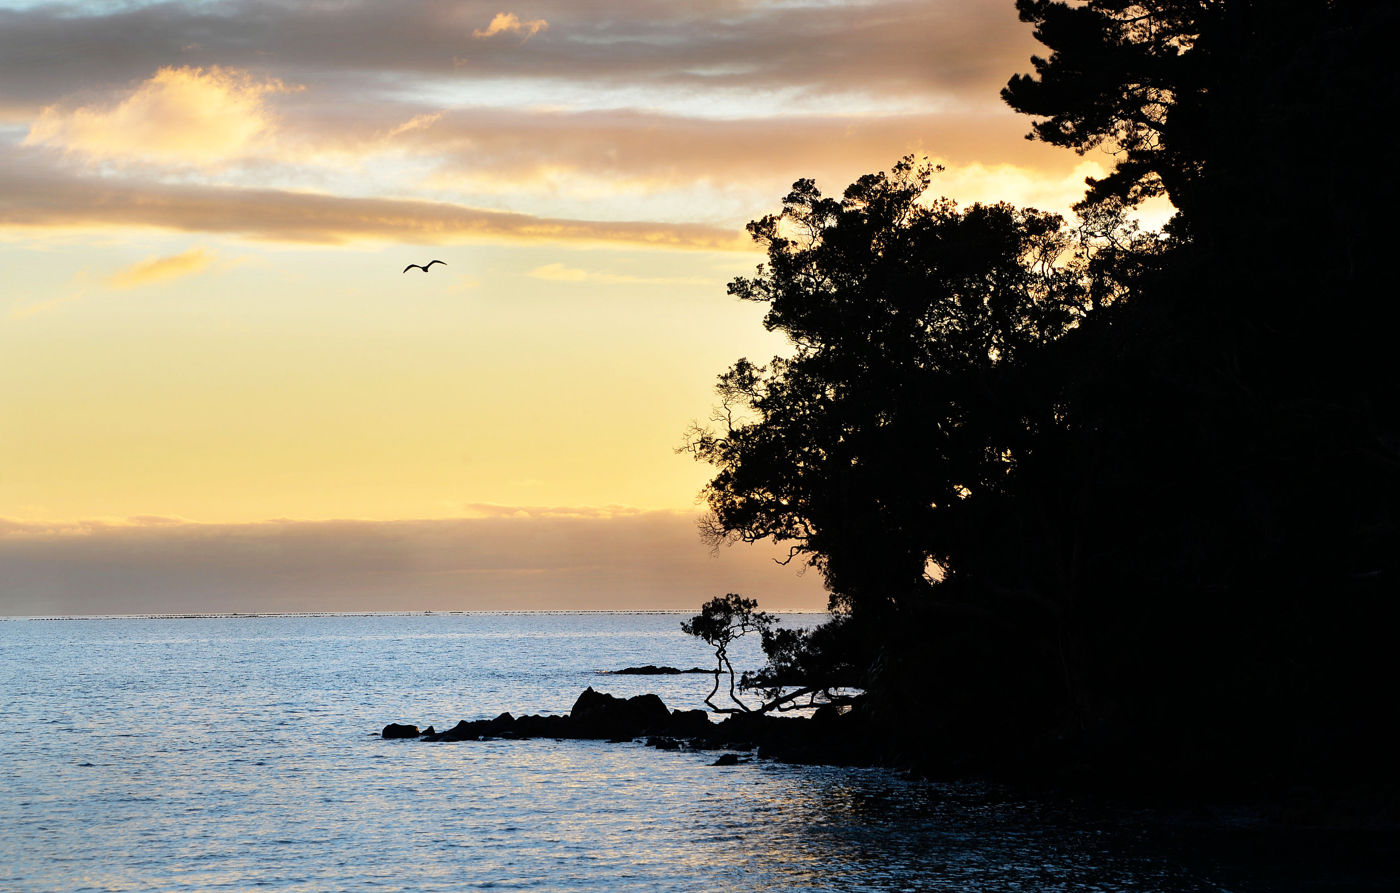
With the clouds blowing away later in the day, it was just amazing sitting on the side of the beach doing absolutely nothing but taking it all in.
Great sunset
A great destination with plenty to see and do… stick this one on your to do list.!
We’ve had a month or so of being housebound mostly due to Rafe’s Bumper project and also a full annual service. Getting it back meant we could escape !
Click on an Image to enlarge
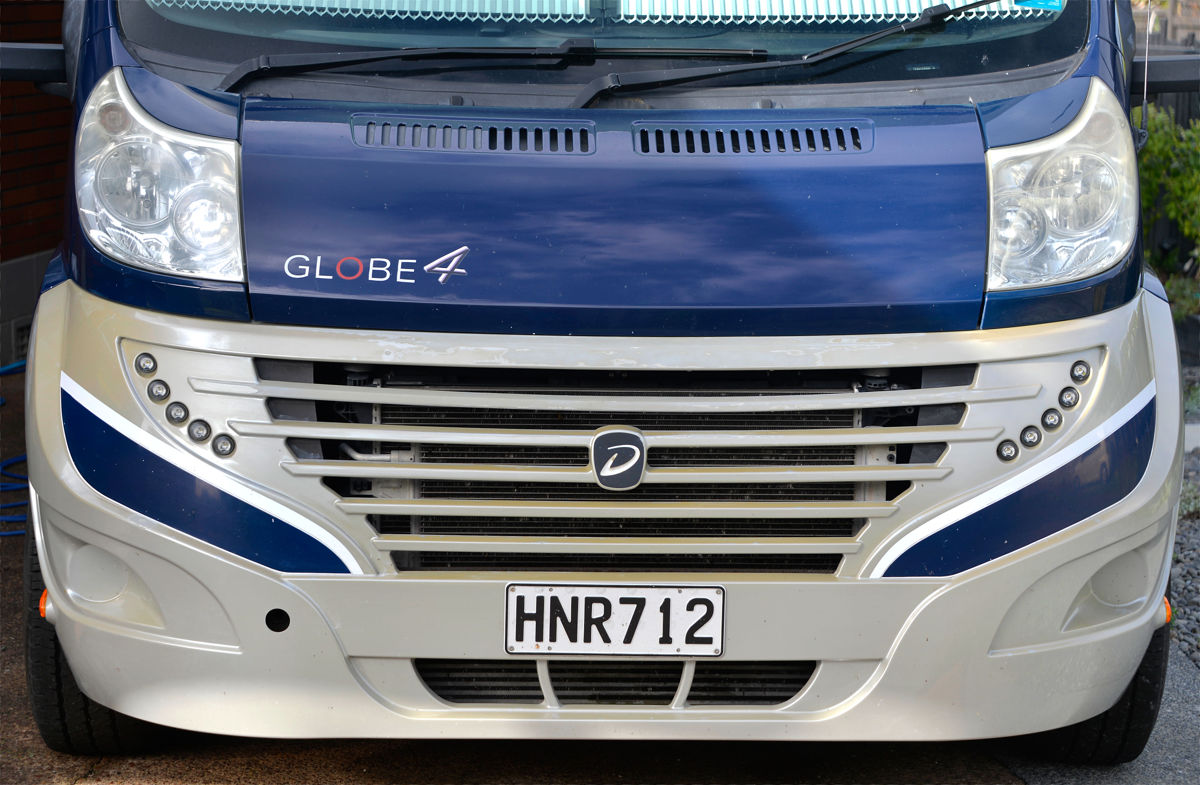
Rafe in the park with newly painted bumper!
Coromandel is somewhere we both thought would be great for a few days before Fiona had to return to work. We only had 4 days so we figured somewhere not too far and where we haven’t been for a while!
NZMCA park
The Thames Coromandel District Council are making some great improvements on the coast rd from Thames. Every time I come up here its different. This time they’ve widened the road north of Waiomu.. there are still plenty of narrow bits but I saw they’re dealing with some of those too.
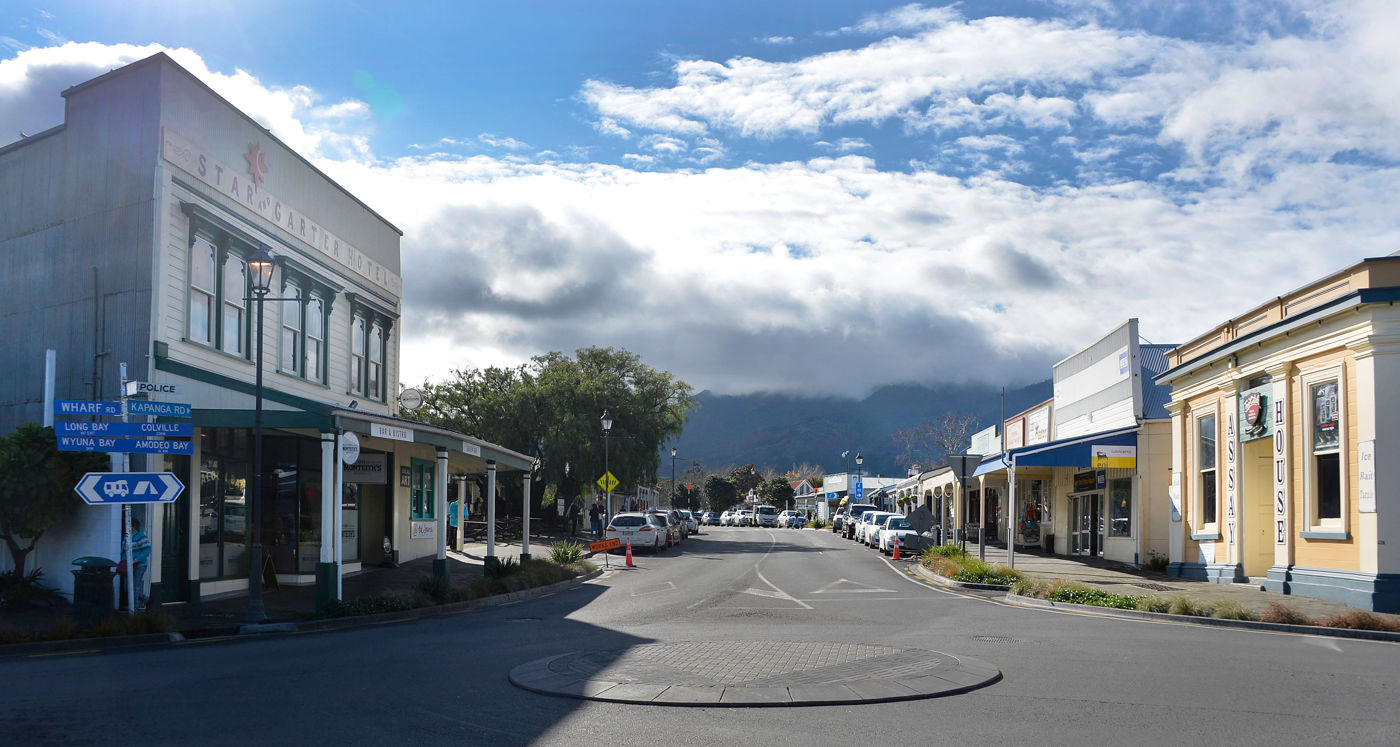
Star and Garter pub
We arrived in Coromandel early in the afternoon on a Sunday so many of the shops were shut. The important ones like the bars and one of our favorite ones, the Star and Garter was open and they had a special on Gourmet pizza’s $10.. that was us for a late lunch!
After a walk around the town, we returned back to Rafe in the NZMCA park.
Click on the Gallery below for a slideshow
Home of the first National Bank
Where i was introduced to my first Husband Waiting chair 🙂
Neat buildings
The local butcher shop
You never get sick of Coromandel, the charm of the shops, even though most were shut as it was a Sunday, there were people wandering around and all of them very friendly. It has a great atmosphere with all the old buildings and everyone seems happy to have a bit of a natter.
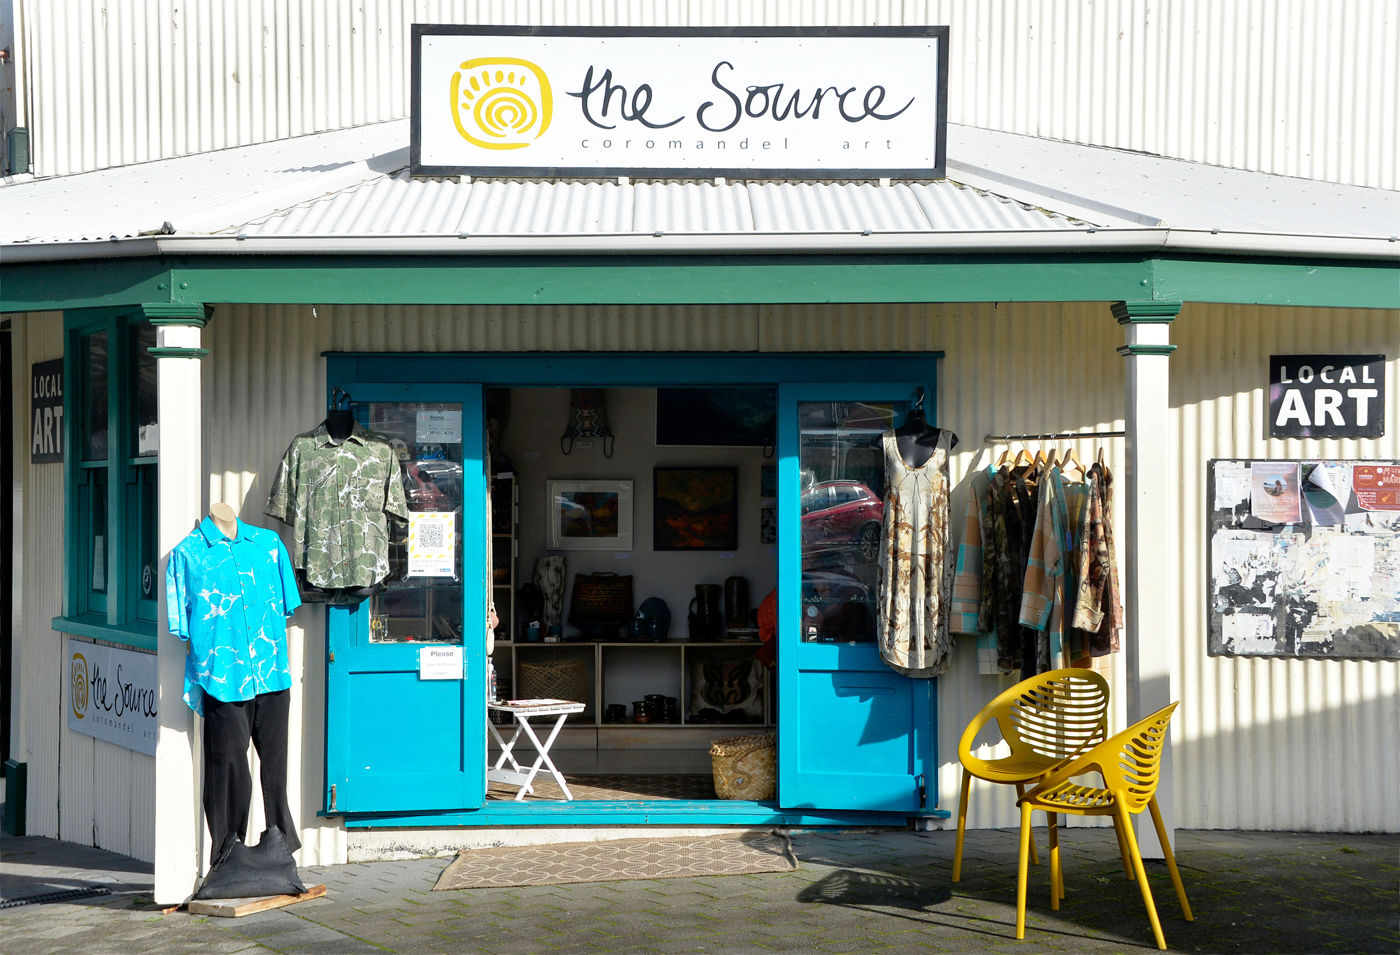
We called in to an Metal Art shop which backed on to the NZMCA park and bought an amazing sculpture of leaves made using recycled parts of copper hot water cylinders. Clever use of old materials.
Where i was introduced to my first Husband Waiting chair 🙂
Later, it time to go down to get Fish and Chips for tea and we headed back to Rafe for the night.
A great Day in Coromandel town, it never disappoints !
It seems at this time of the year, there is an endless demand on outgoing funds for the Motorhome.. Service, Insurance, COF and a rattle or two you’ve discovered that could be silenced.
This year, the big one was repainting the Bumper just to add to the list.
Click on any Image to enlarge
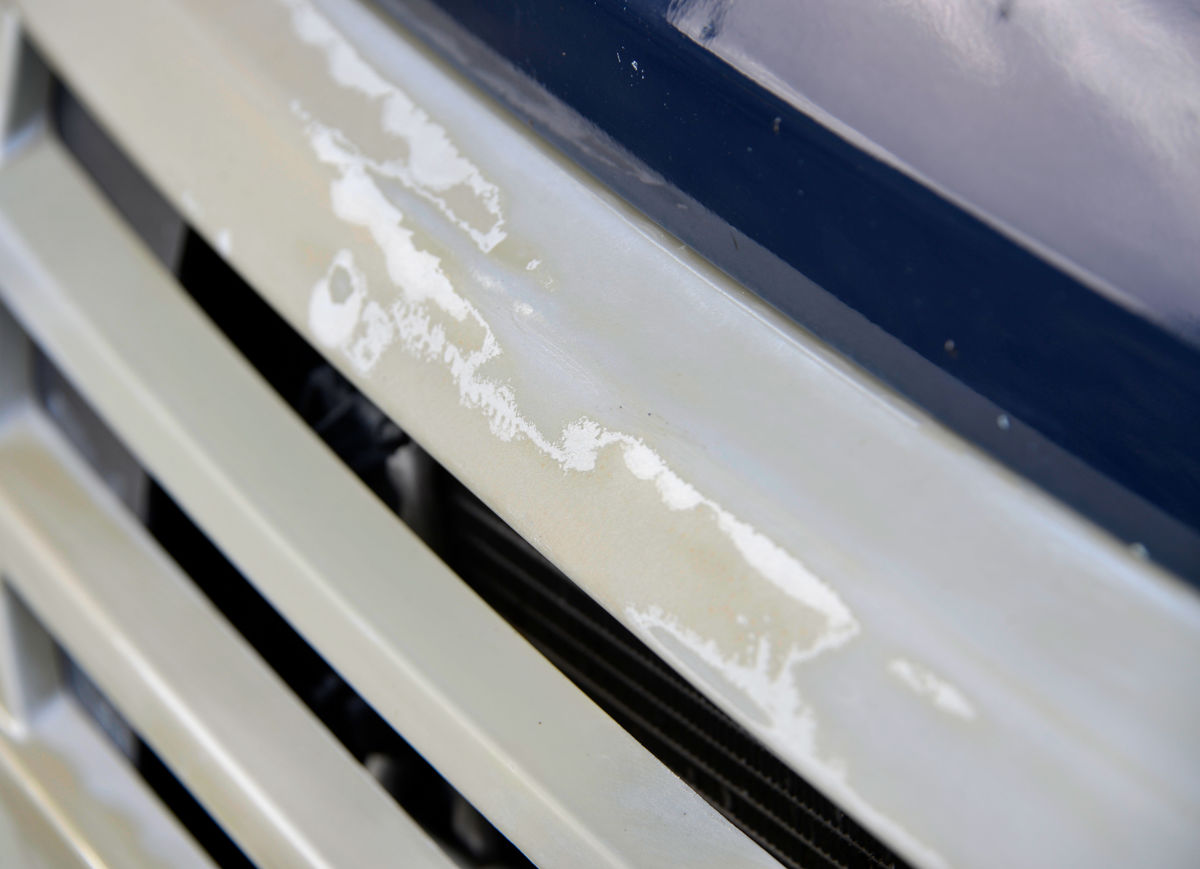
looks like a peely shoulder !
To be fair, a new vehicle where ever it is made should not have to have its bumper repainted after only 6 years so that grates a wee bit, but not being one to dwell on these things, it had to be fixed.
Before.. you can see the yellow tint in the lacquer from the sun.
The deterioration started about three years ago and when I raised it at the time with the dealers, I was told it came under the Fiat warranty which had by then expired. ….Hey Ho as they say.. Lets get on and get it fixed…!
It started with the whole bumper going a yellowy colour and then the paint peeled off in bits. I progressively sanded parts of it to blend the colour and make it look a bit better as it got worse.
About to be taken off
After talking to one of my favorite RV repairers Peter at RV repairs who is also a qualified spray painter, he advised that I should leave it as long as possible so as much of the peeling paint would fall off and remove the need for a massive sanding job!
.. It couldn’t wait any longer !!
Click on the Gallery below for a Slideshow
coming off
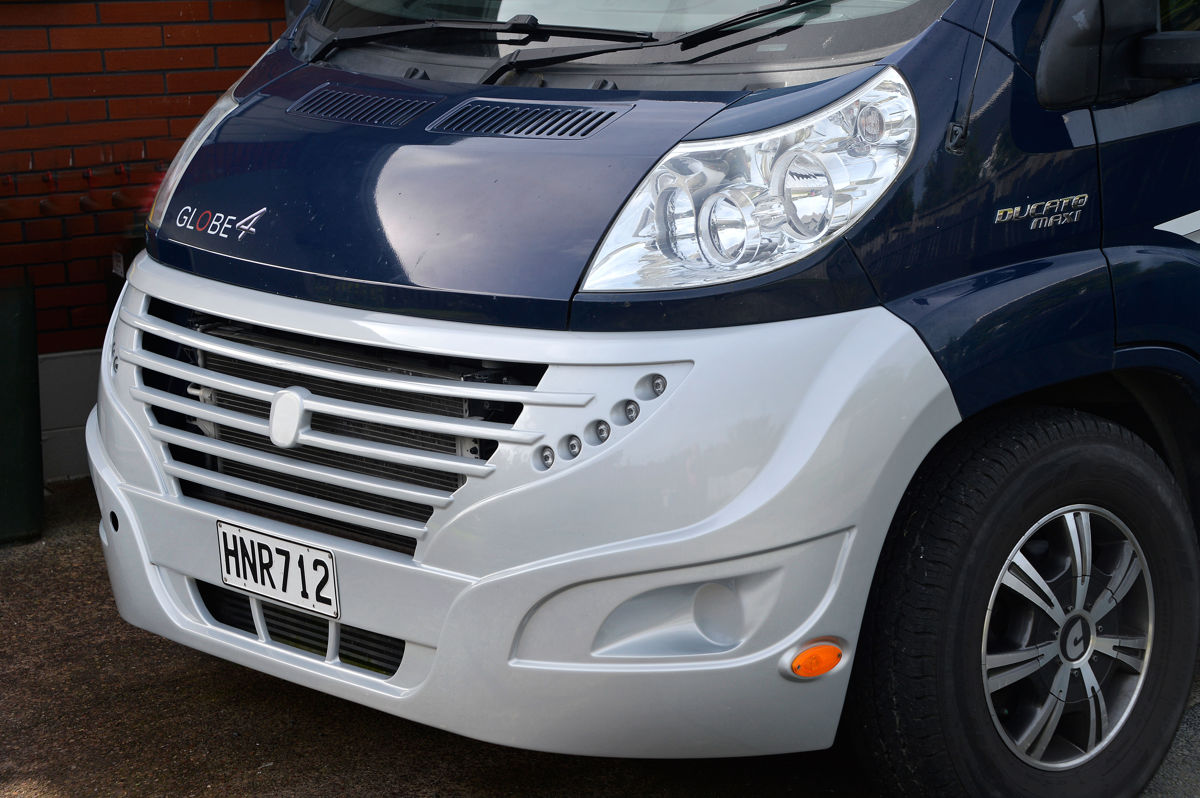
Number plate being attached so I could drive home.
Ready for sanding
Ready for preparation
How to look good naked !
Being sanded – pic by Nathan
Sanding – pic by Nathan
In Devonport where I live, there is a great family run business which many of my mates at school have worked at over the years, run by Dennis and Nathan Hale, called Fleet St Panel beaters. They have a great reputation for doing things properly and are well known around the community as being really nice people.
In getting the newly painted Bumper. reattached
Where they are next to the supermarket in Devonport is pretty tight for big vehicles so it was a case of getting the bumper taken off and taking Rafe back home until the painting was finished.
All sanded and primed.
The bad news came on day 1 when after taking it off, we found that the bumper was actually fiberglass, not plastic. This meant it couldn’t be dipped to strip the paint off and they couldn’t bake the new paint on. It also needed to be sanded thoroughly before applying a special primer for the fiberglass. The good news part of this is that fiberglass is really strong.
Sanded and ready for some colour
Nathan was telling me it they budget on a couple of hours to prepare a plastic bumper. This one needed a day and a half of sanding as a lot of it was by hand. .. I could see my budget being blown sky-high and Fiona giving me a stern talking to 😐
All finished and waiting for Rafe – pic by Nathan
Unfortunately, they had a couple of staff off sick and with the extra preparation, the 4 day job turned into two weeks but the outcome was well worth the wait. The finish was just sensational.
Although I was given the German paint codes, Kris the painter used a fancy machine that could read the colour off the side of the van and match it wirelessly to paints in NZ that can deal with our UV.
All done .. – WOW – pic by Nathan
An amazing colour match and friends who have known the van from new and know a bit about paint reckon it looks better than it was at the beginning.. I agree!!
Yes, it cost a bit more but I’m not complaining with such a great paint job.
Looking really good.. also with the polished headlights.
I’ve ordered a new logo sticker from Dethleffs and have my friendly local signwriter Tom putting the blue and white decals on over the next few weeks.
Fiona & Chris, two empty nesters put their dreams of doing something different into reality… Now back in a house, they were living in their Motorhome, come along for the ride.


 ..
..


You must be logged in to post a comment.