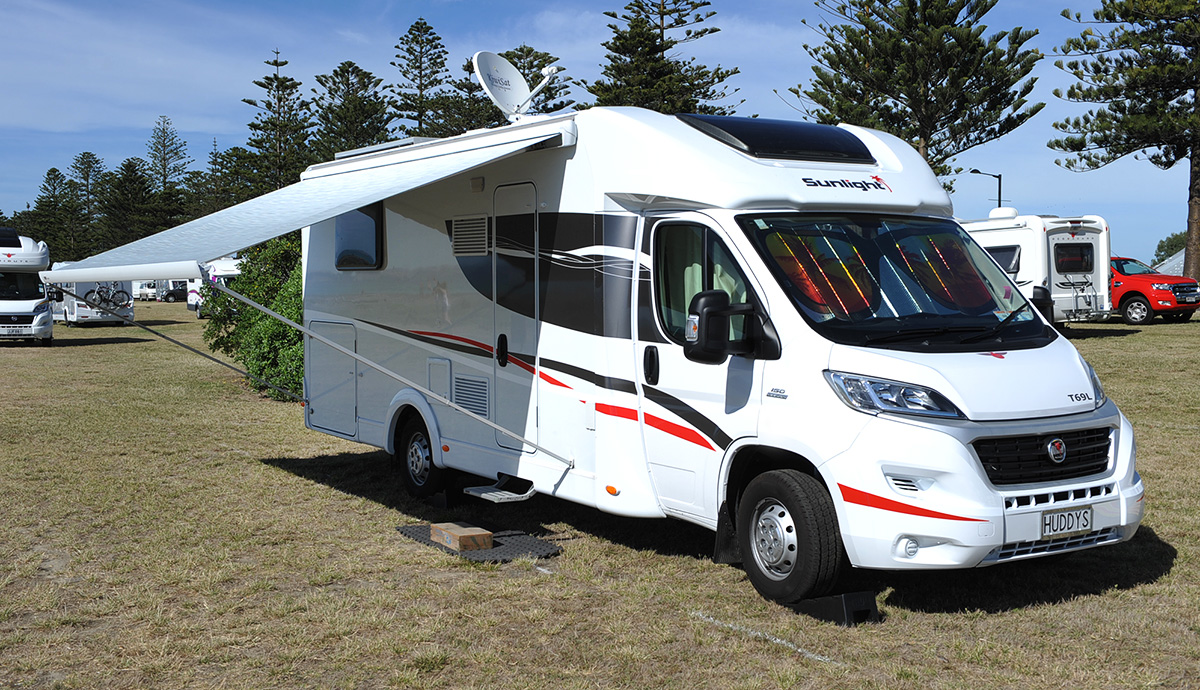
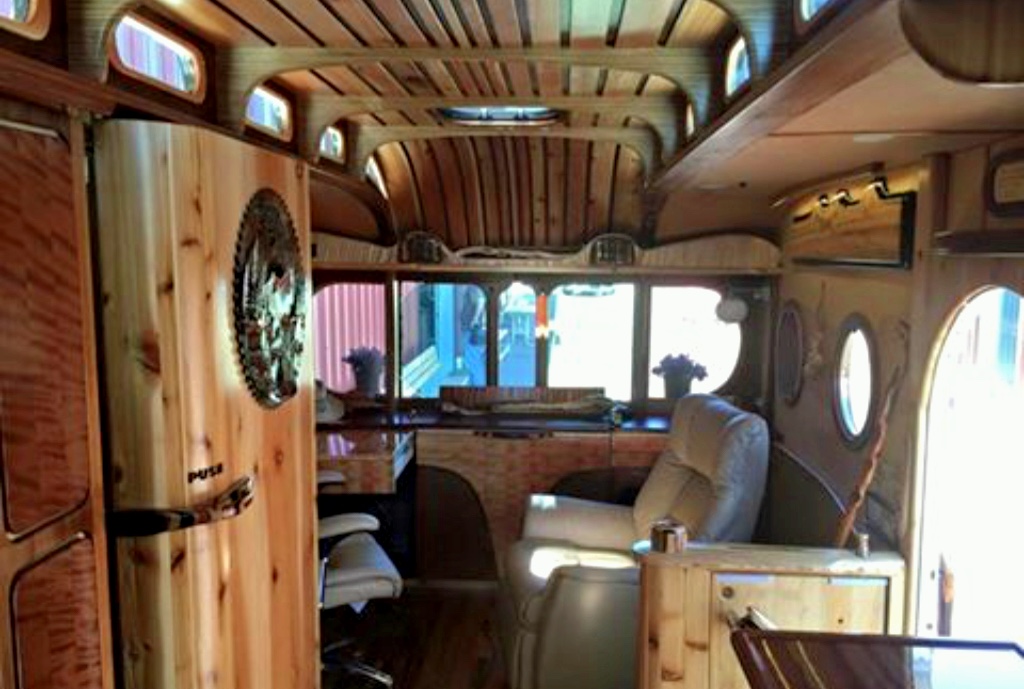
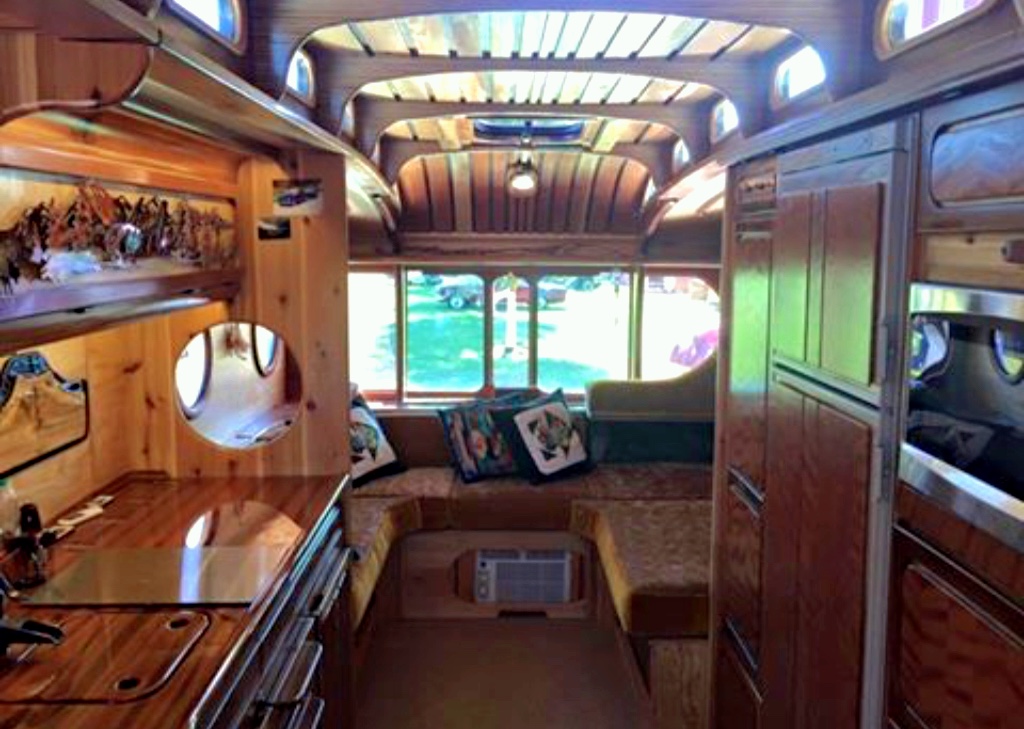
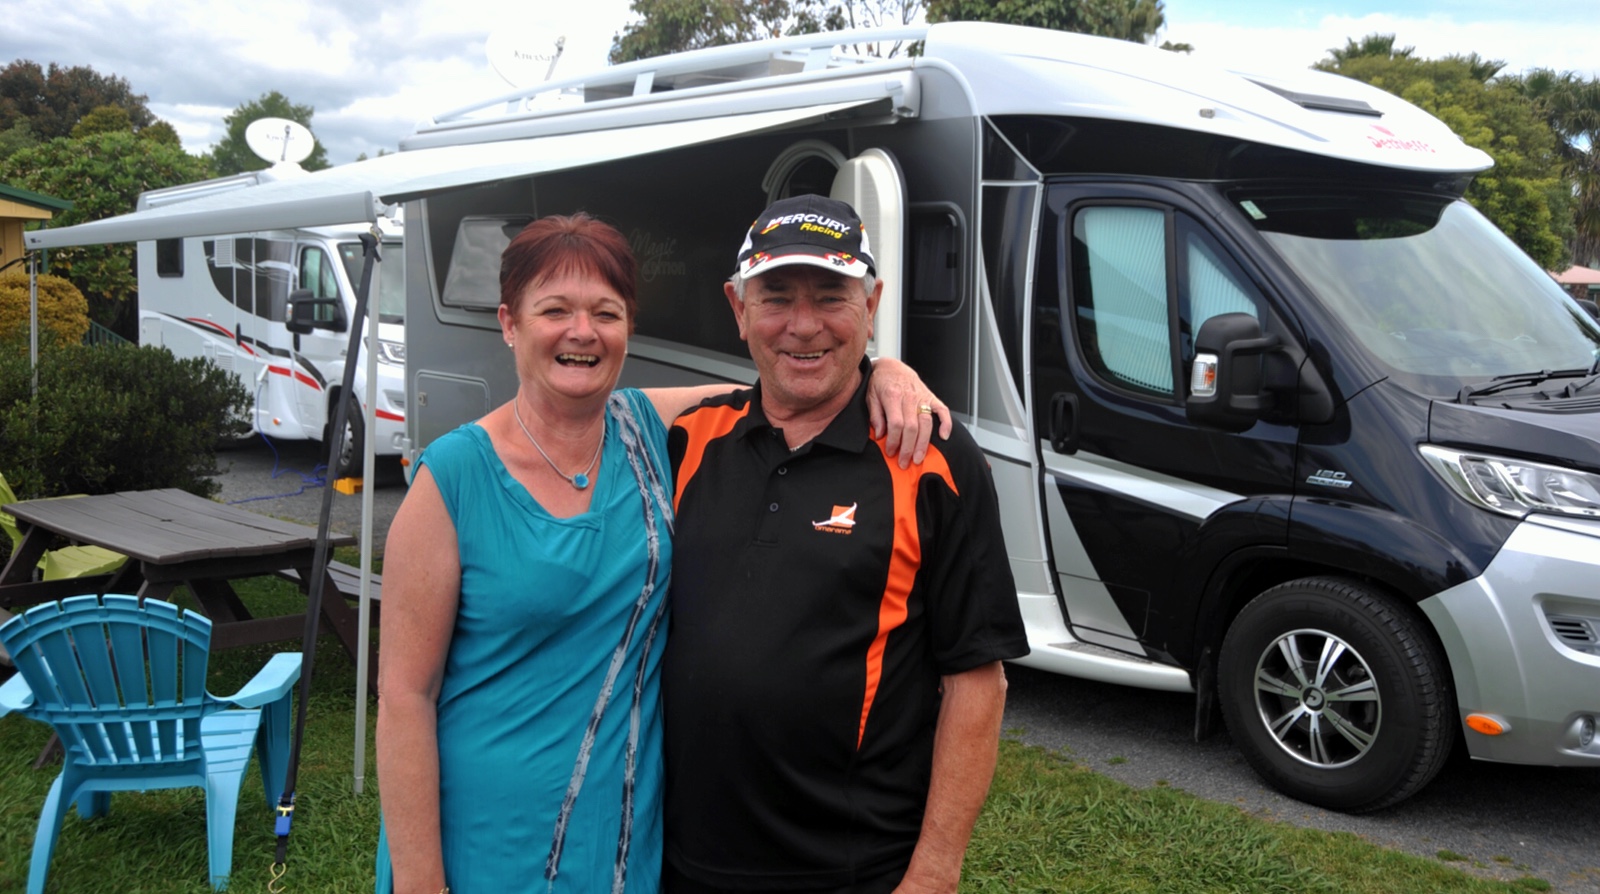
Mike and Wendy are the proud owners of a French Rapido A class Motorhome which they bought nearly a year ago.
He discovered after he received it that his fridge wasn’t doing what he wanted it to and being the clever person that he is, and a Plumber and Gasfitter with more than 40 years experience, he decided to do something about it.
Some of you will remember his earlier post but this greatly expands on what he did earlier.
In Mike’s words and pictures .. Go Mike:

RAPIDO OTT RV FRIDGE UPGRADE
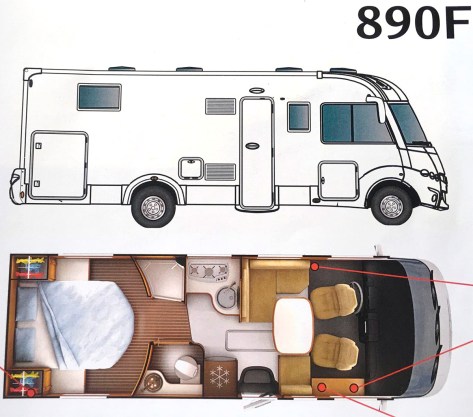
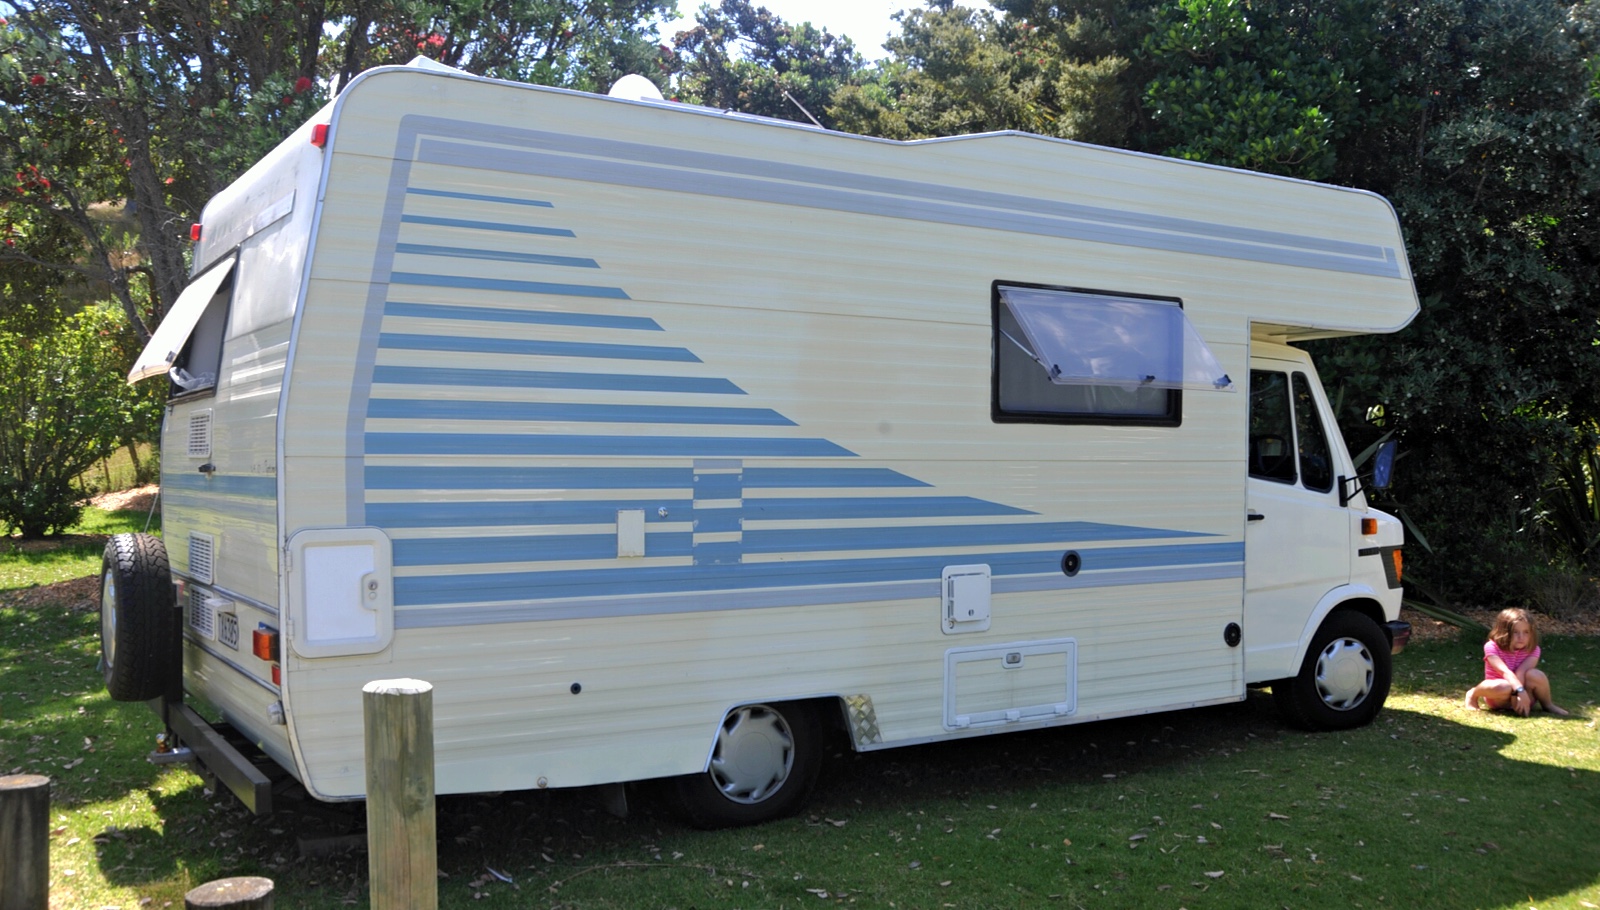
French Import: Rapido
Model: 890F
Year of manufacture: 2014
Length: 7.39m
Width: 2.35m
Height: 2.82m
Fridge make: Dometic
Fridge model: RMD 8505
Fridge climate classification: SN
Type of Gas: LPG
 My name is Michael Brick. We were luckily enough to purchase a Rapido A class motorhome which we really love.
Over the past year there have been a few upgrades mainly to accommodate our needs. Firstly I installed a new LPG regulator which was part of certification requirements and a pipe system upgrade to accommodate the two gas bayonets at the rear of the motorhome, then the outside shower and finally the OTT FRIDGE UPGRADE.
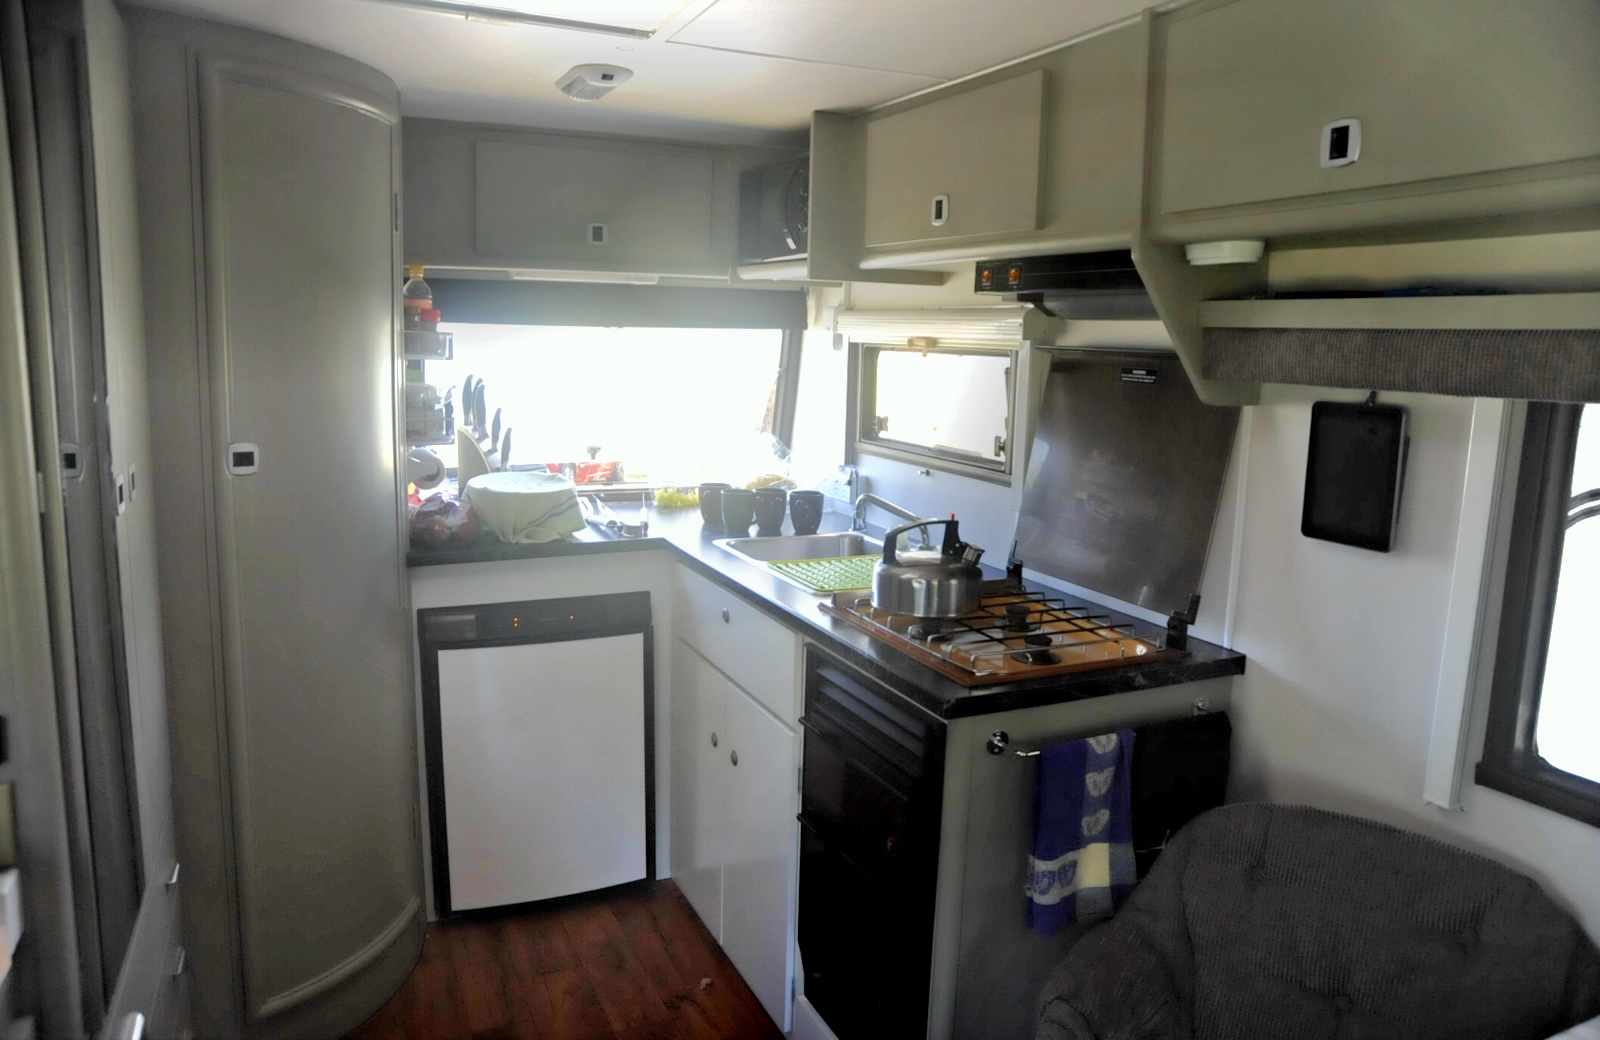
The original fridge installation carried out by Rapido was to good manufactures specifications, however the fridge’s cooling ability was not meeting my specifications.
At this stage I would like to point out I am not a fridge technician, however I have 45 years experience as a Certifying Plumber and Gasfitter.
THE OTT FRIDGE:
Unfortunately the data plate revealed an: “SN climate classification” SN = Subnormal, suitable for use in ambient temperatures of +10°C to +32°C suited for European countries.
Ouch!!! I was told, better to have had the ST climate classification.
ST = Subtropical, suitable for use in ambient temperatures of +16°C to +38°C suitable for NZ climatic conditions.
To find a solution I wrote to Dometic NZ with the following questions and was pretty chuffed to get a very comprehensive reply.
Q. What are the differences between the “SN” and the “ST” climate classification fridges.
A. “T” rated fridges have something called VIP vacuum insulation panels, high value insulation, better insulation in the door et.
If you purchased a “T rated” fridge and put it in the existing cavity it would not go any better. The main issue is the venting. If you take the top vent out and can see the condenser fins it will not work. The bottom of the top vent should be above the top of the fins and a deflector plate from the top/back of the fridge to the inside/top of the vent. While this may seem a subtle difference it makes all the difference.
MY INSTALLATION.
THE COOLING TOWER
Proper baffling of the upper portion of the cabinet is a must to prevent eddies of air from hindering the hot air from escaping.
A lack of airflow across the condenser fins may require additional fans to help circulate and exhaust the hot air from the cooling compartment.
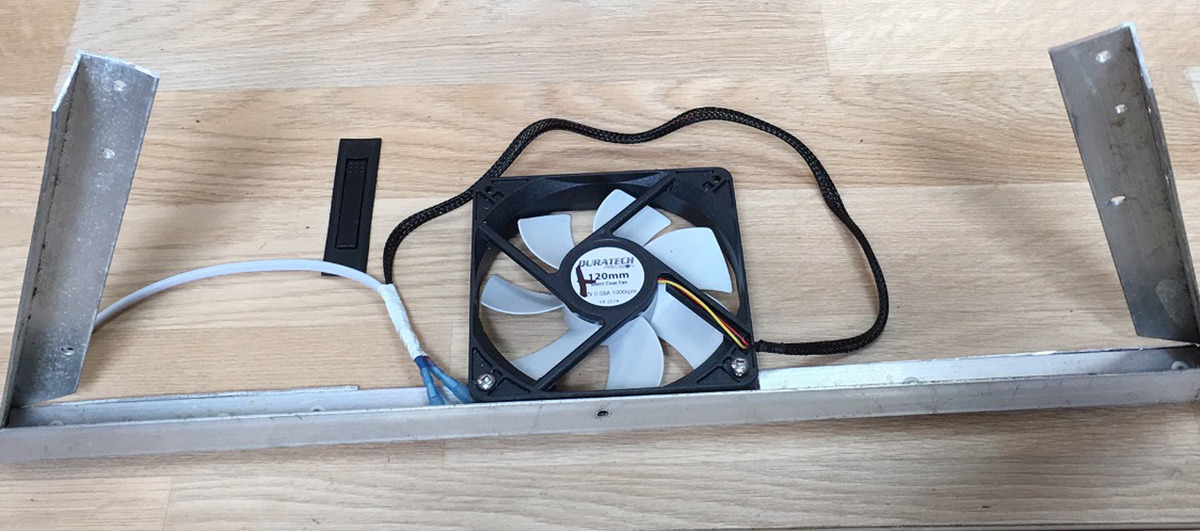
 1). FAN BRACKET:
Through the LS300 vent aperture I lowered a 25x25mm aluminum angled bracket to 40mm below the condenser fins, then fixed to the side walls. The fan was then lowered and fitted to the alloy bracket (long screw driver needed).
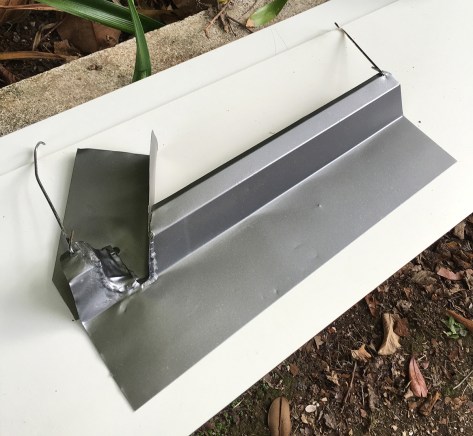 2). THE BAFFLE: This pre made baffle was lowered through the LS300 vent aperture. The long flat portion slides between the alloy bracket and the outside wall of the motorhome. The top of the baffle is set 6mm below the bottom of the condenser fins.
 3). THE FLUE: Spills temperatures of over 200 degrees into the cooling tower next to the cooling fins of the condenser. To stop this heat spilling around the fins I created a division in the baffle then fitted a curved shield around the chimney/flue pipe to guide hot gases up towards the vent aperture.
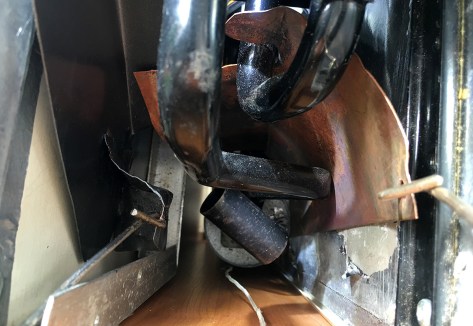
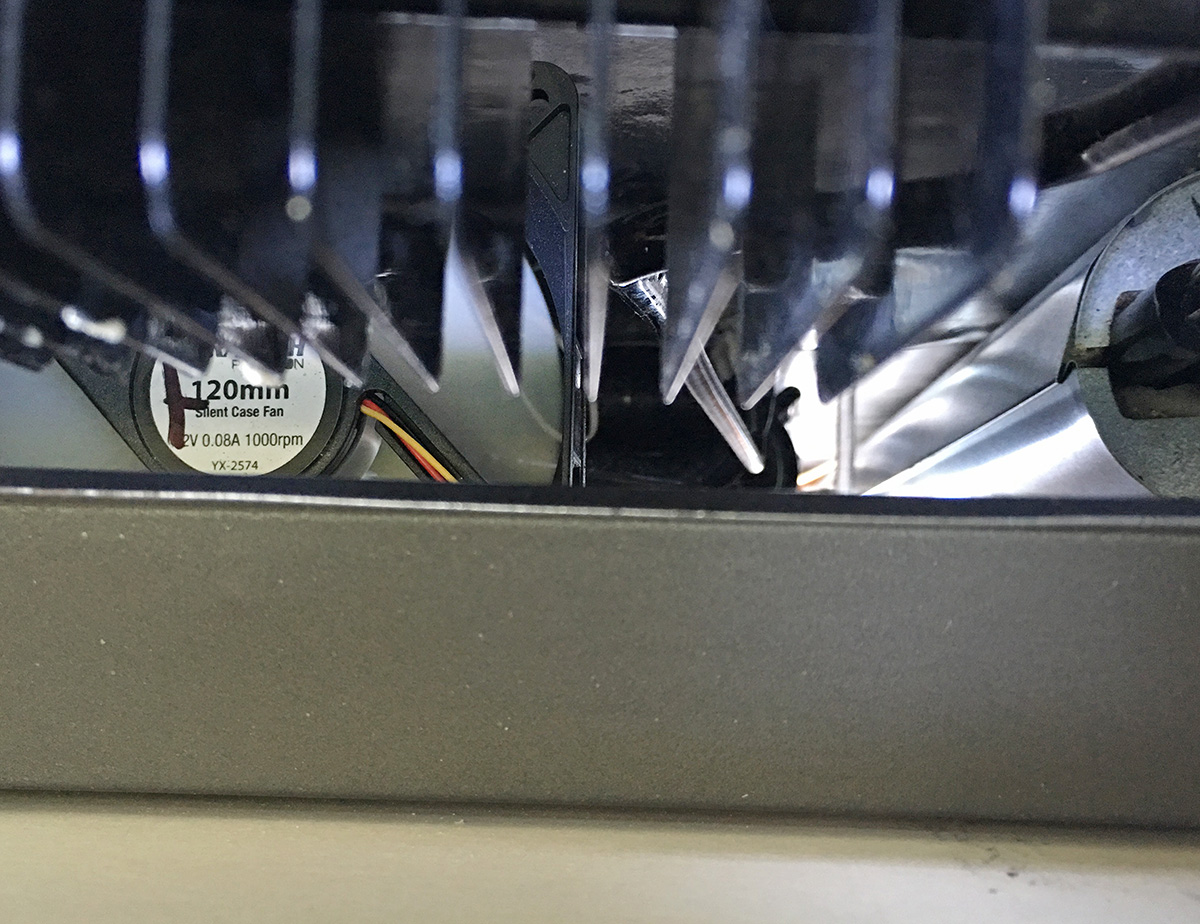
 This photo shows the position of the baffle. The top edge is placed 10mm below the cooling fins. The cold air travelling up the tower is diverted onto the cooling fins.
 This photo shows how the bottom of the baffle interlocks with the fan bracket. The baffle can be raised or lowered to, to set the correct distance from the condenser fins.
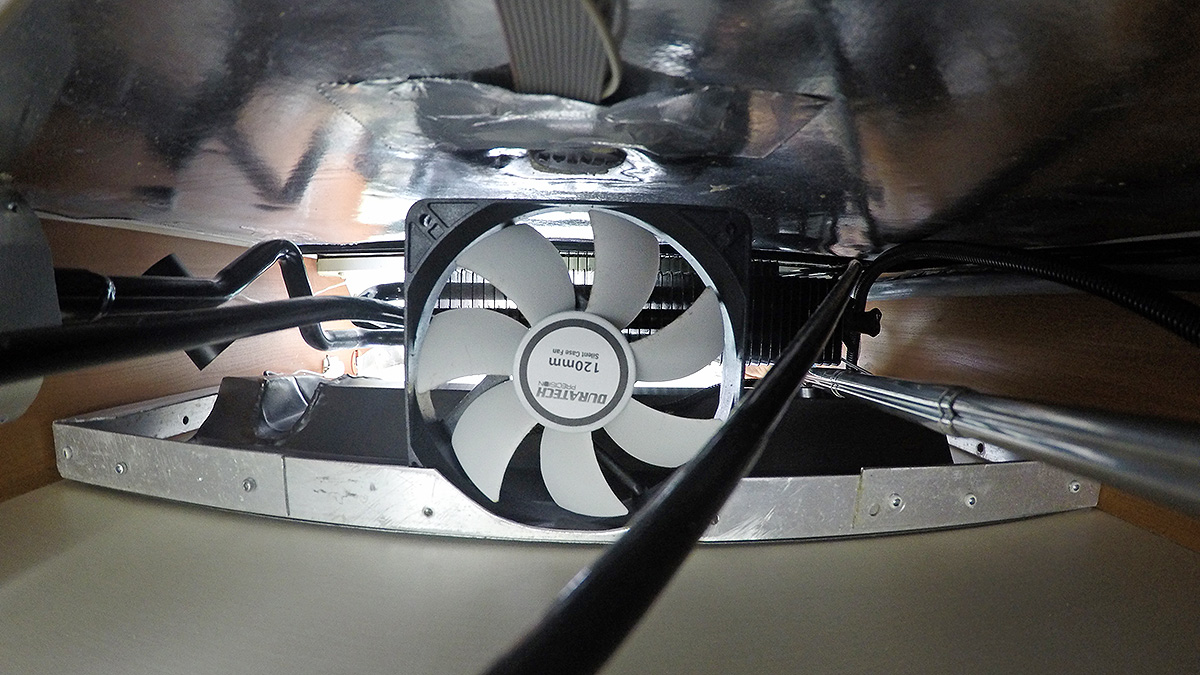
4). BOTTOM FAN: this is placed at the bottom of the cooling tower. Controlled by a 70 degree temperature thermostat (normally open) and a switch wired into the fans power supply so that I have control over when the fan is on.
Duratech 120mm: YX-2584
Air flow: 64.3 (CFM)
Current: 0.22A
Fan Speed: 1500 rpm
Noise: 25dBA
Burner Pressure: 2.75kPa
 5). TOP FAN: This is placed under the cooling fins of the condenser. Controlled by a 50degree temperature thermostat (normally open) and a switch wired into the fans power supply so that I have control over when the fan is on.
Duratech 120mm: YX-2584
Air flow: 64.3 (CFM)
Current: 0.22A
Fan Speed: 1500 rpm
Noise: 25dBA
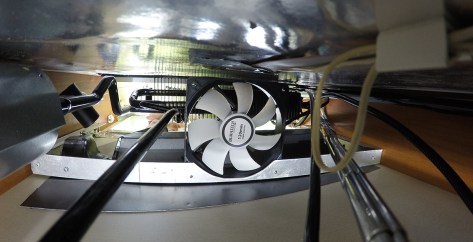 6). FRIDGE FAN: This is a double fan assembly fixed to the cooling fins by an alligator clip.
These fans are controlled by a 100 degree temperature thermostat (normally shut) and a switch wired into the fans power supply so that I have control over when the fan is on. Wires for the fans run through the hole provided for the thermistor cable. To gain access to this hole, the cooling fins have to be removed.
Air flow: 14.7 (CFM)
Current: 0.18
7). FRIDGE FAN: This is a single fan fixed to the bottom of the 2nd shelf right hand side of the fridge. Testing in many spots found this to be the best position.
Controlled by a 100 degree temperature thermostat (normally shut) and a switch wired into the fans power supply so that I have control over when the fan is on.
Duratech 90mm: YX-2572
Air flow: 31.32 (CFM)
Current: 0.13A
Fan Speed: 1500 rpm
Noise level: 20dBA
 8). TEMPERATURE THERMOSTATS:
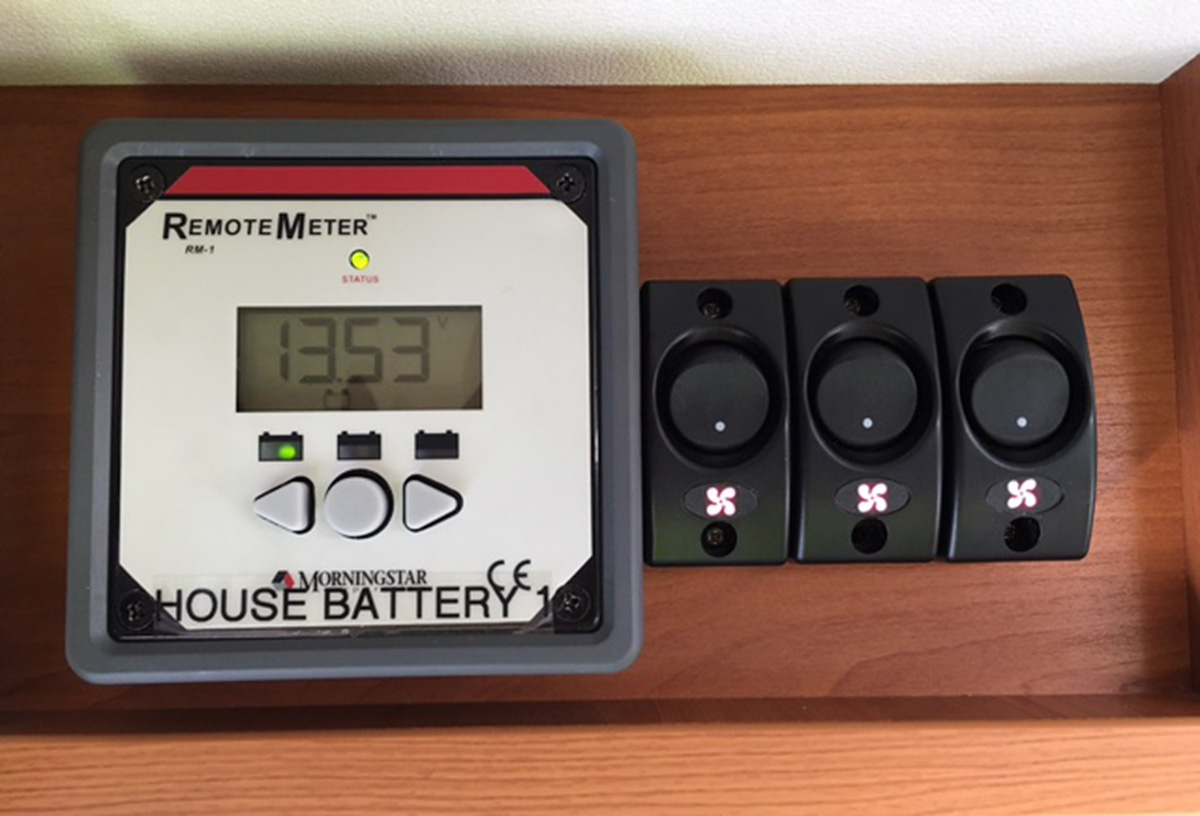
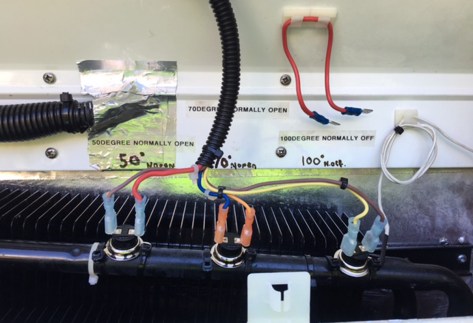 9). FAN SWITCHES: there is full control of all fans.
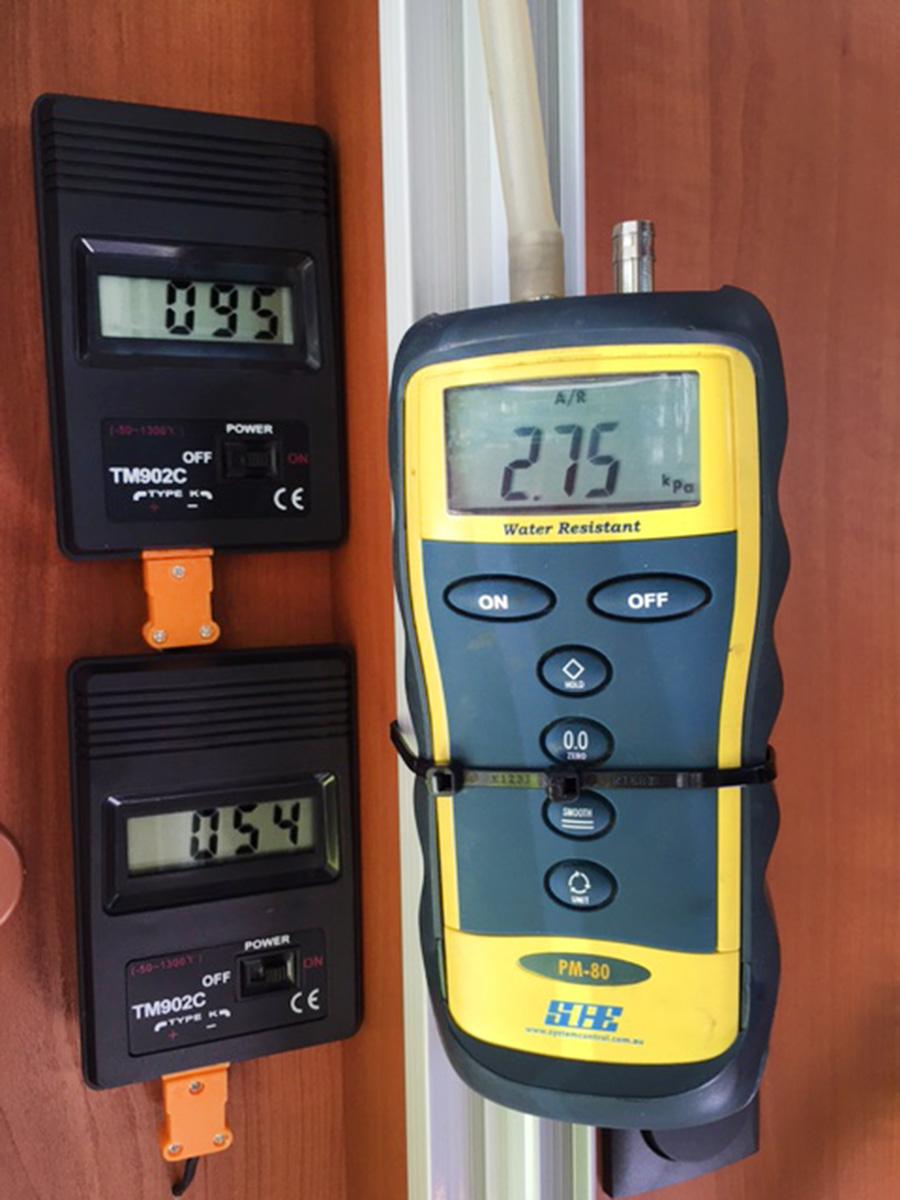
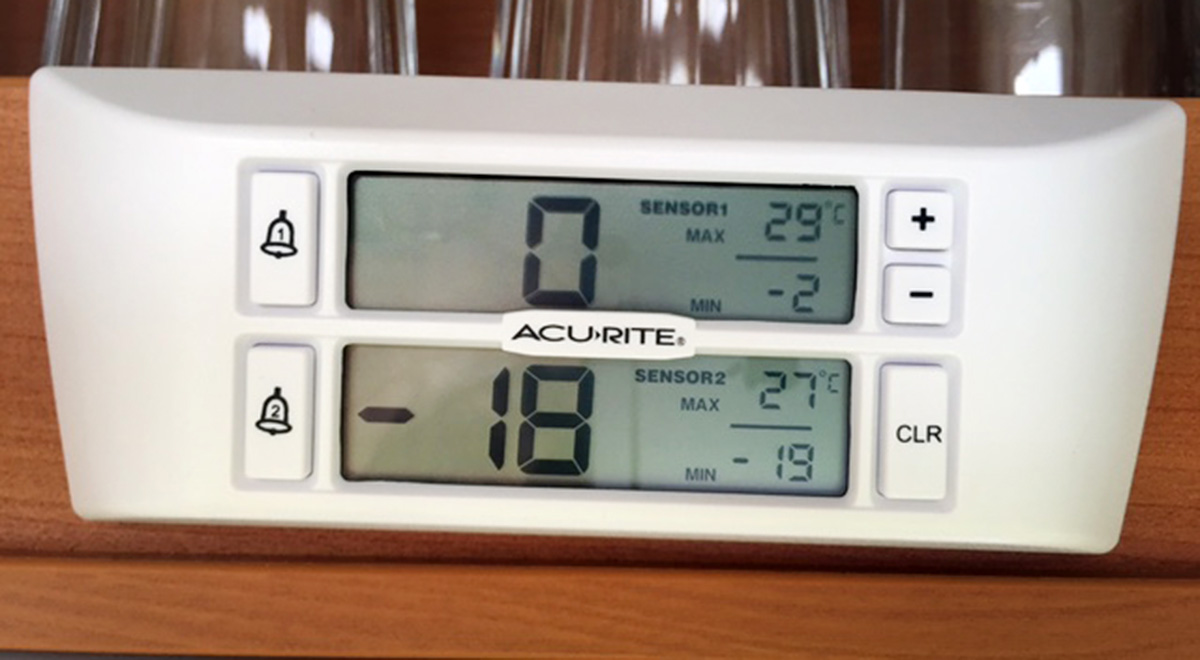
 10). THERMOMETERS: Two type K thermometers are visible for convenient monitoring of temperatures.
The top thermometer: Its wire probe is placed under the 100 degree thermostat. When temperatures of 100 degrees are reached, the fridge fans have turned off. In essence the fans just tricks the fridge into cooling for longer periods.
If the fans were installed with no means of control the cooling cycle remains on too long, which under certain circumstances may cause overheating of the ammonia.
The bottom thermometer: This records temperatures of the rich ammonia solution eg the cooling process. It’s wire probe is attached to the liquid heat exchanger which is below the absorber tank.
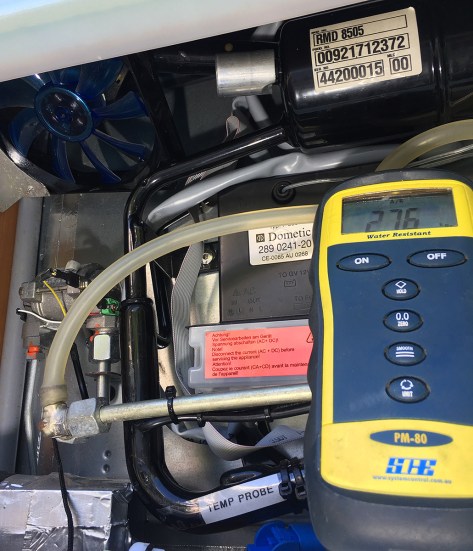
The digital Manometer:
This shows the fridges correct burner pressure of 2.75kPa.
Note: If you increase this pressure you can expect your flame to produce more heat and higher temperatures throughout your cooling system.
 11). TESTING: While comparing the fridges performance on LPG I noticed the ammonia temperatures were a lot higher than when testing on 230 volts. With concerns there maybe a overheating issue I wrote to Dometic NZ. Again, I was very pleased with there informative response.
A. Dometic AU.
While running on an element such as 12 volt DC or 240 volt AC the heat input is over a very precise area around about 85 mm in height this is shorter than the actual element as the filament in the body of the element is short than the over all of the element.
The electric elements are held against the pump tube using steel tubes welded to the side of the pump which directly conducts the heat energy into the side of the pump tube.
The gas flue is welded to the pump tube in the same area as the electric elements for about 90 mm so you end up with the 2 electric sleeves and the gas flue tube all welded to the pump for the same distance and in the same vertical location.
The difference is the electric elements only produce heat energy over a short distance you could say the full length of the welded sleeve about 90 mm, yet the gas flame running up the gas flue heats the full length of the gas flue. The part of the gas flue welded to the pump does all the work adding heat energy into the pump in the right place to separate ammonia from water.
The fact the gas flue runs up the pump tube means there is added heat energy leaking into the overall vertical height of the pump tube which does not happen when running on electricity.
The gas flue is located so it does not touch the pump tube above the weld but it is still very close and encased in insulation which holds in the extra energy.
The result is while running on gas you have a number of things happening which do not happen while running on electricity.
The steel pump tube on gas is hotter all the way to the top and conducts more heat all the way across the condenser.
There are also chemical reactions taking place inside the tube which raise the condenser surface temperatures due to the prolonged heat input over the full length of the pump.
With the added heat to the pump above the weld the pump tends to add more steam to the mix leaving the pump area so the ratio of ammonia vapour and water changes when compared to electric operation.
With more steam (Water) in the mix the condenser must work harder shedding more heat as it turns the steam into water which runs back to the pump.
Stating the above is true however added heat to the condenser without increasing the airflow to remove that heat will raise the surface temperature. This all designed into the unit and is expected.
Just because the temperature goes up in some areas when running on gas doesn’t mean the overall result is not the same as when on electric.
Higher surface temperatures through the condenser while running on gas is not unusual.

11). Wireless fridge/freezer thermometer:
The top thermometer is 1 degree out. The correct reading is fridge -1, freezer -19.


 An easy solution and well worth doing.


You must be logged in to post a comment.